Adding an Extension Bed
Each cast iron extension bed adds
510 mm (20 in.) to the lathe's capacity to
turn between centers.
1. Clean the joining ends of both bed
sections with a petroleum-based
solvent. Make sure there are no
dents or burrs on either mating
surface. Remove burrs and high
spots with a smooth file.
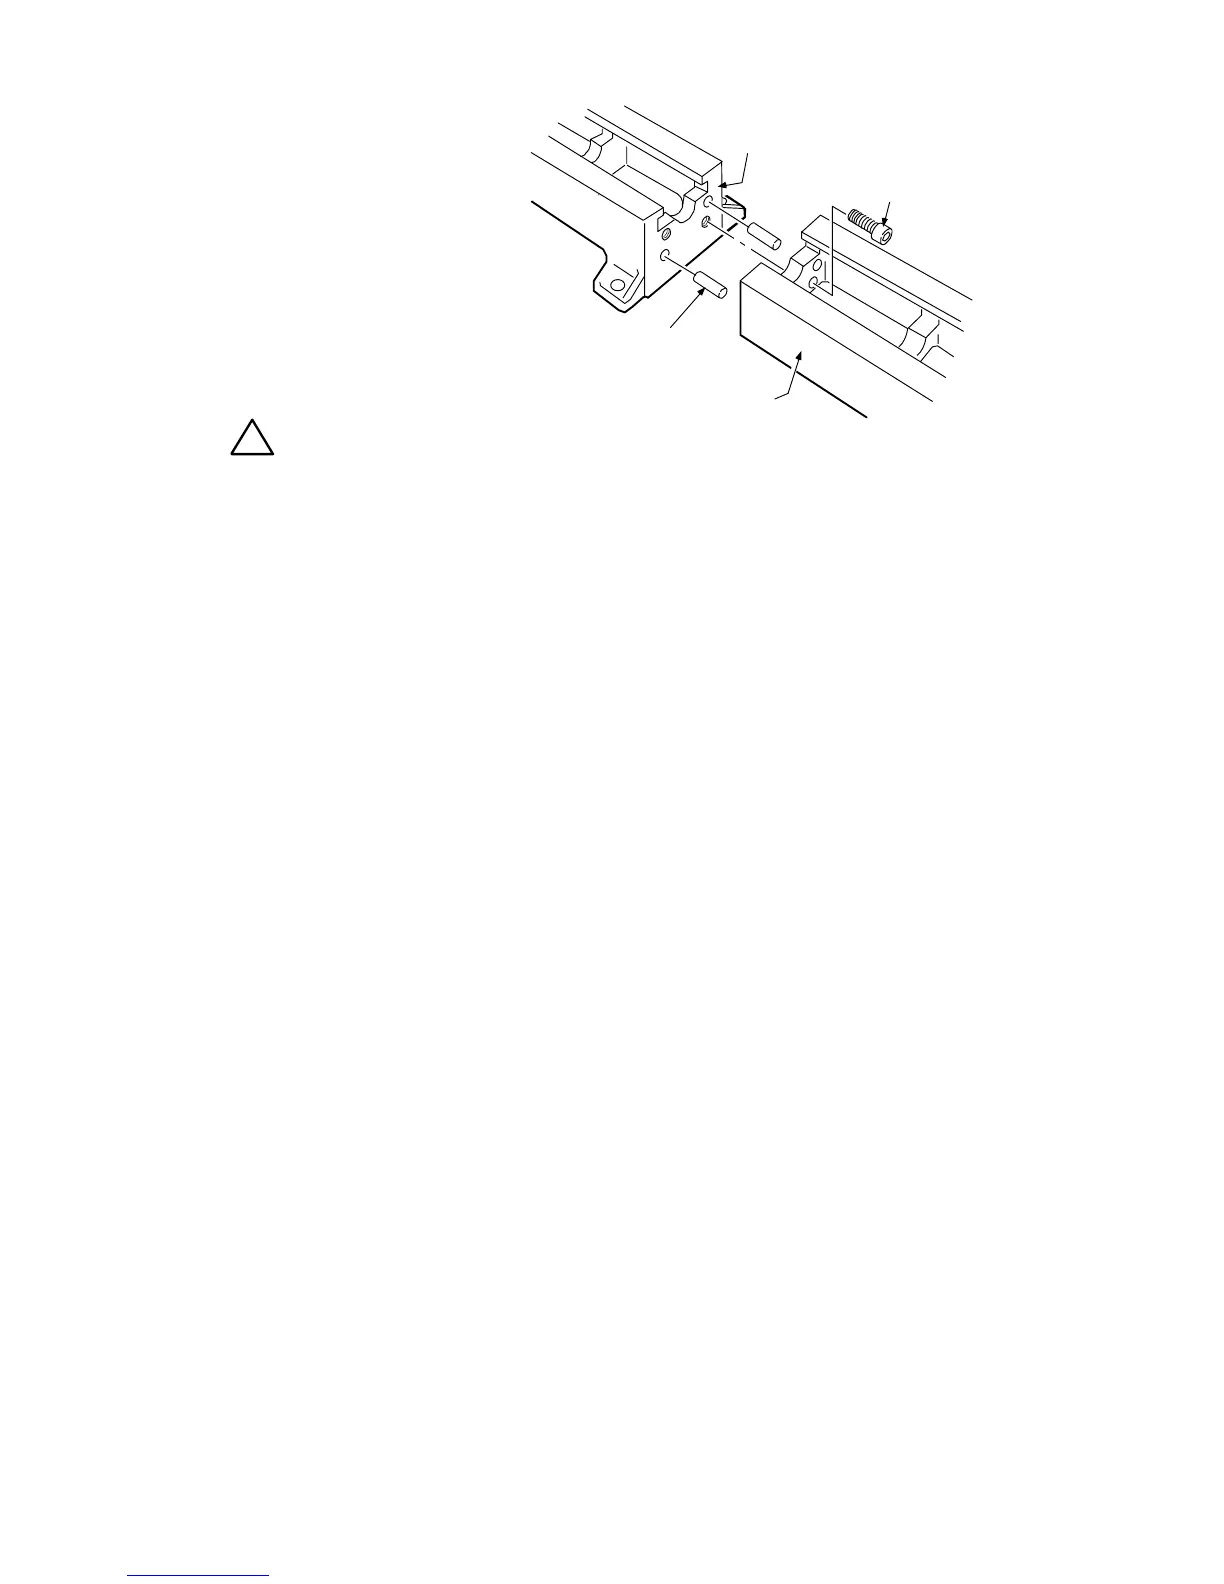
2. Gently tap the two dowel pins into
the non-threaded holes of one of
the bed sections, until they are flush
with the holes inside the casting.
Dowel Pin (2)
Capscrew (2)
Extension Bed
mating surface
!
Warning!
Do not use a metal hammer to pound directly on to the extension bed. This may
damage the bed, affect accuracy and tailstock action, and may prevent you from
adding another extension bed. When using a metal hammer, always add a block
of wood to the contact surface, to cushion the blow and prevent impact damage.
3. Line up the dowel pin holes of the add-on extension to the dowels and gently tap the end of the add-
on bed with a rubber or wooden mallet (or using a metal hammer but with wood to cushion as noted
above under the warning) until the two beds come together.
L Note: Due to tight tolerances between the Dowel Pins and the holes, some users may experience
difficulties in adding a bed extension. This is covered in the trouble shooting guide at back of the
manual.
4. Secure the bed sections together with two M12x30 capscrews using a 10 mm Allen wrench. It may
be necessary to move the lathe so the capscrews can be reached with the wrench from the bottom of
the bed.
5. Check that the toolslide and tailstock move freely over the mating joint and also over the full length of
the add-on extension. If there is ridge between the two mating surfaces use a smooth file to file the
surfaces flush.
6. Follow the suggestions under "Mounting the Lathe to a Support Surface".
14 92-0106-017