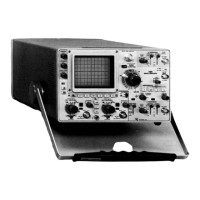
Calibration—485/R485 Service
c. Connect 120 mV from 50 £2 Amplitude Calibrator to
CH 1 and CH 2.
d. Adjust front panel GAIN for mid-range.
e. Adjust CH 2 GAIN (R358) and CH 1 GAIN (R255)
for 6 divisions of deflection.
f. On CH 1 check that the gain in 20 MHz limit is within
±1% of the full bandwidth gain.
57. ADJUST INVERT GAIN (Located Lower
Front of Vertical Board)
a. Set POLARITY to INVERT.
b. Connect 120 mV from 50 £2 source to CH 2.
c. Adjust INV Gain (R318) for 6 divisions.
58. CHECK ADDED MODE GAIN
a. Connect 50 £2 Amplitude Calibrator to CH 1 and CH
2 using dual input cable, (067-0525-00); CH 1 and CH 2 DC
coupled.
b. Adjust each channel for 4 div of deflection, with
VARIABLE VOLTS/DIV.
c. Set POLARITY to + UP.
d. Switch VERT MODE to ADD.
e. Check for 8 div ±0.1 div.
f. Switch POLARITY to INVERT.
g. Check for < 0.1 div deflection with CH 1 and CH 2
centered.
h. If any deflection was noted in step g, adjust CH 2
VARIABLE VOLTS/DIV for a null (single trace) on the
485 display (do not change this setting unless specified in
the following steps).
59. ADJUST C H I TRIGGER GAIN (TRIG
MODE in NORM)
a. Connect probe to test point (TP568), (located to
wards rear of Vertical board).
b. Adjust Trig GAIN, (located in middle of Vertical
board), to null signal displayed on the test oscilloscope.
60. CHECK 50 ft ATTENUATOR ACCURACY
±2%, CH 1 and CH 2
Check all 50 £2 attenuator positions with a 1 kHz
square wave from 50 £2 Amplitude Calibrator.
61. ADJUST POSITION CENTER CH 1 and CH 2
a. C H I to 20 mV/div; DC coupled; apply 8 div of
50 kHz from the Type 191 Constant-Amplitude Signal
Generator.
b. Switch to 10 mV/div and adjust POS CTR (R275) so
the top and bottom are equal spacing from the graticule
center, when POSITION control is rotated to both ends of
its range.
c. Repeat for CH 2 adjusting POS CTR (R375).
62. ADJUST 50 £2 HIGH FREQUENCY TRAN
SIENT RESPONSE, CH 1 and CH 2
NOTE
These adjustments are the five remaining adjustments
in the M AIN VERT TRANS RESP set, the slug-tuned
coil near the output 1C, and four adjustments by the
input stages o f each channel. Total aberrations after
adjustment should be within 4% P-P.
a. Signal source is the TU-5, Tunnel Diode Pulser
driven by the Type 106 Square-Wave Generator (Set 106
to 100 kHz). The test setup path from the Type 106 to
the 485 is as follows:
Type 106 High Amplitude output, 50 £2 input of the
cable
Tunnel Diode Pulser, 2X BNC attenuator, 50 £2 input of
the 485.
Adjust the Pulser and the Type 106 so that the Pulser just
triggers; do not overdrive. A 4 to 7 div step can be used
(keep VOLTS/DIV VARIABLE to CAL). The Tunnel
Diode Pulser is flat for only 150 ns, so don't use for
adjustment of longer time constants.
5-18
REV. D, MAR. 1976

 Loading...