Parts Replacement
8
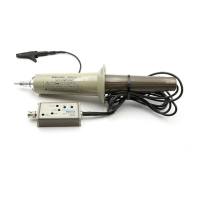
P6137 10X Passive Probe Instructions
1. Loosen the cable-retainer nut and pull it back onto the cable assembly.
2. Use the adjustment tool included in the accessory pack to remove the top and
bottom plastic covers. Insert the adjustment tool into the side of the
compensation box and pry upward and outward.
3. Pry off the BNC connector shell with a wide-blade screwdriver. Gently pry
the BNC shell away from the compensation box.
NOTE. A new BNC shell comes with the replacement cable/compensation box
assemblies.
4. Lift the top half of the compensation box off.
5. Remove the cable assembly.
NOTE. If you are replacing the cable assembly, you need to use the cable-retainer
nut from your old cable assembly.
6. Use a new cable or a new compensation box, and snap the cable assembly
into place in the bottom half of the compensation box.
7. Place the top half of the compensation box onto the lower half, slide the
cable-nut up and tighten.
8. Press the new BNC shell onto the compensation box making sure the
identification pin goes through the oval slot in the shell (see Figure 8).
9. Snap the plastic covers back in place.
 Loading...