Removal and Replacement
6–30
TDS 340A, TDS 360 & TDS 380 Technical Reference
STOP. DO NOT perform step 10 unless you need to replace components on the
Option 14 board.
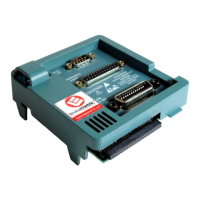
10. Disassembly: Remove the six nuts that fasten the board to its mounting
bracket, as shown in Figure 6–17. Gently separate the board and the bracket.
Depending on the version of the option you have, remove the six or eight
nuts that fasten the board(s) to the mounting bracket, as shown in Figure
6–17. Gently separate the board(s) and the bracket. If part of your option,
unplug the printer power cable from J2, and remove the power connector
from the bracket by compressing the mounting tabs and pushing the
connector through the bracket.
J2
Figure 6–17: Option 14 disassembly
11. Reinstallation: Perform steps 10 through 2 in reverse order.
12. Reinstallation: Perform steps 9 through 2 in reverse order.

 Loading...


