Adjustment Procedures
TDS 340A, TDS 360 & TDS 380 Technical Reference
5–5
4. Press the main menu button Recall Factory Setup; then press the side menu
button OK Confirm Factory Init.
5. Press CLEAR MENU.
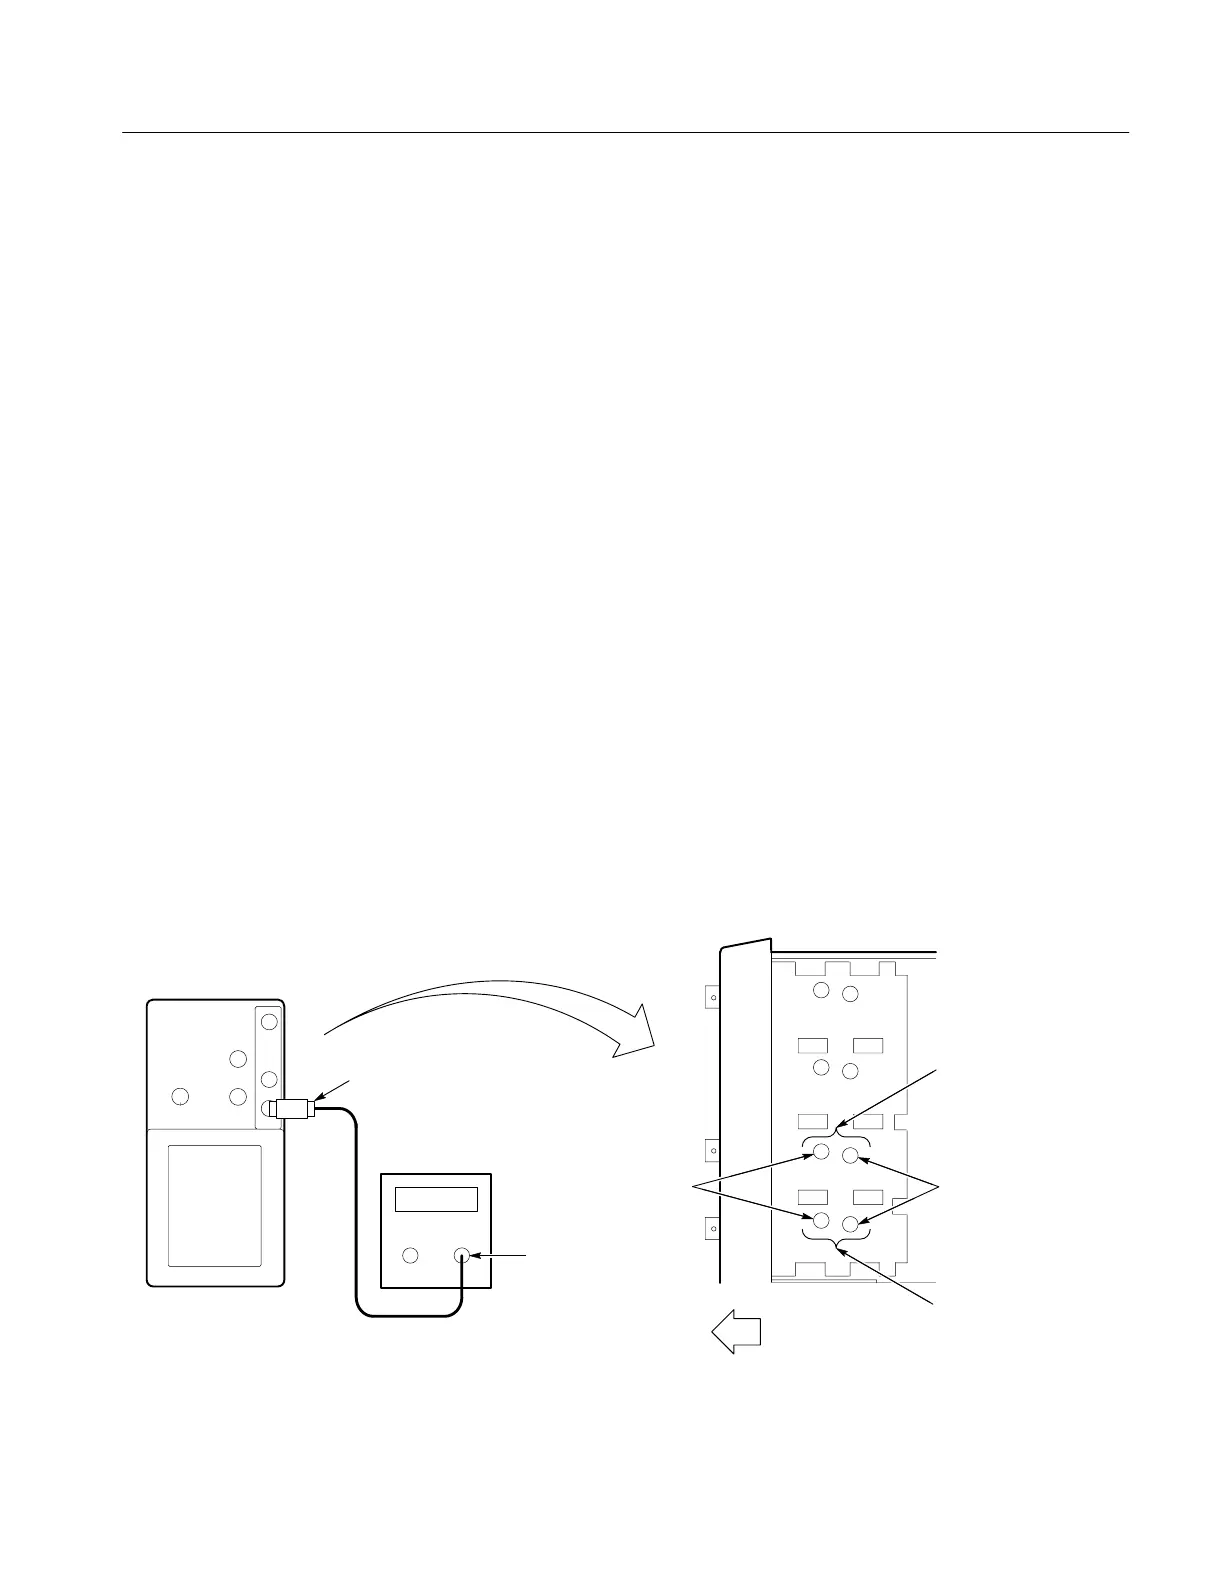
6. Connect the high output of a fast–rise step generator (Item 5) to the CH 1
BNC through a 50 W coaxial cable (Item 3) and a 50 W termination (Item 2).
(See Figure 5–3.)
7. Set the calibration generator to output a high amplitude, 1 kHz signal. Set
the pulse amplitude to 25%.
8. Set the oscilloscope VOLTS/DIV to 200 mV, the SEC/DIV to 10 ms, and
adjust the pulse amplitude for a five division display.
9. Press SET LEVEL TO 50%.
10. Use the vertical POSITION control to place the top of the waveform near
center screen.
11. Set the VOLTS/DIV to 100 mV.
12. Use an adjustment tool (Item 1) to adjust the CH 1 10X capacitor for the
flattest response. (See Figure 5–3.)
13. Remove the 50 W termination from the setup.
14. Set the VOLTS/DIV to 2 V.
10X adjustment 100X adjustment
Front of instrument
View from bottom of instrument
CH 2
CH 1
Fast–rise step
generator
50 W termination
Output
Digitizing oscilloscope
Figure 5–3: Attenuator adjustment setup and locations
 Loading...