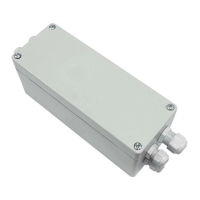
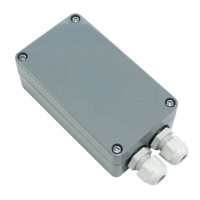
The Teleco TVPLA868CC2(S) and TVPLA868CC2B(S) are 24V control units with integrated radio receivers designed to manage one or two 24V motors for adjustable slats, typically used in pergola systems. The TVPLA868CC2(S) has a height of 74mm, while the TVPLA868CC2B(S) has a height of 50mm.
Function Description
These control units enable the independent or synchronized control of motor outputs, allowing for flexible configuration of pergola slats. They feature a self-learning procedure for setting limit switches and working times, simplifying installation and calibration. The units are equipped with inputs for various environmental sensors, including rain, wind, and temperature (for ice detection), and can combine rain and temperature sensor data to detect snow conditions. An optional LED CARD (available only in the TVPLA868CC2(S) version) allows for controlling 1-colour, RGB, or RGBW 24V LED lights.
Important Technical Specifications
- Power Supply: 24V
- Max. Power for Each Output: 4.5A
- Maximum Power Applicable to the Board: 240W (including the plug-in LED controller board)
- Fuse (blade): 10A
- Operating Temperature Range: -20°C to +45°C
- Reception Frequency: 868.3 MHz
- Radio Memory Capability (transmitters): 16
- Rain Sensor Power Supply: 12 Vdc (max. 100mA)
- Anemometer: 4 pulses/rotation (ANEM4)
- Temperature Probe: NTC (R=10Kohm; B=3435K)
- Protection Rating: IP54
- Material of the Box and its Cover: Thermoplastic ABS (not suitable for direct UV exposure)
Usage Features
Motor Configuration:
The control unit supports three motor configurations:
- Pergola with 1 motor: DIP4=OFF, DIP5=OFF. Press P1 and P2 simultaneously for 5 seconds to initiate configuration. The motor moves to its limit switches, and L1 flashes when reached. If the direction is wrong, invert motor wires.
- Pergola with 2 synchronized motors: DIP4=OFF, DIP5=ON. Press P1 and P2 simultaneously for 5 seconds. Both motors move together, and L1+L2 flash when limit switches are reached.
- Pergola with 2 independent motors: DIP4=OFF, DIP5=OFF for Motor 1; DIP4=ON, DIP5=OFF for Motor 2. Press P1 and P2 simultaneously for 5 seconds for each motor. Each motor is configured individually.
Self-Learning of Limit Switches:
After motor configuration, press P1 and P2 simultaneously twice in quick succession, holding them for 5 seconds the second time. The system will cycle through complete closing and opening, learning the limit switch positions. L1 (or L1+L2 for synchronized motors, L2 for motor 2) will turn ON when the limit switch is reached. If movement doesn't stop, the current threshold may need adjustment.
Setting Current Threshold:
The control unit uses a current threshold to stop motors. To adjust this:
- Turn the control unit OFF then ON.
- Within 10 seconds, set DIP6 to ON.
- Within 30 seconds, press P1 multiple times to select the desired current level (1=0.5A to 9=4.5A).
- Set DIP6 to OFF to store the value. L4 will flash to indicate the stored level. DIP6 must remain OFF during standard operation.
Transmitter Memorization:
The system supports 7/42 channel, automatic (2 or 3 button), hold-to-run (2 or 3 button), and Green Mouse Screen transmitters.
To memorize:
- Press P1 or P2 (depending on motor control mode) the required number of times for the transmitter type and hold the last time until a continuous sound is emitted.
- Press any button on the transmitter (or button 2 or 3 for Green Mouse Screen). An intermittent sound indicates successful memorization.
Radio Code Deletion:
- Single Radio Code: Press P1 or P2 five times and hold the last time. An intermittent sound will be emitted. Press the button on the transmitter relative to the code to be deleted within 10 seconds. A continuous sound indicates successful deletion.
- All Radio Codes: Press P1 or P2 six times and hold the sixth time for 10 seconds. A fast intermittent sound will be emitted. Release when the sound becomes continuous.
Remote Memorization/Deletion of Radio Codes:
- Remote Memorization: Press and hold P3 on a memorized transmitter until a continuous sound is emitted. Press a button on an already memorized code, then press a button on the new code to be memorized.
- Remote Deletion: Press and hold P3 on a memorized transmitter three times until a slow intermittent sound is emitted. Press a button on the code to be deleted within 5 seconds.
Sensor Management:
- WIND Sensor (ANEM4): Detects wind speed. The control unit compares it to a threshold set by DIPs 1-2-3 (40-75 Km/h). If activated, pergola slats tilt to 33% of full opening, and no commands are executed.
- SNOW Condition: Activated when temperature is below 2°C and rain is detected. Slats tilt to 66% of full opening, and only hold-to-run commands are executed.
- TEMPERATURE Sensor (TMP150): Activates when temperature is below 2°C and slats are closed (danger of ice). Slats tilt to 10% of full opening.
- RAIN Sensor (RAIN102): Detects water drops. If activated, pergola slats completely close, and no commands are executed. After the alarm ends, for 6 hours, slats tilt to 33% for water draining, and only hold-to-run commands are executed for 4 minutes.
Activation/Deactivation of Sensors:
- TEMPERATURE Sensor: Press the "STOP" button of a memorized transmitter 10 times and hold the last time for 2 seconds. A continuous sound for 4 seconds activates it. Two beeps and L4 flashing every 3 seconds deactivates it.
- RAIN Sensor: Press the "STOP" button of a memorized transmitter 10 times and hold the last time for 10 seconds. A continuous sound for 4 seconds activates it. Two beeps and L4 flashing every 2 seconds deactivates it. This can also be done via P2.
Change Automatic Alarm Angles:
Press P1 or P2 the required number of times (8 for WIND, 9 for TEMP, 13 for SNOW, 10 for Reset) and hold the last time until a continuous sound is emitted. Put the slats to the desired angle.
Maintenance Features
Replacing the Control Unit:
If the control unit is defective but the memory card is functional (board revision > 9.x), the unit can be replaced without losing configuration parameters.
- Ensure the control unit is not powered.
- Insert the memory card from the defective unit into the new one.
- Set the DIP switches on the new unit to match the old one.
- Switch the system on.
Quick Learning of Limit Switches:
If motor control mode, correct motor direction, at least one transmitter per independent motor output, and current threshold are already programmed, self-learning of limit switches can be done without accessing the control unit.
- Test motor movement and direction using a memorized transmitter.
- Keep button P3 of the transmitter pressed for 10 seconds. The system will cycle through complete closing and opening, learning the limit switch positions.