Do you have a question about the Teledyne 4700 and is the answer not in the manual?
Details for contacting Teledyne Isco's customer service and technical support.
Defines the sampler's intended purpose and general safety guidelines.
Specifies power requirements, grounding, and cord safety.
Provides crucial warnings regarding electrocution, hazardous locations, and practices.
Explains the classification system for safety alerts (Caution, Warning, Danger).
Explains the meaning of various hazard symbols used in the manual.
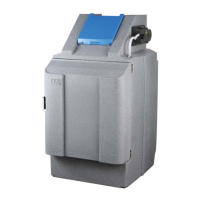
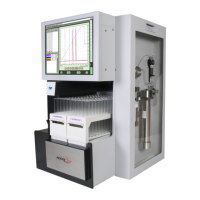
Describes the 4700 Refrigerated Sampler's design, operation, and capabilities.
Identifies and describes key physical components of the 4700 sampler.
Lists detailed technical specifications including dimensions, power, and operational limits.
Instructions for safely unpacking the shipment and checking contents.
Outlines the general sequence of steps for sampler installation.
Discusses considerations for selecting a safe and appropriate location for the sampler.
Details on how to install different bottle configurations (kits).
Step-by-step guide for attaching the distributor arm and discharge tube.
Instructions for installing 4-bottle and 2-bottle configurations.
Instructions for installing single bottles (10L or 20L).
Guidance on selecting, cutting, and attaching the suction line.
Explains how to connect external devices for data and control.
Instructions for connecting the sampler to an AC power source.
Optional steps to prevent tampering with operation or samples.
Explains the buttons and functions of the sampler's control panel.
Steps to power on, navigate menus, and begin sampler configuration.
Details on setting up sampler parameters like time, date, and hardware.
Specifies installed bottle configuration and volume settings.
Entry of suction line length for pump table calculations.
Configuration for liquid detection, rinse cycles, and sample retries.
Sets target temperature and enables/disables Quick Cool mode.
Configures the four alarm outputs for different sampler events.
Views and resets pump counts to track tubing life.
Enables security feature requiring a password for configuration and operation.
Explains how sampling programs control event frequency and actions.
Guides through the process of programming sampling parameters.
Explains time-paced and flow-paced sampling methods.
Options for entering sample volume or using defined pump counts.
Provides examples for defining sample volume and programming modes.
Step-by-step guide to defining sample volume using pump counts.
Illustrates programming a time-paced sampling sequence with specific parameters.
Demonstrates programming a flow-paced sampling program with specific settings.
Shows programming for flow-proportional volumes at fixed time intervals.
Steps to initiate a programmed sampling sequence.
Describes how to interpret the sampler's display during operation.
Instructions for pausing or halting an active sampling program.
Steps to perform after a sampling program has concluded.
How to access and review the sampler's event log.
How to collect detailed temperature data via computer connection.
Procedures for safely removing collected sample bottles.
Instructions for collecting a single sample on demand.
Steps to calibrate the sampler for accurate sample volume delivery.
Manual operation of the pump for purging or forward movement.
Checklist of tasks to perform before each sampler use.
Detailed steps and checks for inspecting the sampler pump.
Step-by-step instructions for replacing the pump tube.
Procedures for cleaning pump rollers, housing, and wetted parts.
Details diagnostic routines to test sampler subsystems.
Tests for pump assembly and distributor function.
Tests for refrigeration, PCB, input, and battery voltages.
Procedures for verifying displayed temperature readings with a thermometer.
General procedures and precautions for replacing major sampler modules.
Instructions for removing and replacing the pump module.
Instructions for removing and replacing the control panel module.
Instructions for removing and replacing the distributor module.
Instructions for replacing the refrigeration module.
Explains how to identify and purchase replacement parts.
Specifies warranty coverage, exclusions, and limitations.
| Brand | Teledyne |
|---|---|
| Model | 4700 |
| Category | Laboratory Equipment |
| Language | English |