Assembly
Important warnings – read this before starting assembly
You should visually inspect all the solder pads/traces with a magnifier for any etching problems. This is done before shipping, but I
recommend the builder do a second inspection as well. We do 100% continuity checks of all pads before shipment using computer
controlled flying probes based on PCB netlist coordinates.
All of the SMT components are pre-installed on the main board for your convenience. SMT parts are supplied wherever necessary for
performance or availability reasons. CAUTION: Be very careful handling this board to avoid damage to the installed parts. Anti-static
measures are highly recommended, such as use of an anti-static mat, grounded soldering iron and wrist band.
You may wish to clean the flux from the board after assembly, although it is not necessary with most modern solders. A toothbrush and
alcohol are good for this. Only use rosin core solder. Use of acid core solder voids the warranty. Lead-free solder is OK, and the boards
are RoHS compliant, but it will be more difficult to remove parts without damaging the board should you have to.
Overview
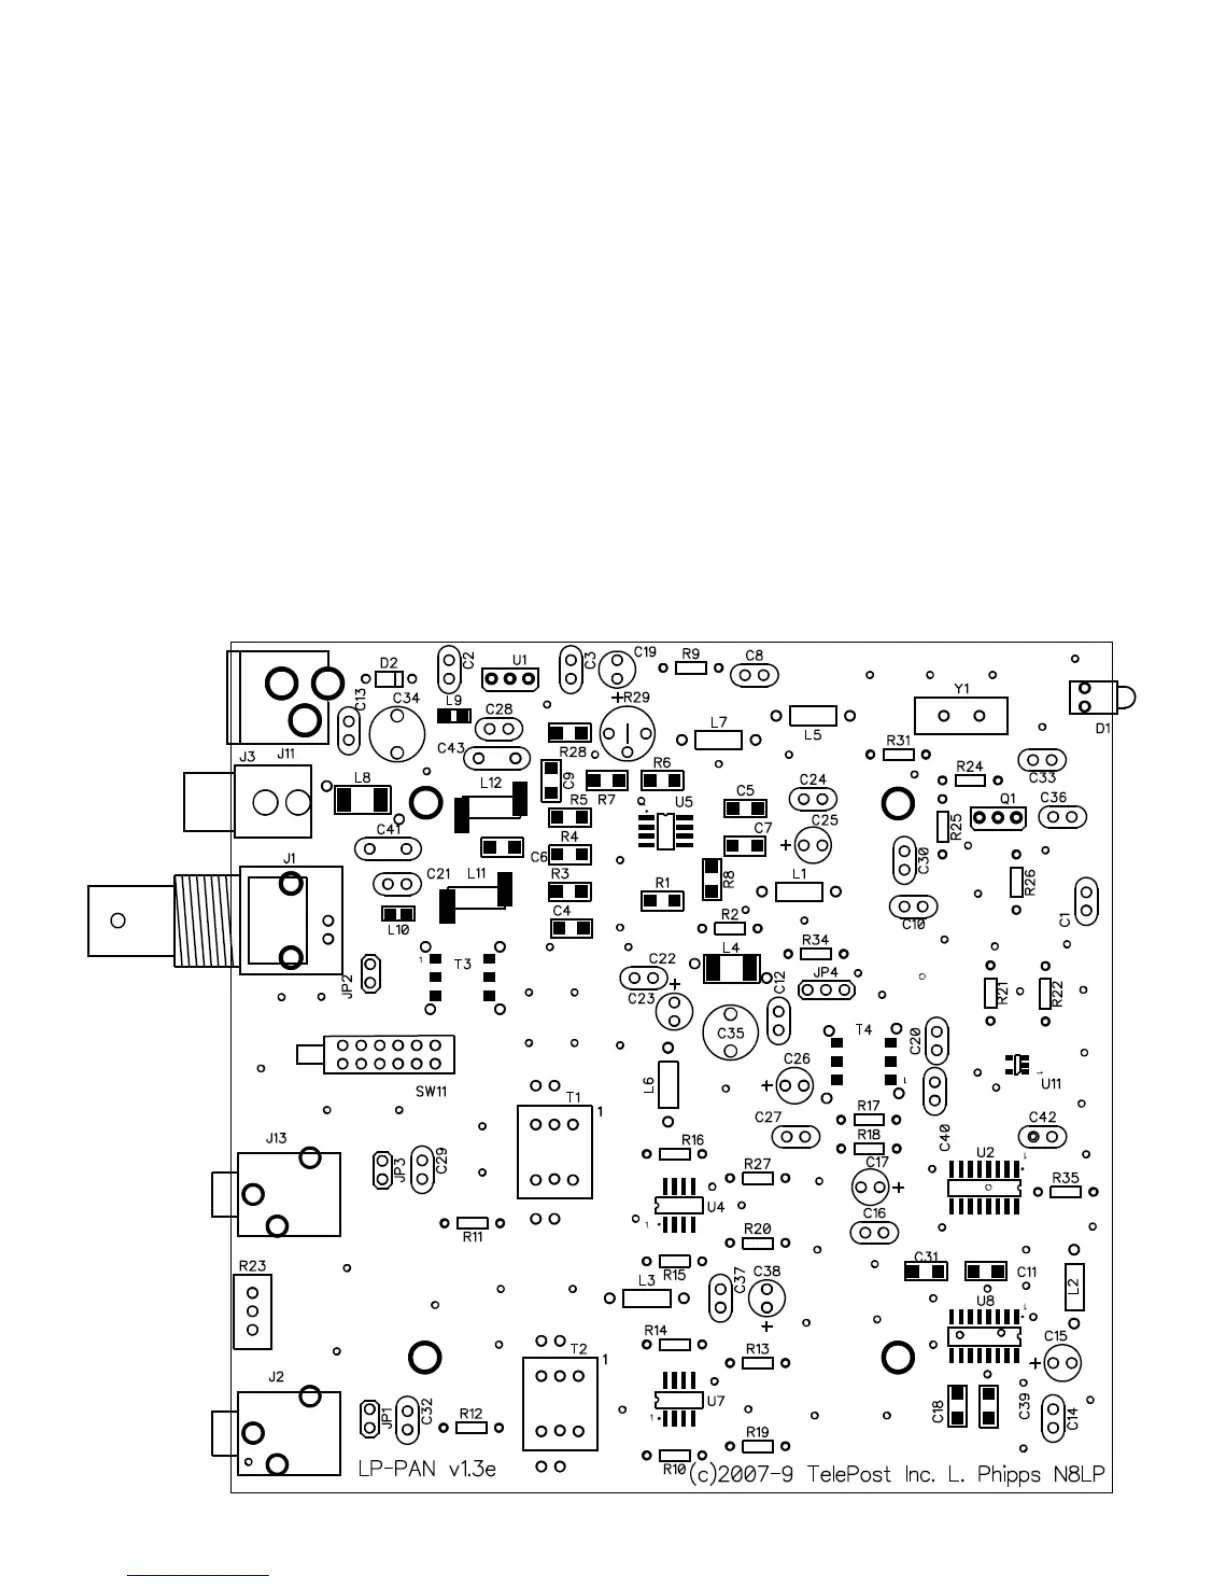
Below is the component placement diagram for the main PCB. These markings match the silk-screening on the PCB, but are repeated
here for clarity. You can also cross out the parts on this graphic as they are installed. You should check all parts before starting to allow
you to start the process of obtaining replacement parts as soon as possible if needed. It is also a good idea to sort the parts in
advance… egg cartons are handy for this (passive parts only). Many crafts stores, Like Michael’s, also have nice plastic cases with
dividers at low prices. If there is any doubt about component values, especially with the 1% resistors which can use strange markings,
check them with your DMM.