3. V10 Wiring & Panel Definition
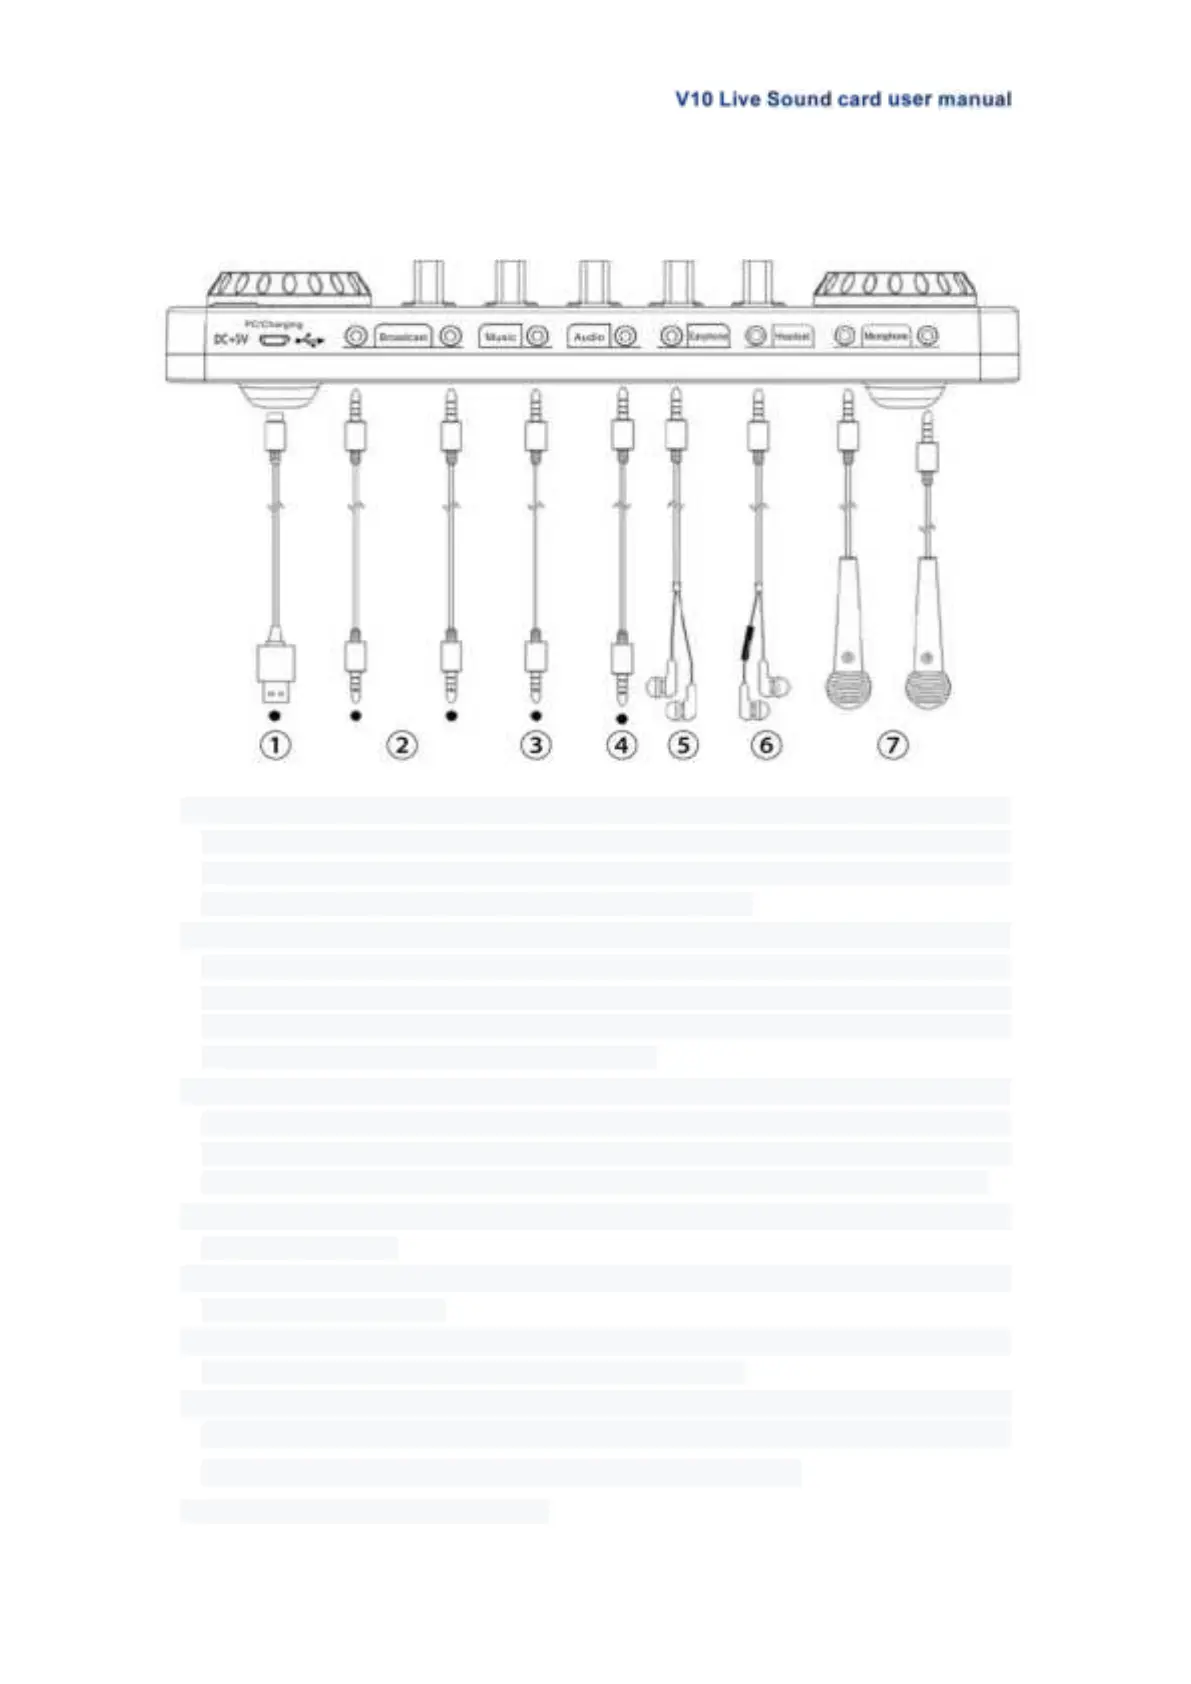
3.1 V10 Live Sound Card Wiring Diagram
①PC/Charging: DC+5v input; OTG port; Used for data transmission; Also used as a
computer live streaming interface and computer accompaniment interface; The V10
serves as an external audio console for the computer, laptop, smartphone and tablet
while live streaming, recording or singing on the computer.
②Broadcast: The processed sound can be output to the smartphone, tablet PC or other
devices with a 3.5mm TRRS cable. Can live stream to multiple platforms at the same
time. Can be connected to the desktop computer microphone jack or laptop 3.5mm
audio jack when using PC live streaming. If
..
you
...
use
...
iPhone
......
for
...
live
....
streaming,
..........
please
......
use
...
3.5mm
.....
to
..
lightning
.........
adapter(but
...........
not
...
included)
.........
.
③Music: Music accompaniment input port; Connect an external audio source or devices
to the audio console via an 3.5mm TRRS audio cable, to play music during live
streaming or audio production. When input music, it can be connected to the
smartphone
..........
headphone
.........
jack,
.....
desktop
.......
computer
........
earphone
........
jack
....
or
..
laptop
......
3.5mm
.....
jack
....
.
④Audio: 3.5mm Output port; Connect audio playback device such as speakers or
monitor headphones.
⑤Earphone: 3.5mm output port; Monitor earphone jack, used to monitor all sound of
audio console in real-time.
⑥Headset: 3.5mm port; Used to sound input by a headphone with microphone function.
ALSO used to monitor sound of audio console in real-time.
⑦Microphone: 3.5mm port; Connect a 3.5 mm condenser microphone that does not
require external power supply. 【
.
48V
...
microphone
..........
need
....
a
.
phantom
.......
power
.....
then
....
use
...
XLR
...
to
..
3.5mm
.....
mic
...
cable
.....
to
..
connect
.......
the
...
V10
...
audio
.....
console
.......
mic
...
jack
....
】
.
Tip: Please not using while charging.