Connect your power source to the transmitter and receiver using the included
A/C adapter. If both devices are equipped with battery plate accessories, attach a
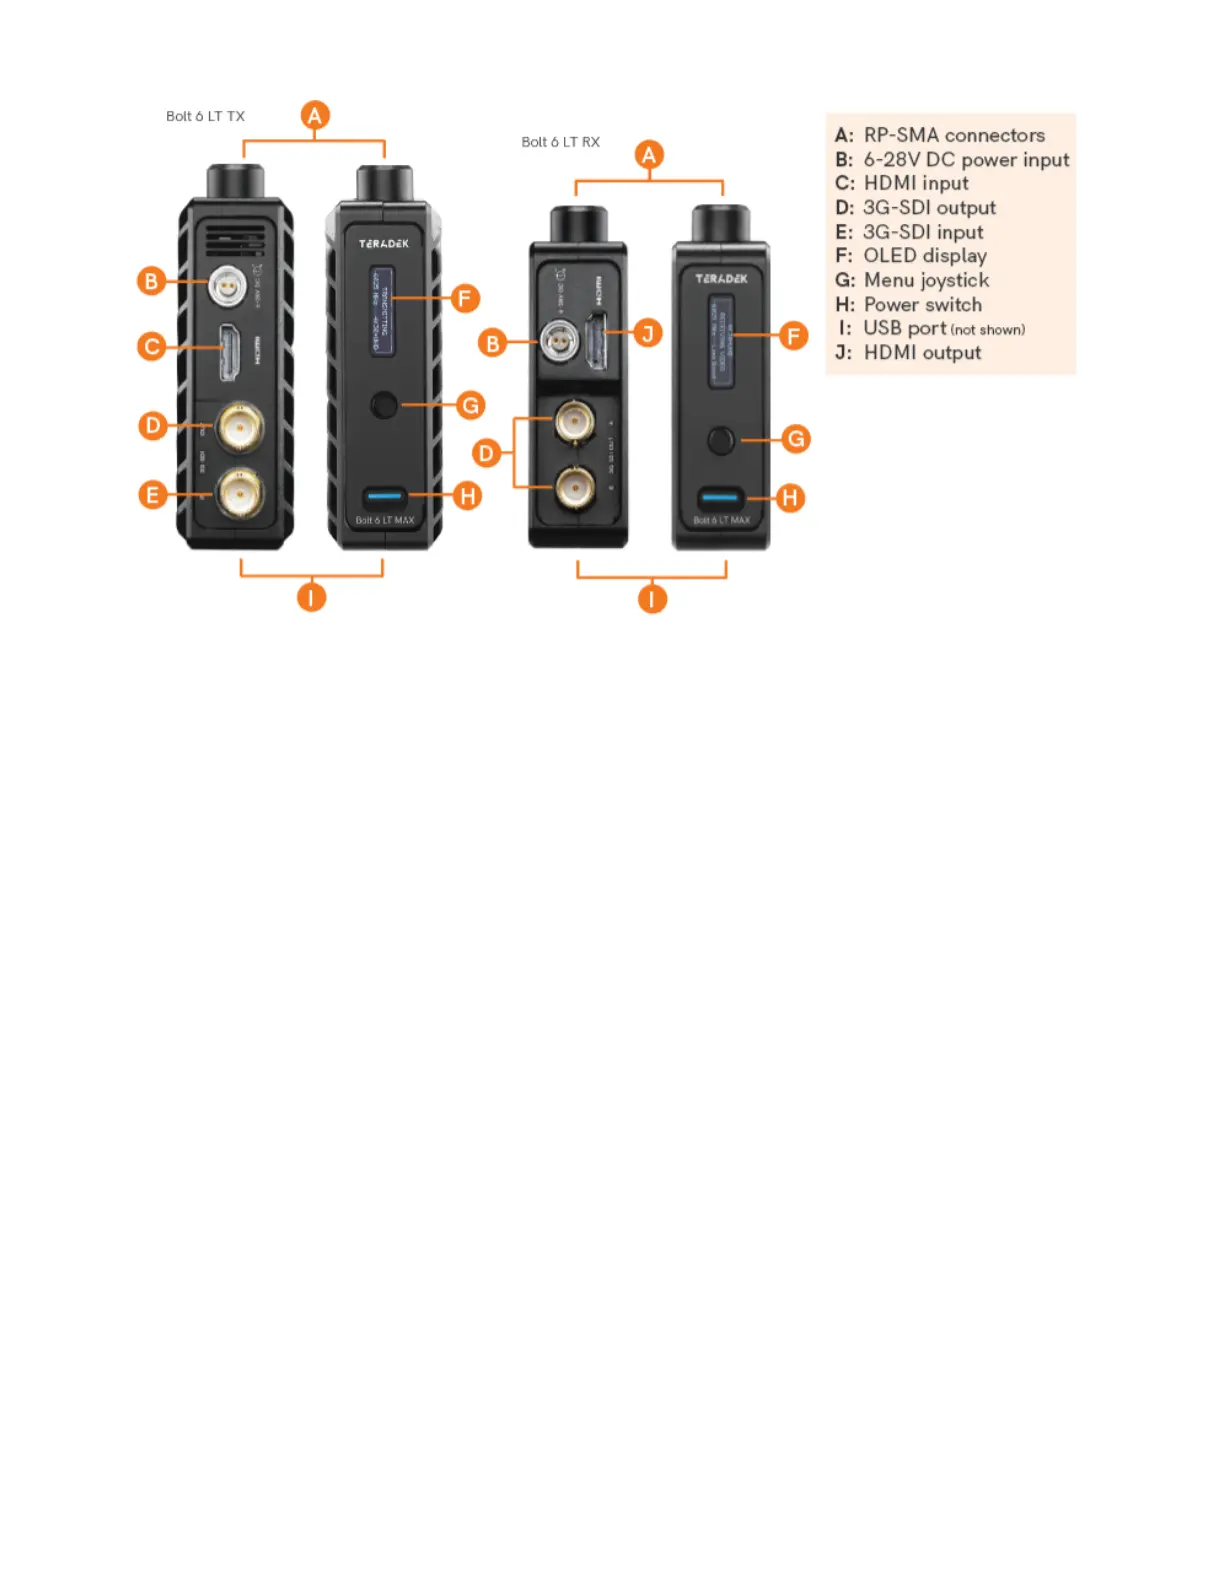
Connect the output from your video source to either the SDI or HDMI input (
) on the Bolt transmitter.
Connect either the SDI or HDMI output (
) from the Bolt receiver to the
video input on your monitor.
Turn the units on by moving the power switches on both the transmitter and
Bolt devices purchased as a set (TX and RX), are paired by default, requiring no
additional configuration. Bolt devices purchased separately need to be paired using the
device's front panel (OLED) menu,
transmitter with multiple receivers, you will need to use either Bolt Manager or the Bolt
NOTE: Before starting either pairing process, ensure that both the
transmitter and receiver have the same firmware version and have Bluetooth
Bolt 6 LT Quick Start Guide | Bolt 6 | Teradek User Guide
https://guide.teradek.com/a/1604143-bolt-6-lt-quick-start-guide
 Loading...