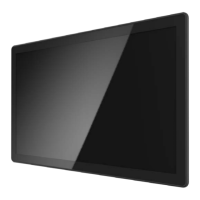
The APM-22 is a 22-inch touchscreen LCD monitor designed for commercial applications, including point-of-sales, point-of-information, point-of-service, and interactive signage. It features a stylish, thin cable management bracket and a versatile design, making it suitable for various business sectors.
Technical Specifications
LCD Touch Panel:
- Size: 22" TFT LCD
- Brightness: 250 cd/m² (Non-touch screen), 212 cd/m² (P-CAP)
- Number of Pixels: 1920 (H) × 1080 (V)
- Touch Type: P-CAP/ 10 points
Environment:
- Compliance: IPX0
- Operating Temperature: 0°C ~ 40°C
- Storage Temperature: -20°C ~ 60°C
- Operating Humidity: 20% ~ 80% RH, non-condensing
Physical:
- Mounting: VESA 100 mm x 100 mm
- Dimension (W x H x D): 517.0 mm x 312.0 mm x 42.4 mm
- Net Weight: 4.4 kg
- Gross Weight: 6.3 kg
Interface Connectors
The APM-22 offers multiple interface options for connectivity:
Power Connector:
- The AC/DC converter uses an IEC320 type male power receptacle.
- The power cord, supplied in an appropriate Option Kit, is 1.8 ± 0.05 meters long and PC99 compliant.
- The product is intended to be supplied by a Listed Power Adapter or DC power source, rated 12Vdc, 2.0A minimum, with a Tma of 40 degrees C minimum, and an altitude of operation of 3048m minimum.
Video Signal Connector (D-type 15-pin female connector - VGA):
- Pin 1: Red video signal input
- Pin 2: Green video signal input
- Pin 3: Blue video signal input
- Pin 4: NC
- Pin 5: DDC ground for VESA DDC2B function
- Pin 6: Analog signal ground for red video
- Pin 7: Analog signal ground for Green video
- Pin 8: Analog signal ground for blue video
- Pin 9: +5V: Input from host system for VESA DDC2B function
- Pin 10: Signal ground
- Pin 11: NC
- Pin 12: SDA signal input for VESA DDC2B function
- Pin 13: Horizontal signal input from host system
- Pin 14: Vertical signal input from host system
- Pin 15: SCL signal input for VESA DDC2B function
DisplayPort (1.1a):
- Includes pins for ML_Lane Data (0-3), Signal ground, AUX_CH (p/n) for Auxiliary Channel, Hot Plug, DP PWR Return, and DP PWR.
HDMI (1.3a):
- Includes pins for TMDS Data (2+, Shield, 2-, 1+, Shield, 1-, 0+, Shield, 0-), TMDS Clock (Shield, - , +), CEC, Reserved (N.C. on device), SCL, SDA, DDC/CEC Ground, +5V Power, and Hot Plug Detect.
Usage Features
Mounting Options:
- VESA Mount: Conforms to the VESA Flat Display Mounting Interface Standard (100 mm x 100 mm). Requires four M4 screws with proper length (distance between back cover surface and screw hole bottom is 8 mm and 18 mm). The mounting stand must support at least 7.67 lbs (3.48 Kg).
- Wall Mount: Supports mounting to wooden or concrete walls using 16 screws and four bracket sets.
- Landscape: Side brackets can be attached to the left/right or top/bottom sides.
- Portrait: Side brackets can be attached to the left/right or top/bottom sides.
- Face Up: Brackets are installed on the customer's cabinet, and the APM-22 is then assembled into the cabinet with screws.
- Warning: This apparatus is intended to be supported by a Listed Wall Mount Bracket or the equivalent.
On-Screen Display (OSD):
The monitor features an OSD key pad for adjustments.
- Menu Key: Pops up the OSD menu, returns to the main menu, or exits the OSD.
- Up/Down Keys: Selects main items, adjusts values (Brightness, Contrast), or moves OSD menu position.
- Enter Key: Chooses adjustment items, selects sub-item functions.
- Power Key: Turns the monitor On/Off.
OSD Functions:
- Contrast: Adjusts monitor luminance level (Default: 50).
- Brightness: Adjusts monitor backlight level (Default: 100).
- Auto Adjust: Fine-tunes the image to full screen automatically.
- Left/Right: Moves screen image horizontal position.
- Up/Down: Moves screen image vertical position.
- Horizontal size: Adjusts screen image horizontal dot clock.
- Fine: Adjusts screen image pixel phase.
- OSD Left/Right: Moves OSD menu horizontal position (Default: 50).
- OSD Up/Down: Moves OSD menu vertical position (Default: 50).
- OSD Time out: Sets OSD auto-disappear time (Default: 15 seconds).
- OSD Language: Selects OSD menu language (English, French, Japanese, Deutsch, Spanish, Italian, Traditional Chinese, Simplified Chinese) (Default: English).
- Factory Reset: Restores factory default values.
- RGB: Selects color temperature (9300K, 6500K, 5500K, 7500K, User) (Default: USER).
OSD Lock/Unlock Function:
- To Lock:
- Turn on the monitor with a valid signal.
- Press the "Menu" key to open the OSD menu.
- Press and hold the "Menu" key again until the OSD menu disappears.
- While still holding "Menu", press the "Power" key once. The "Lock/Unlock" menu will appear for 3 seconds.
- Use the "Enter" key to select "OSD" or "Power" setting, then use "Up" or "Down" to set to "Lock".
- Release "Up" or "Down" to save the setting and exit.
- To Unlock:
- Turn on the monitor with a valid signal.
- Press and hold the "Menu" key.
- Press the "Power" key simultaneously. The "Lock/Unlock" menu will appear for 3 seconds.
- Use the "Enter" key to select "OSD" or "Power" setting, then use "Up" or "Down" to set to "Unlock".
- Release "Up" or "Down" to save the setting and exit.
- Note: When OSD Lock is active, all buttons except "power" are disabled. When Power Lock is active, the power key is disabled.
EDID Data:
- DP/HDMI: Provides a display communications channel conforming to VESA DDC2B hardware requirements, containing a 256-byte EDID file as specified by VESA EDID Standard.
- VGA: Provides a display communications channel conforming to VESA DDC2B hardware requirements, containing a 128-byte EDID file as specified by VESA EDID Standard.
Maintenance Features
Precautions:
- Do:
- Turn off the product before cleaning.
- Use a soft cloth moistened with mild detergent to clean the product housing.
- Use only the qualified power adapter provided with the device.
- Disconnect the power plug from the AC outlet if the product will not be used for an extended period.
- Don't:
- Do not use abrasive cleaners, waxes, or solvents for cleaning.
- Do not operate the product in extremely hot, cold, or humid environments.
- Avoid areas susceptible to excessive dust and dirt.
- Do not place near any appliance generating a strong magnetic field.
Warnings:
- To prevent the risk of fire or shock hazards, do not expose the product to moisture.
- Do not open or disassemble the product, as this may cause electric shock.
Package Overview
The APM-22 package typically includes:
- LCD Display
- Power Cord
- DC Power Supply
- OSD Keypad
- DP cable
- VGA cable
FCC/IC Statement:
- The device complies with Part 15 of the FCC Rules and Canadian ICES-003/NMB-003 regulation.
- Operation is subject to two conditions: (1) The device may not cause harmful interference, and (2) The device must accept any interference received, including interference that may cause undesired operation.
- Warning: This device generates, uses, and can radiate radio frequency energy. If not installed and used according to the manual, it may cause harmful interference to radio communications. Operation in a residential area may require the user to correct interference at their own expense.
Restricted Substances Marking (Declaration of Presence Condition):
The APM-22 complies with restricted substance regulations. The table indicates the presence condition of lead, mercury, cadmium, hexavalent chromium, polybrominated biphenyls (PBB), and polybrominated diphenyl ethers (PBDE) in various components:
| Unit |
Lead (Pb) |
Mercury (Hg) |
Cadmium (Cd) |
Hexavalent chromium (Cr⁶⁺) |
Polybrominated biphenyls (PBB) |
Polybrominated diphenyl ethers (PBDE) |
| Plastic Parts |
Ο |
Ο |
Ο |
Ο |
Ο |
Ο |
| Metal Parts |
Ο |
Ο |
Ο |
Ο |
Ο |
Ο |
| Cable component |
- |
Ο |
Ο |
Ο |
Ο |
Ο |
| LCD Panel |
- |
Ο |
Ο |
Ο |
Ο |
Ο |
| Touch Panel |
- |
Ο |
Ο |
Ο |
Ο |
Ο |
| PCBA |
- |
Ο |
Ο |
Ο |
Ο |
Ο |
| Software |
Ο |
Ο |
Ο |
Ο |
Ο |
Ο |
- Note 1: "Exceeding 0.1 wt%" and "exceeding 0.01 wt%" indicate the percentage content of the restricted substance exceeds the reference percentage value of presence condition.
- Note 2: "Ο" indicates that the percentage content of the restricted substance does not exceed the percentage of reference value of presence.
- Note 3: The "-" indicates that the restricted substance corresponds to an exemption.