THE PRESSER FOOT
The Presser Foot Assembly is raised and lowered
with the Preser Foot Lever (No.23 on P.XX)
First, switch the power o:
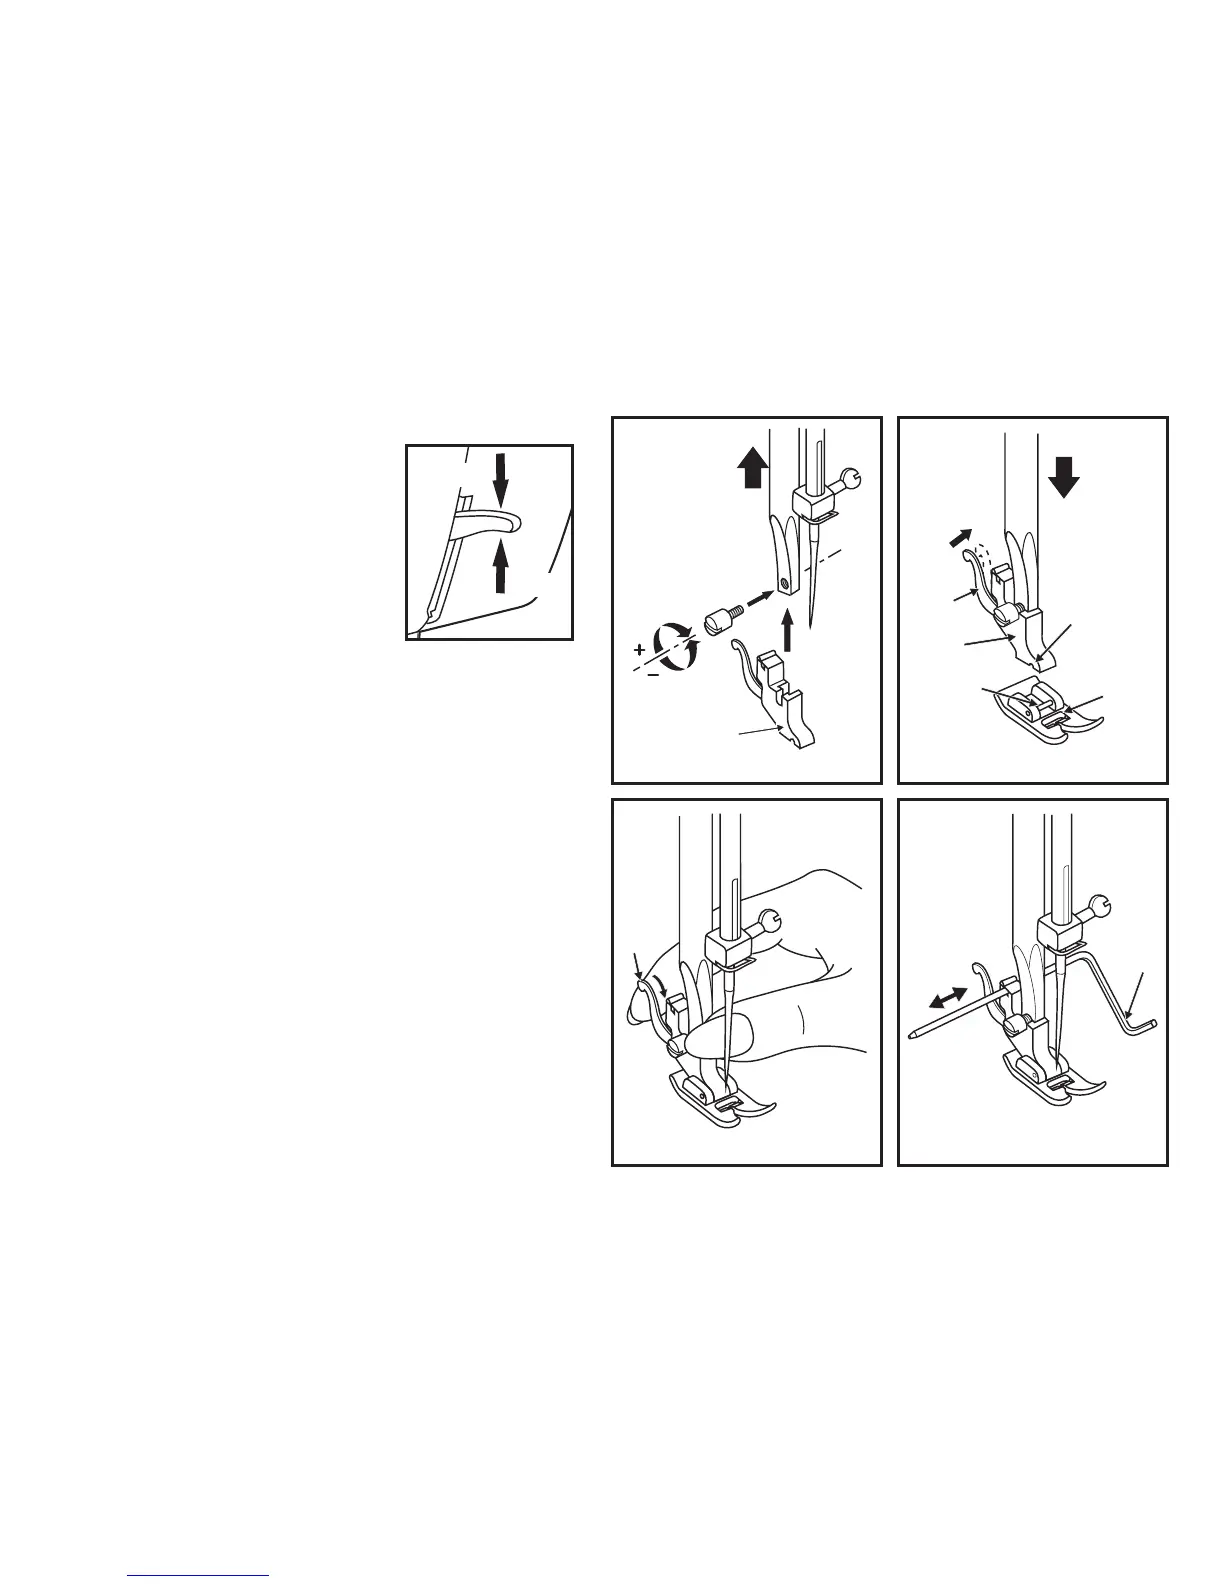
To attach the Presser Foot Holder- Refer to gure 1:
A: Raise the presser foot clamp.
B: Attach the presser foot holder as illustrated.
You can use the provided screw driver to loosen and tighten the screw.
To attach the Pressure Foot- Refer to gure 2:
Place the All Purpose foot (F) on the needle plate
Gradually lower the presser foot holder (B) until the cut-out (C) is directly
above the pin (D) on the plate.
Raise the lever (E). Lower the presser foot holder fully onto the presser foot
and the presser foot will lock automatically in place. Release the lever.
To remove the Pressure Foot- Refer to gure 3:
Raise the presser foot. Raise the lever (e) and the foot disengages.
To Attach the Seam Guide- Refer to gure 4:
The seam guide is a useful accessory to help you gauge the position of
seams etc. but its use is not essential.
Attach the seam guide (g) in the slot as illustrated. Adjust according to
need for hems, pleats, etc.