Do you have a question about the TESmart HKS0802A1U and is the answer not in the manual?
[SEC]: Set the interval number of seconds; [MIN]: Set the interval number of minutes; [Set]: After setting minutes and seconds, press this button to set final auto scan time interval.
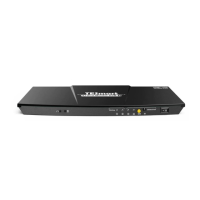
The LED will be red if auto scan mode is turned off; The LED will be blue if auto scan mode is turned on.
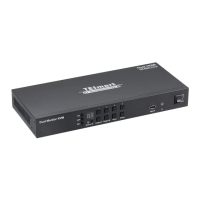
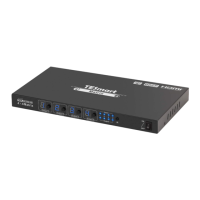
Display current input number and EDID emulator status (use the latter dot).
Receive IR signal.
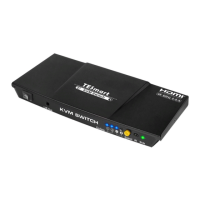
Press to control the Switch. Please refer to Chapter 10.1 for the detail.
Connect to USB 2.0 device.
Turn on or off power supply of the KVM.
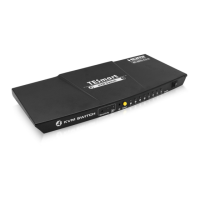
12V DC power supply.
Connect IR extension cable to this port to receive IR signal even the KVM is installed in a rack.
Connect RS232 cable to use RS232 commands to control the KVM.
Connect to USB 2.0 devices.
Used for product cascading to realize simultaneous display of 4 monitors.
For USB keyboard and mouse input.
Connect to 2 HDMI displays for video output.
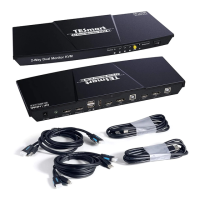
4 PCs can be connected to the KVM at the same time. Each group contains 2 HDMI ports(marked as Input A/B) and a USB port. Connect the ports to corresponding input devices for signal input.
Diagram illustrating the physical connections for the KVM switch and connected devices.
Steps and considerations for preparing the physical connection environment and cables.
Detailed instructions for connecting PCs and peripherals to the KVM switch.
Example setup of a KVM workbench with the 4x2 HDMI KVM Switch connected.
Explains the two display modes supported by the KVM switch: duplicate and extended.
Details the DCCI feature for cascading KVMs to achieve quad-monitor setups.
Describes the Auto Scan feature for automatic display switching at regular intervals.
Explains how to use the mouse wheel for switching input sources and enabling mouse wheel switching mode.
Instructions for operating the KVM switch using the buttons on the front panel.
Guide to using the infrared remote control for KVM switch operations.
Details on connecting and using RS232 for KVM control, including communication protocol.
Explains how to use keyboard hot keys for switching input sources and other KVM functions.
Explains the Pass Through Mode function for improved keyboard/mouse compatibility and user experience.
Lists compatible keyboard and mouse models tested in the laboratory.
| Ports | 8 |
|---|---|
| Power Supply | 5V/1A |
| HDCP | HDCP 2.2 |
| Bandwidth | 18Gbps |
| EDID | Yes |
| Operating Temperature | 0°C to 40°C |
| Storage Temperature | -20°C to 60°C |
| Audio Support | Yes |
| Type | KVM Switch |
| Input Ports | 8 |
| Input Resolution | Up to 4K@60Hz |
| Output Resolution | Up to 4K@60Hz |
| Video Resolution | 4K |
| Switching Method | Manual |
| Control Method | IR Remote |