6 Using the product
53
6.4. Mounting the wall bracket
The scope of delivery does not include mounting materials
(e.g. screws, wall plugs).
✓ The data logger has been removed from the wall bracket.
1. Position the wall bracket at the desired place.
2. Use a pen or something similar to mark the location for the
fastening screws.
3. Prepare the fastening location in accordance with the fastening
material (e.g. drill hole, insert wall plugs).
4. Fasten the wall bracket with suitable screws.
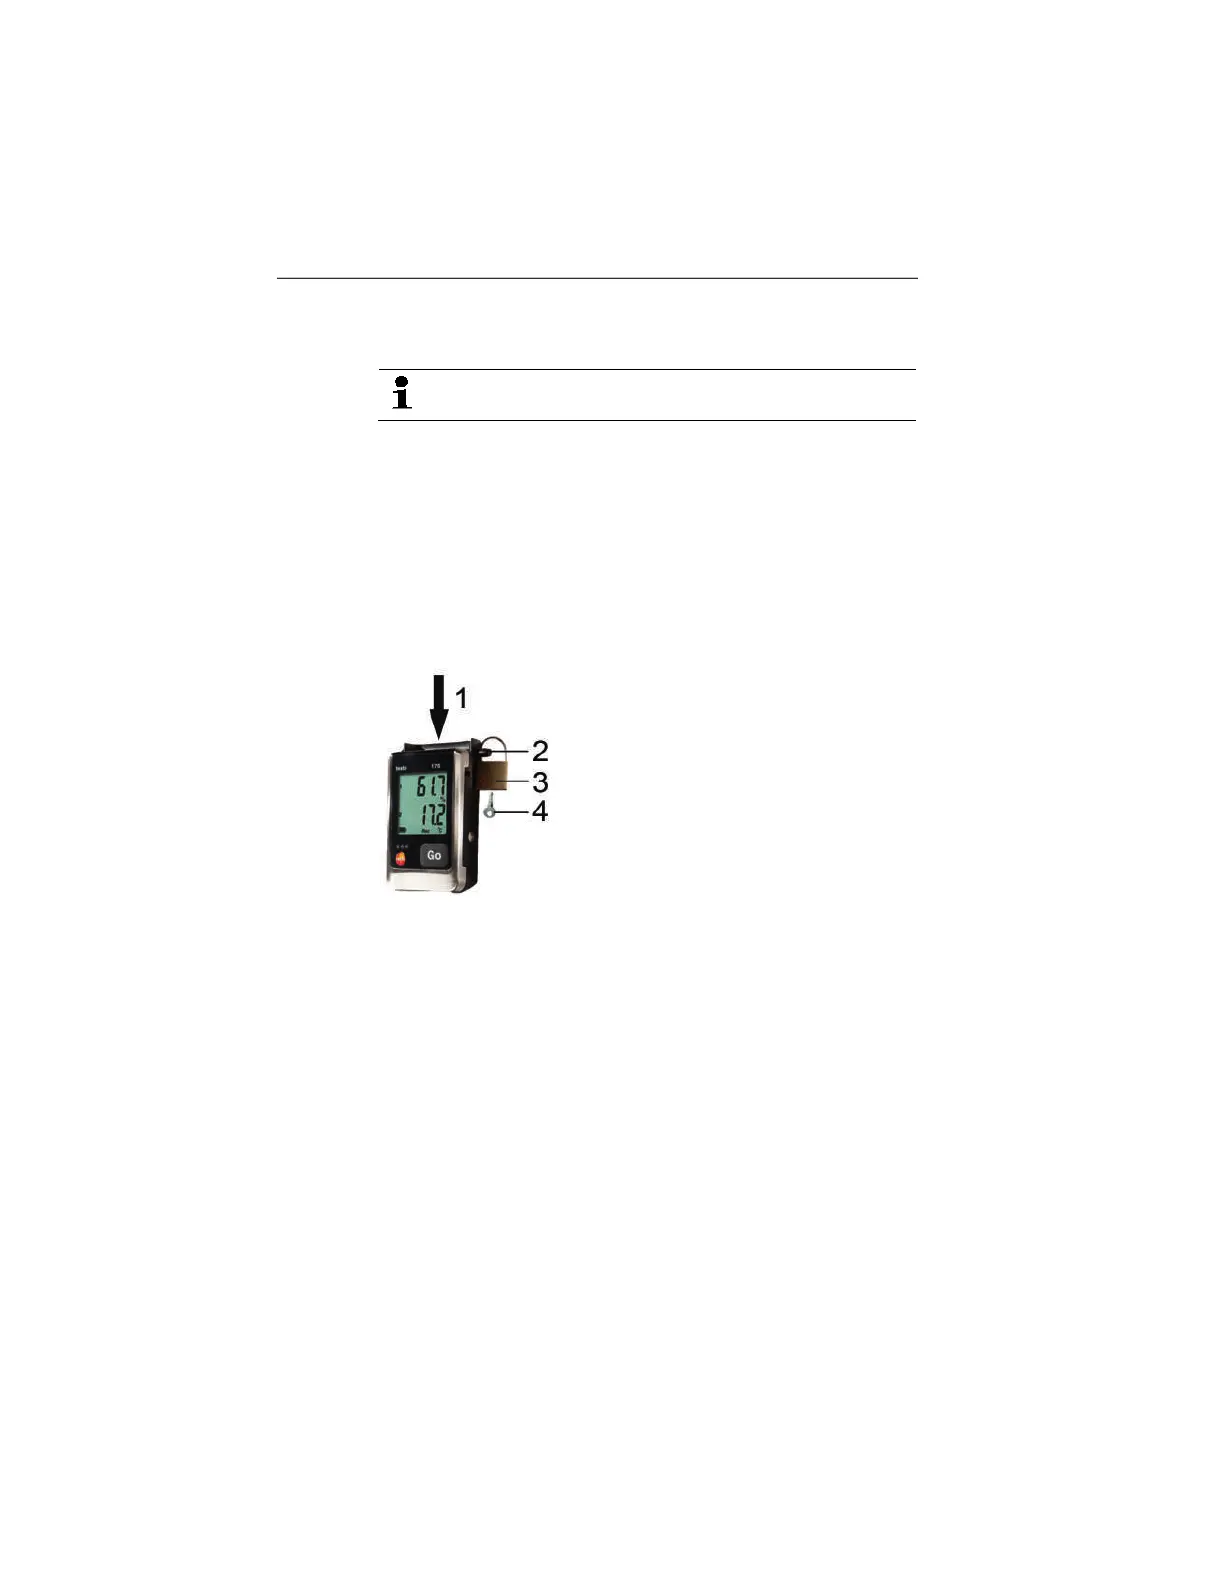
6.5. Securing the data logger
✓ The wall bracket has been mounted.
1. Slide the data logger into the wall bracket (1).
2. Push the locking pin (2) through the holes in the wall bracket.
3. Fasten the lock (3) on the locking pin.
4. Pull off the key (4).
6.6. Reading out data
Via USB cable
1. Connect the USB cable to a free USB port on the PC.
2. Loosen the screw on the right side of the data logger.
3. Open the cover.
www.GlobalTestSupply.com
Find Quality Products Online at: sales@GlobalTestSupply.com