09-367 4 - 8 rev 12/98
section 4 OPERATION
PTO BELT ADJUSTMENT
It is necessary to check the PTO belt adjustment
A. Each time a new attachment is installed.
B. If the PTO drive belt slips or does not release
properly.
1. Attach the new implement using the correct
attachment drive belt. See the Attachment
Operator’s Manual for the correct belt or the belt
chart on page 5-10 in this manual.
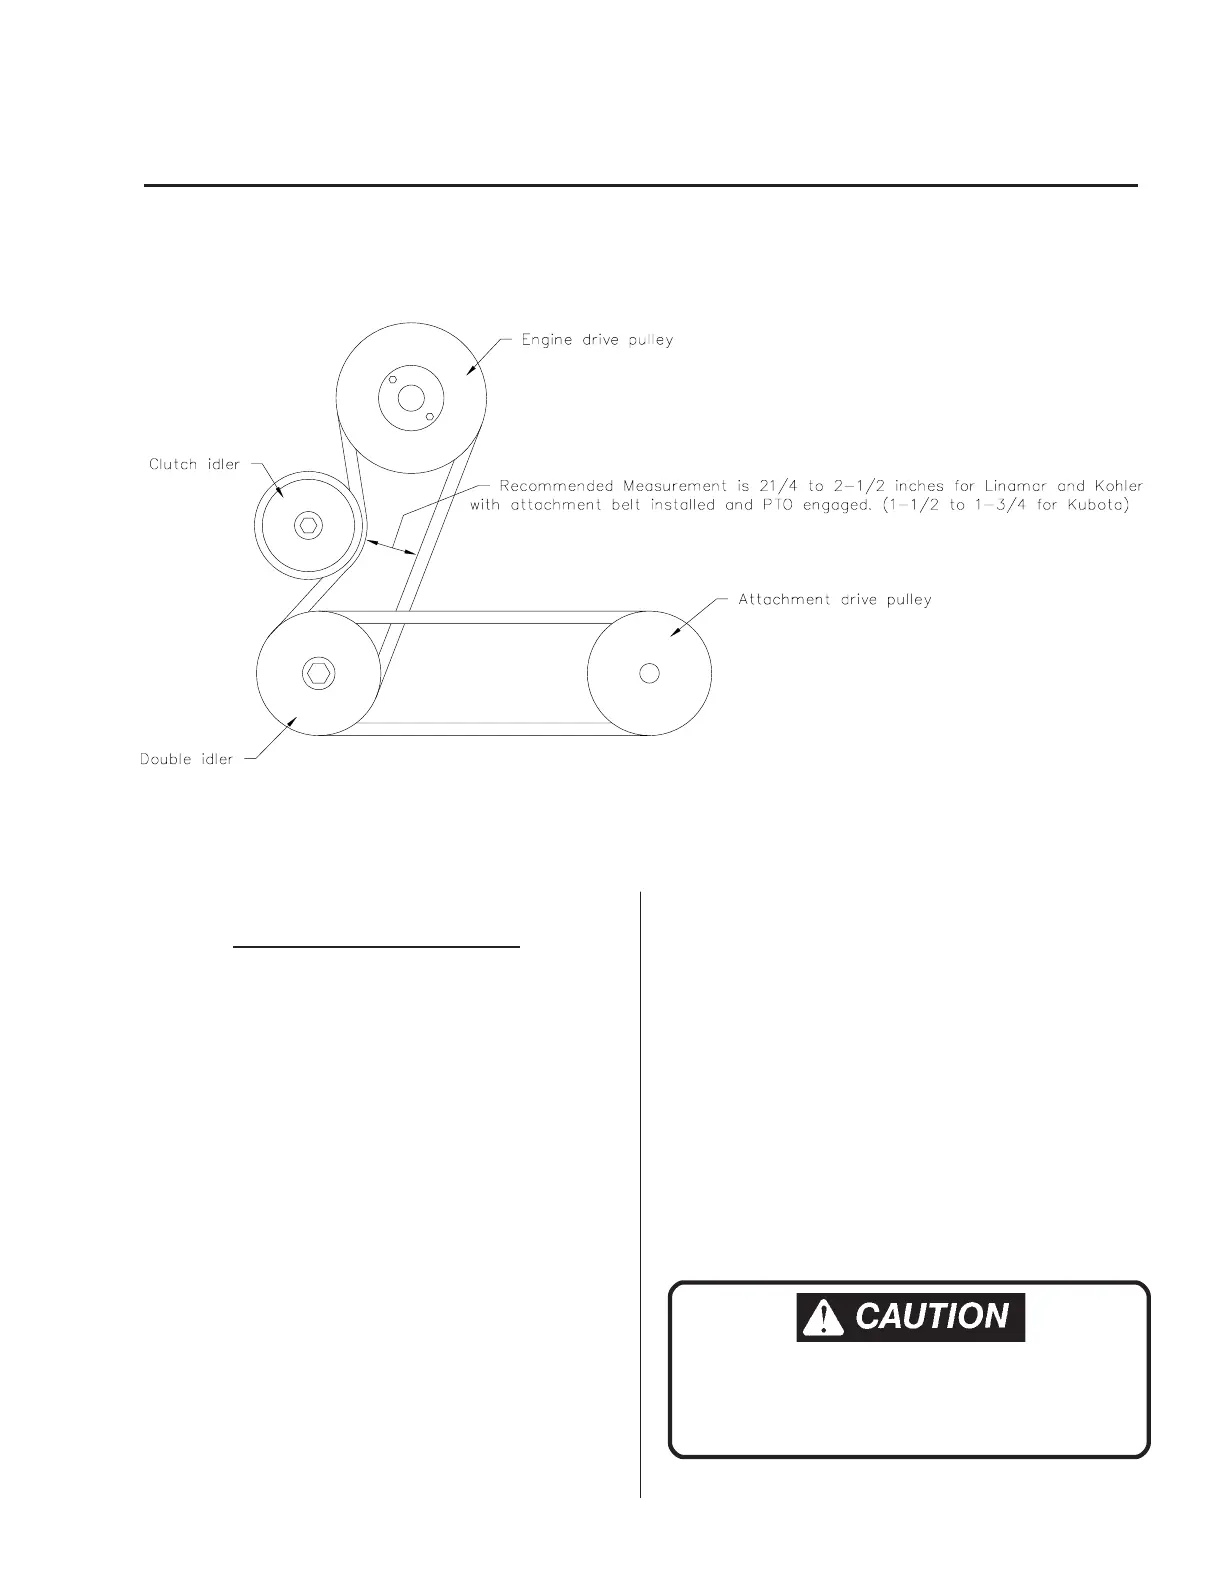
2. Stop the engine, engage the PTO lever and check
the distance as shown in above drawing. The
correct distance between the PTO drive belt is
2-1/4 to 2-1/2 inches (1-1/2 to 1-3/4 for Kubota). If
the distance is less than 2-1/4 inches (1-1/2
Kubota) the drive belt may slip. If the distance is
greater than 2-1/2 inches (1-3/4 Kubota) the drive
belt may not release properly when the
attachment is raised to the highest position.
3. Disengage the PTO and adjust the idler slide
assembly by turning the belt release catch handle
clockwise to tighten belt and counter clockwise to
loosen belt. Adjust to obtain the correct
measurement as stated in step 2.
NOTE: If correct measurement is not possible,
check for an improper size drive belt.
4. Start the unit and raise the attachment to full height.
The attachment should not run with PTO
disengaged. If it does, the drive belt adjustment is
too tight. Repeat Steps 1 through 4.
STOP ENGINE! DO NOT ATTEMPT TO INSTALL
BELTS OR MAKE BELT ADJUSTMENTS WITH
THE ENGINE RUNNING.