EasyManua.ls Logo

The Land of Nod Charley Harper Playhouse User Manual

The Land of Nod Charley Harper Playhouse
6 pages
To Next Page IconTo Next Page
Page #1 background imageLoading...
Page #1 background image
x07
x04
H
G
I J
FE
L
x02
D
C
B
A
x04
x01
M
x01
K
x04 x01 x01
x01 x01 x01
x01
x01
x04
The Land of Nod
8135 River Drive • Morton Grove, IL 60053 • p: (800) 933-9904 • e: customerservice@landofnod.com • www.landofnod.com
Charley Harper Playhouse Assembly Instructions
Page 1 of 6
Made in China - r03
This page lists the contents included in the box. Please take
time to identify the hardware as well as the individual
components of the product. As you unpack and prepare for
assembly, place the contents on a carpeted or padded area
to protect them from damage. Please follow the assembly
instructions closely. Improper assembly can result in
personal or property damage.
Note: 2 adults are required to safely assemble this product.
Question and Answer IconNeed help?

Do you have a question about the The Land of Nod Charley Harper Playhouse and is the answer not in the manual?

The Land of Nod Charley Harper Playhouse Specifications

General IconGeneral
BrandThe Land of Nod
ModelCharley Harper Playhouse
CategoryIndoor Furnishing
LanguageEnglish

Summary

Introduction and Parts Inventory

Product Contents Overview

Lists components and hardware, advising to identify all parts before assembly.

Assembly Safety Precautions

Advises placing parts on a padded area and notes that two adults are required for safe assembly.

Assembly Steps

Step 1: Initial Frame Connection

Connects parts A and E, forming the first section of the playhouse frame.

Step 2: Base Frame Construction

Expands the frame by connecting parts A, E, M, and L to create the base.

Step 3: Vertical Support Installation

Installs vertical supports (parts B and D) into the base frame.

Step 4: Upper Frame Structure

Adds horizontal and diagonal connectors (parts F, G, H, I) to the vertical supports.

Step 5: Reinforce Top Structure

Connects parts A and D to reinforce the upper part of the playhouse frame.

Step 6: Roof Peak Assembly

Attaches parts C to form the triangular roof structure.

Step 7: Add Roof Supports

Installs parts J, A, and K to support the roof peaks.

Step 8: Final Structure Assembly

Completes the main frame structure and prepares for fabric attachment.

Step 9: Fabric Attachment

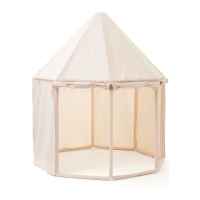
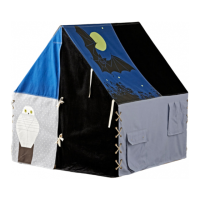
Attaches the fabric components to complete the Charley Harper Playhouse.

Related product manuals