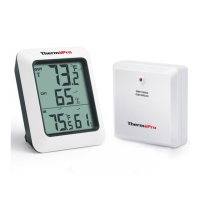
Synchronize Remote Sensors with The Base Station
Please note: each time the batteries (inserted into either
-14-
-15-
ENEN
1. Position the remote sensor near the base station;
2. Once the batteries are installed in the base station, the
signal icon . (located on the upper left of the base station
display) will flash for 3 minutes, indica-ting that the base
station is in synchronization mode: it is waiting for remote
sensors to be registered.
RF
3. If 3 minutes have passed after the batteries were installed
in the base station and the RF signal Icon is no longer
flashing, press and hold the CHANNEL/SYNC button on
the back of the base station for 3-4 seconds until the RF
signal icon is flashing again to set it back in
synchronization mode;
base station or remote sensor) are replaced or base station/
remote sensor lost connection, make sure to follow the
below synchronization process to pair and re-connect the
base station and remote sensor:
4. Install the batteries in the remote sensor and wait for a
moment or just press either the TX or RESET button inside
the remote sensor battery compartment, the remote
sensor temperature/humidity will show on the base station
display which indicates the synchronization is complete.
5. If you have additional remote sensors, repeat the above
steps to register the remote sensors (up to 3 remote
sensors can be registered with one base station);
6. If you have registered more than one sensor, press the
CHANNEL/SYNC button on the base station to select the
remote channel you want displayed permanently on the
base station. Press CHANNEL/SYNC button until you
observe a circular arrow on the base station LCD display
under the channel number. The unit will then auto-scroll,
 Loading...