Do you have a question about the Thermador PCS486GD and is the answer not in the manual?
Covers improper installation, flammable liquids, and procedures to follow if gas is detected.
Emphasizes that installation and service must be performed by qualified personnel.
Describes various Thermador Professional cooktop models and their BTU ratings.
Adherence to industry standards, recommendations for vent hoods, and avoiding cabinet storage.
Specific warnings regarding propane pressure regulation and appliance use as a cooking device only.
Table listing recommended Thermador hoods and blowers for different cooktop models.
Instructions on optimal hood height and necessary clearance from combustible materials.
Recommendation for providing replacement air and consulting with ventilation professionals.
Professional prep, clearances, structural support, utility access, and cabinet depth requirements.
Details on notching cabinets, creating deck cutouts, and maintaining airflow.
Diagrams and specific dimensions for wall and island cabinet openings.
Diagrams illustrating side views, front projection, flush mounting, and underside connections.
Guidelines for flush installations and mounting above warming drawers.
Instructions for safe unpacking, removing parts, and checking the power cord.
Guidance on placing the cooktop in the opening and ensuring it is level.
Confirming the correct gas type, factory settings, and propane conversion process.
Specific cautions for propane gas tanks and the importance of correct pressure regulation.
Requirements for natural/propane gas, shut-off valves, regulators, and leak testing procedures.
Details specific gas installation requirements applicable only in Massachusetts.
Guidelines for safe electrical connection, including plug type and receptacle requirements.
Recommended and alternate grounding methods, with warnings about improper grounding.
Steps for attaching the low back backguard and using optional trim channels.
A table listing model numbers for backguard and island trim accessories.
Recommended cleaning methods and products for maintaining stainless steel finishes.
Important warnings about using specific cleaning agents to prevent surface damage.
Procedures for testing burner ignition, flame quality, and height.
A comprehensive list of checks for electrical, gas supply, and operational readiness.
This document provides installation instructions and important information for Thermador Professional Cooktops, specifically models GP24WK, PCS364GD, PCS364GL, PCS366, PCS484GG, PCS486GD, PCS486GL, and PCS484WK. These cooktops are designed for household cooking and are not intended for room warming or heating.
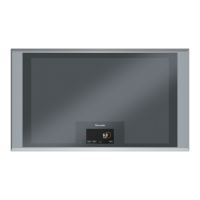
The Thermador Professional Cooktops are high-performance cooking appliances available in various sizes and configurations. The GP24WK is a 24-inch wide wok unit featuring a powerful 30,000 BTU/HR burner. The 36-inch models (PCS364GD, PCS364GL, PCS366) offer configurations with four sealed burners and a griddle, four sealed burners and a grill, or six sealed burners. The 48-inch models (PCS484GG, PCS486GD, PCS486GL, PCS484WK) can include four sealed burners with a griddle and grill, six sealed burners with a griddle, six sealed burners with a grill, or four sealed burners with a 30,000 BTU/HR wok. All sealed burners are rated at 15,000 BTU/HR, griddles at 15,000 BTU/HR, and grills at 18,000 BTU/HR. These cooktops are equipped with an intermittent/interrupted ignition device that cycles the two far left surface burners on and off when set to the ExtraLow® setting, which is normal operation.
The cooktops are designed for installation into a countertop opening and are supported by their side flanges. They can be installed with the front flush or projecting, depending on the countertop's depth. Proper ventilation is crucial for these high-heat appliances. It is strongly recommended to install a suitable overhead vent hood, with downdraft ventilation not recommended. For wall installations, the hood width should at least match the cooktop's nominal width, while for island installations, the hood should overhang the cooking surface by 6 inches on both sides for optimal smoke elimination. The lower edge of the hood should be positioned between 30 and 36 inches above the cooking surface, or a minimum of 42 inches if it contains combustible materials. Due to the high volume of ventilation air, a source of outside replacement air (make-up air) is recommended, especially for tightly sealed homes.
The cooktop requires a gas supply, and it is shipped configured for natural gas. For use with propane gas, the unit must be converted by qualified service personnel using the Thermador Model STARLPKIT field conversion kit. A manual gas shut-off valve must be installed externally in an accessible location for safety. Electrical power is supplied via a 3-prong grounding type receptacle, connected to a properly grounded and polarized 120VAC, 15 Amp, single-phase, 60Hz circuit. Improper grounding or polarization can cause malfunctions like continuous sparking of burner igniters and create shock hazards.
Before operation, all loose components such as burner caps and grates must be properly seated. The burner igniters will click until the flame ignites when a knob is pushed and turned counterclockwise to "HI". Burner flames should be blue and stable, without yellow tips, excessive noise, or lifting from the burner. The sealed top burner flames should be approximately 1-1/2 inches high, while griddle and grill burner flames should be between 1-1/2 to 2 inches high. If flames are too yellow, indicating insufficient air, the air shutter (for grill and griddle only) should be adjusted counterclockwise to increase air inlet. No air shutter or low flame adjustment is necessary for sealed top burners. The griddle should be level or slightly tilted forward and should not rock; leveling screws are provided for adjustment.
To maintain the appearance of the stainless steel surfaces, they should be cleaned by wiping with a damp soapy cloth, followed by rinsing with clear water and drying with a soft cloth to prevent water marks. Mild glass cleaner can be used for fingerprints and smears. For persistent discolorations or deposits, a non-scratching household cleanser or stainless steel polishing powder with a little water and a soft cloth can be used. Stubborn cases may require a plastic scouring pad or soft bristle brush with cleanser and water, rubbing lightly in the direction of the polishing lines or "grain" of the stainless finish. It is important to avoid excessive pressure to prevent marring the surface. A stainless steel cleaner/polish is recommended to protect the finish and maintain its appearance.
It is crucial to prevent deposits from remaining on the surface for long periods. Ordinary steel wool or steel brushes should not be used, as small bits of steel can adhere to the surface and cause rust. Salt solutions, disinfectants, bleaches, or cleaning compounds should not remain in contact with stainless steel for extended periods, as many of these chemicals can be harmful. Always rinse with water after exposure to such substances and wipe dry with a clean cloth.
For any burner adjustments, Thermador recommends that they be made by a qualified technician at the time of installation. Extreme care must be used during adjustments, as improper or lack of adjustments may void the warranty. An electrical wiring diagram and schematic are attached to the bottom of the cooktop chassis for access by a qualified service technician, and this information should not be removed or discarded. Regular checks for gas leaks using a soap solution are recommended for supply line connections; never use a flame to check for leaks.