13 14
English /
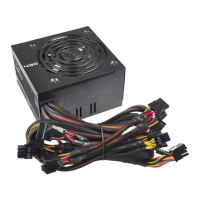
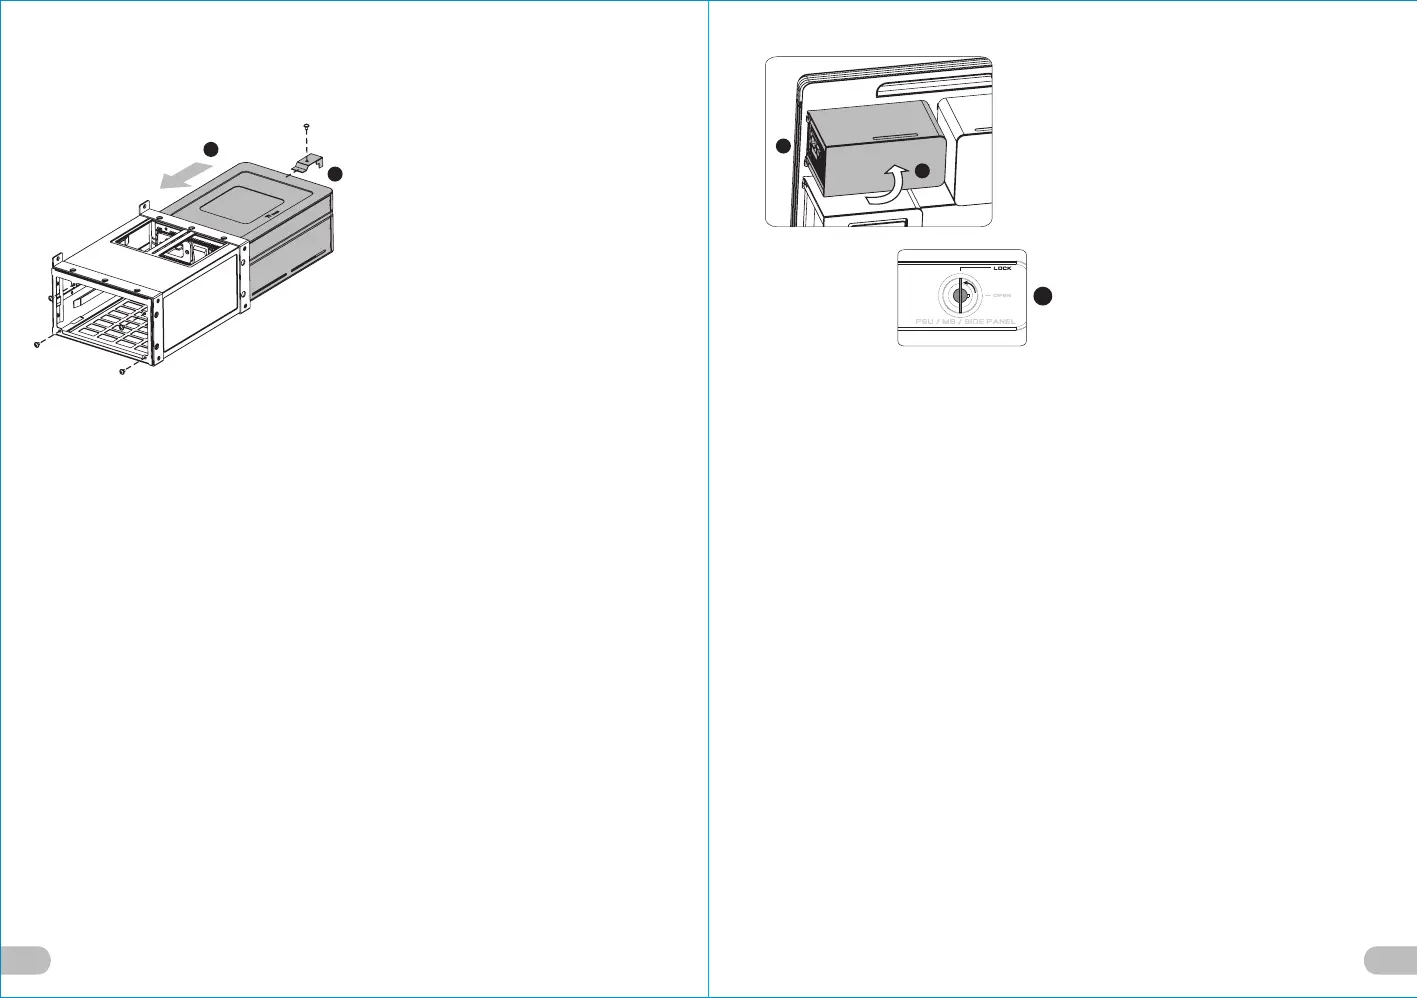
6.Put the power supply in place and fix
it with the screws.
7.Lock the stops onto the holder.
Deutsche /
6. Bringen Sie das Netzteil in Position und
fixieren Sie es mit den Schrauben.
7. Befestigen Sie die Stopper am Halter.
Français /
6. Positionnez le bloc d’alimentation puis
fixez-la avec les vis.
7. Verrouillez les butoirs sur le support.
Español /
6. Coloque la fuente de alimentación en
su sitio y fíjela con los tornillos.
7. Fije los topes en el soporte.
Italiano /
6. Posizionare l’alimentatore e fissarlo
con le viti.
7. Bloccare i fermi sul supporto.
繁體中文 /
6. 將電源供應器裝入並鎖上螺絲固定.
7. 鎖回電源供應器支架檔片.
日本語 /
6. 電源装置を所定の位置に置き、ねじで
固定します.
7. 止め具をホルダー上にロックします.
Русский /
6. Установите блок питания на место и
закрепите его винтами.
7. Зафиксируйте ограничители в
держателе.
简体中文 /
6. 将电源供应器装入并锁上螺丝固定.
7. 锁回电源供应器支架档片.
Türkçe /
6. Güç kaynağını yerine yerleştirin ve
vidalarla sabitleyin.
7. Tamponları tutucunun üzerine takın.
English /
8. Fix the power supply properly.
9. Put the power supply cover in place.
10. Turn the keyhole of the side panel PSU/
MB/SIDE PANEL back into the LOCK
position using the key.
Deutsche /
8. Fixieren Sie das Netzteil.
9. Bringen Sie die Netzteilabdeckung an.
10. Drehen Sie die Schlüsselaufnahme an der
Seite des Gehäuses PSU/MB/SIDE PANEL
wieder mithilfe des Schlüssels in die
Position LOCK.
Français /
8. Fixez fermement le bloc d’alimentation.
9. Replacez le couvercle du bloc d’alimentation.
10. Tournez la boutonnière du panneau
latéral BLOC D’ALIMENTATION/CARTE
MERE/PANNEAU LATERAL dans la
position VERROUILLEE à l’aide de la clé.
Español /
8. Fije adecuadamente la fuente de
alimentación.
9. Coloque en su sitio la cubierta de la fuente
de alimentación.
10. Gire de nuevo la cerradura del panel
lateral PSU/MB/SIDE PANEL a la posición
LOCK utilizando la llave.
Italiano /
8. Fissare correttamente l’alimentatore.
9. Posizionare il coperchio dell’alimentatore.
10. Ruotare di nuovo l'incavo per la chiavetta
del pannello laterale PSU/MB/SIDE
PANEL in posizione LOCK (BLOCCO)
usando la chiave.
繁體中文 /
8. 將電源供應器鎖回.
9. 將電源供應器外蓋蓋上.
10. 用鑰匙將側板PSU/MB/SIDE PANEL
鎖孔轉回LOCK位置.
日本語 /
8. 電源装置を適切に固定します.
9. 電源装置を所定の位置に置きます.
10. キーを使って、側面パネルのPSU/MB/
SIDE PANELのキー穴を「ロック」位置
まで戻します.
Русский /
8. Закрепите блок питания
надлежащим образом.
9. Установите крышку блока питания
на место.
10. Поверните отверстие под ключ на
боковой панели PSU/MB/SIDE
PANEL (БП/МП/БОКОВАЯ ПАНЕЛЬ)
обратно в положение LOCK
(БЛОКИРОВКА) с помощью ключа.
简体中文 /
8. 将电源供应器锁回.
9. 将电源供应器外盖盖上.
10. 用钥匙将侧板PSU/MB/SIDE PANEL锁孔
转回LOCK位置.
Türkçe /
8. Güç kaynağını uygun biçimde sabitleyin.
9. Güç kaynağı kapağını yerine yerleştirin.
10. Anahtarı kullanarak yan panelin PSU/
MB/SIDE PANEL deliğini LOCK (kilitli)
konuma getirin.
6
7
10
8
9