Disassembly and Reassembly
(Rev.
7. 12y'01)
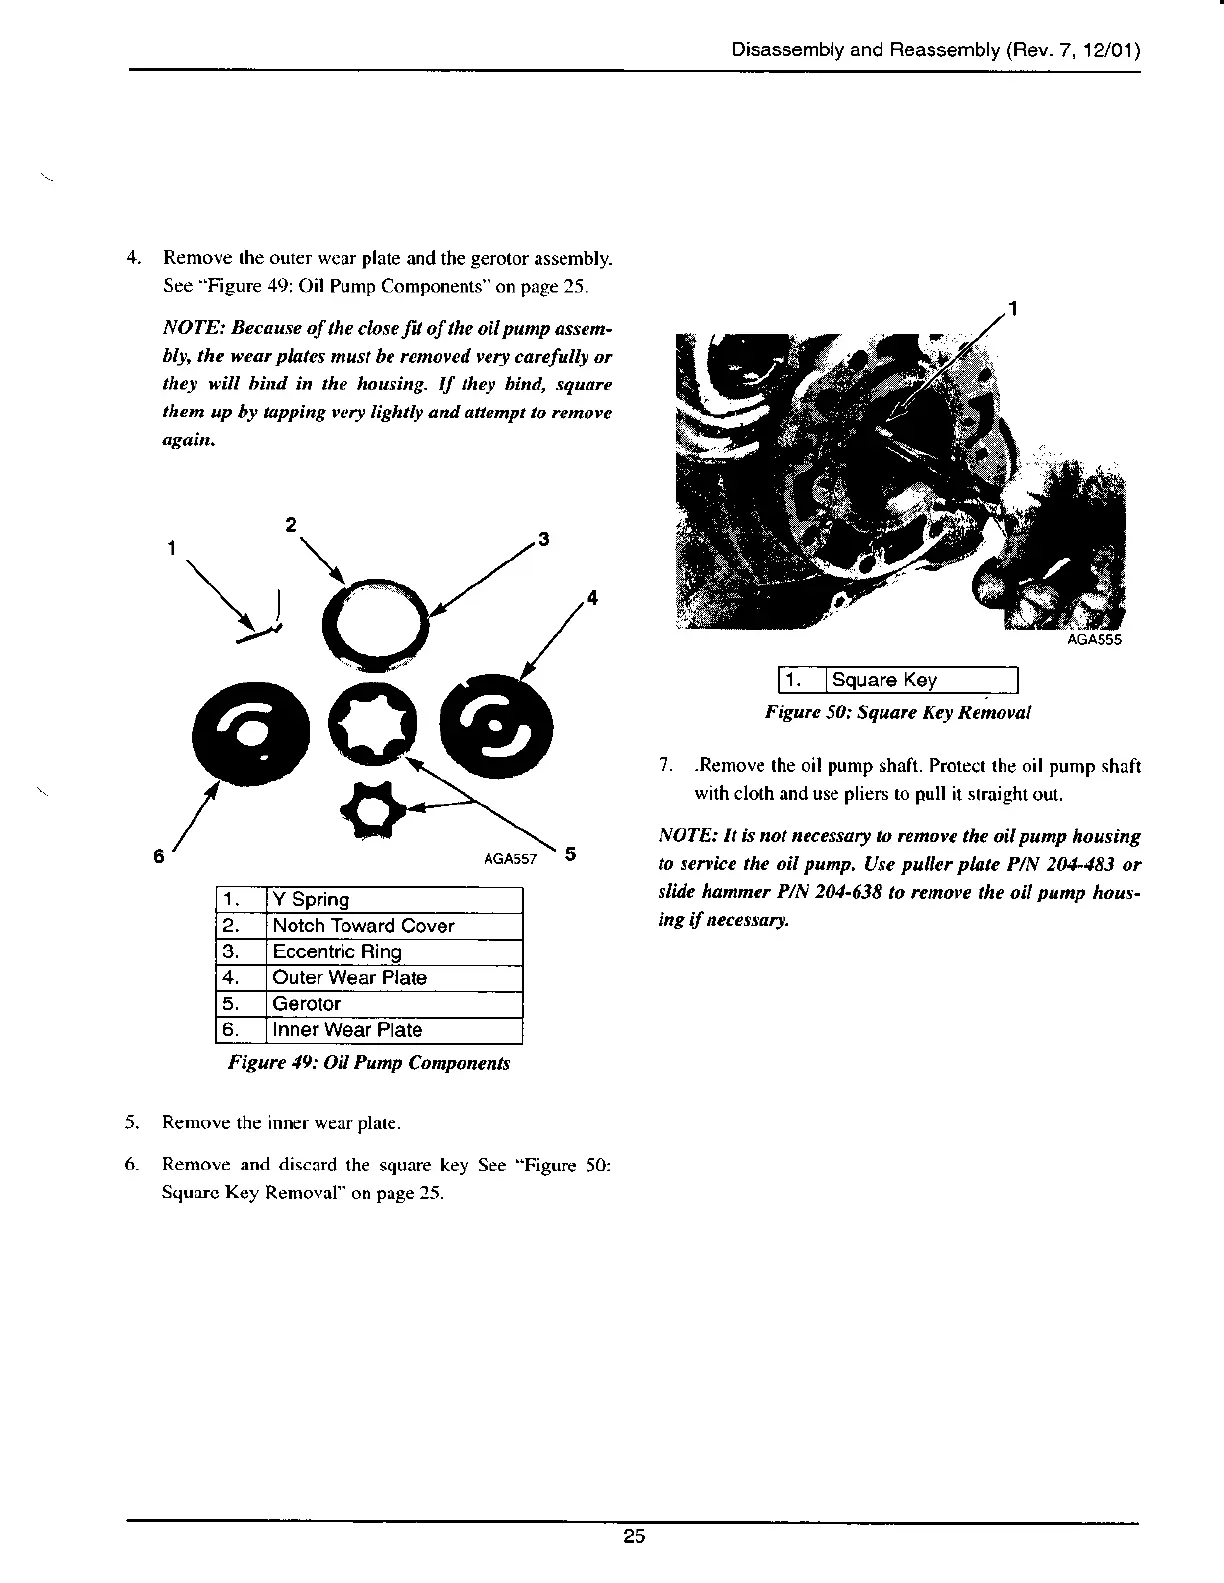
4. Remove rhe outer wear plale
and the
g€rotor
assembly.
See Figure 49r
Oil Pump Components on
page
25.
Nol:E: Be.ause oI
the close
fi
of the oil
pu"a
assen-
bb, the weor plates
nust be rcnowd very carcfu
r
ol
thej will hid
in the housing. II thet bind, squarc
them
up bf tapping wry lightl' and attempt to .cmove
1. Square
Fisu.c
50: Squarc KeJ Removal
?. -Remove
the oil
pump
shaft. Protect rhe oil pump shafi
with
cloth and use
pliers
to
pull
it straighl
oul.
NOTE: I. is not ecessary to rc ovc
the oil
punp
housing
to semice thc oil
punp,
UM
pulcr plate
PlN 2(M-483 or
slide hanner P/N 201-638
to remove the oil
pump
hous-
1.
Y Spring
2. Notch Toward
Cover
3. Eccentric Rinq
4. Outer Wear Plate
5.
G€rotor
6. Inner
Wear Plate
Figurc 19: Oil Puilp
Conponents
5.
6.
R€move
the inner wsrpl e.
Remove and discard
the square key See
'Figure
Squdc Key
Removal on
page
25.
50:
25