Disassembly and Reassembly
(Rev.
7. 12l01)
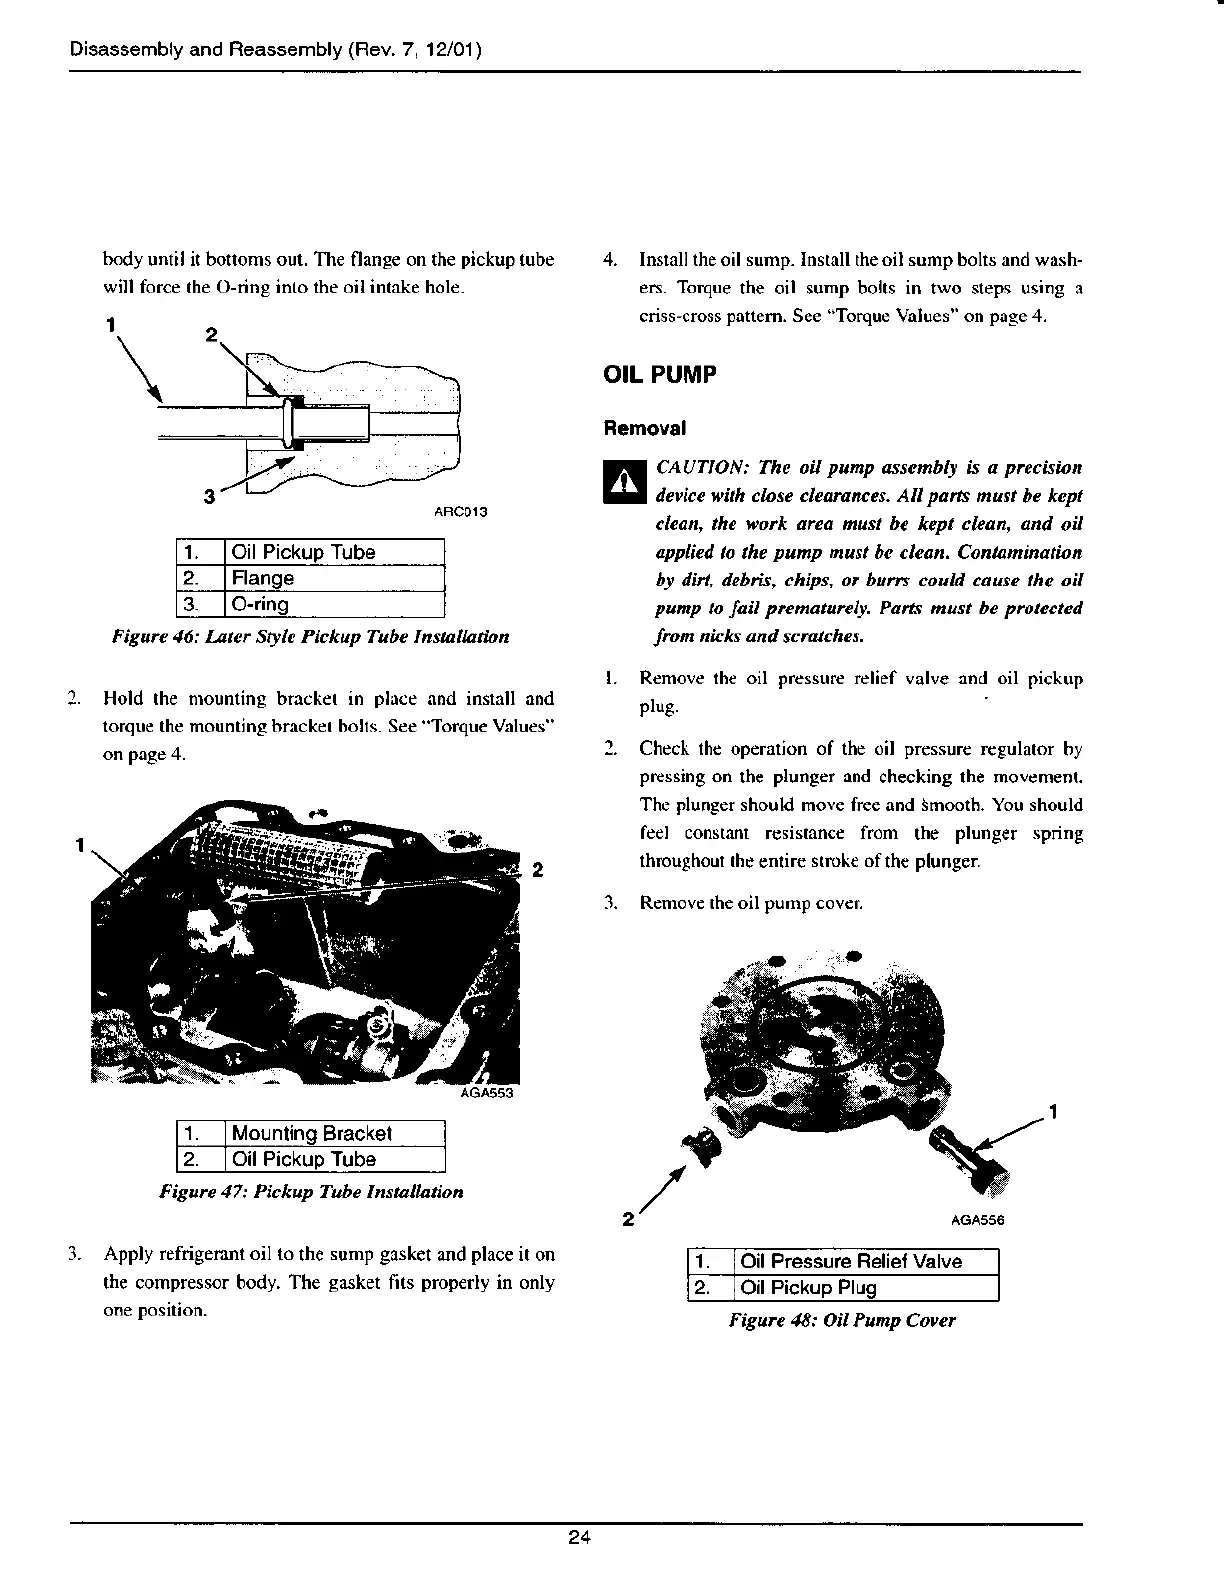
body
until ir boroms out. The flange on the
pickup
tube
will
force rhe O-ring inb the oil inralie hole.
1^
4. Insmll the oil sump- Instnll theoil sump bolts and wash-
es. Torque
the oil
sump
boltr in rwo.lep\ u.ing J
criss'cross
pnttem.
See
"Torque
Values" on
pnge,l.
OIL PUMP
Ramoval
CAUTION: Thc oil
punp
esscmblr is a
Nccsnn
device with clase cleamnces. AII
paft
must
be
kcpt
clean, the i'ork area must bc
kep,
ckan, and
oil
applied to the
punp
nust be clean. Contanination
bt dbt debtu, chips, or burn coud cause rhc oil
punp
to
Iail
pfcnaturely
Par'I. must be
prcteeted
f?on
nick and
sctulches.
Oil Pickup Tube
Flange
3. O-ring
Figure 46: Iat.r Stylc Pickup Tubc Instalhtion
Hold the nrcunting bmcket in
plfte
nnd instill and
torqu€ the mounting bracker bolls. See Torque Values'
on
page
,1.
l. R€move ihe oil
pressure
relief valve and oil
pickup
pl,'C.
l. Checl lhc operation of the oil pressur€
rcgulator by
pressing
on
$e
plunger and
checking lhe molem€nt.
The
plunger
should move free and Smooth. You should
f<l consrrnr rrsisrrn(d from
th(
plune€r
\pnnE
throughour the
enlire
stroke of
th€
plunger
3. Remove the oil
pump
cover.
Mounlinq
Brackel
2. Oil Pickup Tube
Ficure 47: Pickup Tube Install^rion
Apply refrigeranl oil 1()
the
sump
gasket
and
place
it on
the comprelsor body. The
gasket
fits
properly
in only
1 Oil Pressure Relief Valve
2.
Oil
Pickuo Pluo
Fisurc 18: Oil Punp Cover
24