Do you have a question about the Thermo Scientific Applied Biosystems QuantStudio 6 Pro and is the answer not in the manual?
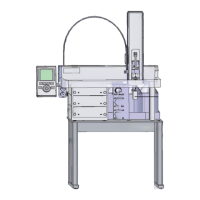
Describes the physical components and features of the QuantStudio 6 Pro and 7 Pro systems.
Details the instrument's home screen interface, features, and connectivity options.
Explains different real-time PCR run types including Standard Curve, Genotyping, and Melt Curve.
Highlights critical safety warnings for handling the instrument and its components.
Covers procedures for signing into the instrument using a PIN or facial authentication.
Explains how to use the instrument's voice command feature for hands-free operation.
Guides on creating and initiating runs using system templates or saved plate files.
Provides step-by-step instructions for correctly loading plates into the instrument drawer.
Details the process for inserting TaqMan™ Array Cards into the instrument.
Explains how to modify plate file properties like sample setup and export settings.
Covers editing thermal cycling parameters, steps, stages, and data collection points.
Describes how to edit sample names, targets, reporter dyes, and reagents for specific wells.
Instructions on how to modify sample and target information while a run is in progress.
How to temporarily halt a run, for example, to add reagents.
Procedure for terminating an ongoing instrument run.
Instructions for copying and deleting plate files from the instrument.
Covers viewing QC status, amplification plots, and transferring data files.
Explains the necessity and process of calibrating instrument and block combinations.
Details recommended frequencies for various calibration and verification procedures.
Step-by-step guide for performing essential plate block calibrations.
Outlines the process for verifying instrument performance using RNase P plates.
How to configure instrument settings to enforce user sign-in.
Steps to connect the instrument to a Thermo Fisher Connect account for enhanced features.
Procedures for creating, managing, and setting up facial authentication for user profiles.
Guide to enabling SAE functions, configuring application profiles, and connecting to the SAE server.
Instructions for administrators to disable SAE mode on the instrument.
Process for users to sign in to the instrument when SAE mode is active.
Instructions for installing a new block into the instrument.
Detailed procedures for cleaning and decontaminating the sample block to remove contaminants.
Steps for safely replacing instrument fuses, including materials and procedures.
Covers requesting technical support, instrument service, and performing self-verification tests.
Guidance on checking for, downloading, and installing software updates.
Instructions on backing up instrument settings and profiles to USB or Connect.
Procedures for restoring instrument settings and profiles from a backup.
Details power requirements, receptacle needs, and voltage tolerances for instrument operation.
Specifies acceptable conditions for installation site, altitude, humidity, and temperature.
Steps for obtaining and installing the QuantStudio desktop software on a computer.
Provides general networking information and supported connection options.
Step-by-step guide for loading PCR reaction mix into TaqMan™ Array Card reservoirs.
Instructions on configuring and operating the centrifuge for card preparation.
Detailed steps for using the TaqMan™ Array Card Sealer to seal the card properly.
Lists consumables and catalog numbers for 96-well, 0.2 mL plate formats.
Lists consumables and catalog numbers for 96-well, 0.1 mL plate formats.
Lists consumables and catalog numbers for 384-well plate formats.
Lists kits and consumables specifically for TaqMan™ Array Cards.
General safety guidelines for operating the instrument, covering electrical, laser, and moving parts hazards.
Precautions for handling chemicals, waste disposal, and potential hazards.
Guidelines for working with potentially biohazardous materials and required safety equipment.
Information on how to contact Thermo Fisher Scientific for product support and technical assistance.
| Instrument Type | Real-Time PCR System |
|---|---|
| Channels | 6 |
| Temperature Range | 4–100°C |
| Light Source | LED |
| Detection Technology | CCD camera |
| Temperature Accuracy | ±0.25°C |
| Heating Rate | Up to 6.5°C/sec |
| Sample Capacity | 96-well |
| Block Format | 96-well or 384-well |
| Reaction Speed | Fast |
| Dyes | FAM, SYBR Green, VIC, ROX |
| Excitation Sources | LED |
| Connectivity | Ethernet, USB |
| Power Requirements | 100–240 VAC, 50/60 Hz |
| Ramp Rate (max) | 6.5°C/sec |
