A
B
C
D
E
F
North America
166 Cummings Center
Beverly, MA 01915 USA
Toll Free: 1-800-225-1480
Tel: 1-978-232-6000
Dom. Fax: 1-978-232-6015
Int’l Fax: 978-232-6031
Europe
P.O. Box 254, 3860 AG Nijkerk
Wallerstraat 125K, 3862 BN
Nijkerk, The Netherlands
Tel: (31) 033-2463887
Fax: (31) 033-2460832
Asia Pacific
Blk 55, Ayer Rajah Crescent
#04-16/24, Singapore 139949
Tel: 65-6778-6876
Fax: 65-6773-0836
www.thermo.com/water
Environmental Instruments
Water Analysis Instruments
©2008 Thermo Fisher Scientific Inc. All rights reserved. RDO is a registered trademark of In-Situ Inc.,
Fort Collins, CO USA. All other trademarks are the property of Thermo Fisher Scientific Inc. and its subsidiaries.
RDO
Important Note – Read Before Assembling or
Operating the Equipment
The RDO optical DO sensor has an internal clock that counts down the 365 day
lifespan of a new optical cap. The countdown begins when the RDO cap is
installed on the RDO sensor, the RDO sensor is connected to the meter and the first
measurement is taken. The 365 day countdown cannot be reset or changed once
the first measurement is taken.
To View the Remaining Lifespan of the RDO Cap
In the measurement mode, press the setup key. Press the up arrow key until dO
is displayed on the top line. Press the line select key to move the icon to the
middle line. Press the up arrow key until LIFE is displayed on the middle line.
The remaining lifespan of the RDO cap, in days, will be displayed on the bottom
line. Press the measure key to return to the measurement mode.
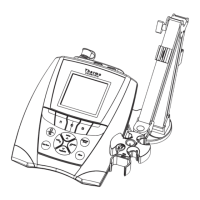
Preparation
1. Power adapter (benchtop meters only) – Select the appropriate wall outlet plug
and slide the plug plate into the groove on the back of the adapter. See A.
Batteries – Select four AA alkaline batteries. Confirm that the meter is off and
remove the battery cover. Orient and insert the batteries as depicted in the
battery compartment housing. Replace the cover. See B and C.
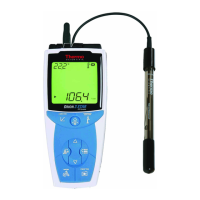
2. Prepare the RDO optical DO sensor according to the directions in the RDO
sensor user guide. Install the RDO cap on the RDO sensor before connecting
the RDO sensor to the meter.
Note:
An Err 880 message on the meter indicates that the RDO sensor is
not fully connected to the meter. Reconnect the sensor by firmly pushing the
sensor connector into the 9 pin miniDIN meter input.
Note:
An Err 882 message on the meter indicates that the RDO cap is missing
or not properly installed on the RDO sensor.
3. Calibration sleeve – To prepare the calibration sleeve, remove the cap from the
sleeve and remove the sponge from the cap. Saturate the sponge with distilled
water and squeeze all of the excess water out of the sponge. Reassemble the
calibration sleeve and insert the RDO sensor.
4. Meter connections – Connect the power adapter to the meter and to the wall
outlet (benchtop meters only). See D. Connect the RDO sensor to the 9 pin
miniDIN input on the meter. See E. Connect the stirrer sensor to the stir jack
input on the meter (benchtop meters only). See F.
Note:
All unused inputs on the meter should be covered with the black caps.
Key Description
power
up arrow line select
stir
(benchtop
meters only)
calibrate
down arrow
setup
measure
digit
view log
Meter Connections
All connectors on the 5-Star Plus benchtop meter are depicted above. All connectors on the 5-Star
Plus portable meter are highlighted in gray.
The 3-Star Plus and 4-Star Plus meters will have fewer connectors. For example, the 3-Star Plus
portable RDO meter will only have 9 pin miniDIN, 8 pin miniDIN (for ATC probe only) and
RS232 connectors.
For the complete Orion Star
™
and Star Plus meter user guide, visit www.thermo.com/water.
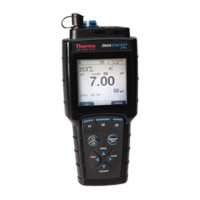
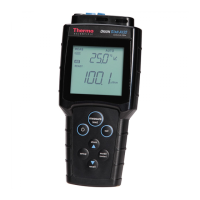
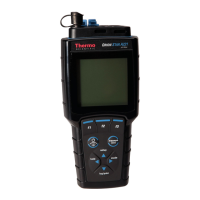
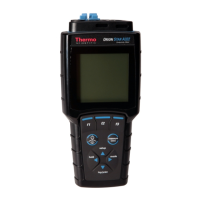
Thermo Scientific Orion Star
™
RDO
®
Optical Dissolved Oxygen Meter
Quick Start Guide
English
257251-001 Rev. A 09-08
Stir Jack –
Stirrer Sensor
Pin Tip –
Reference
BNC – pH,
ORP or ISE
8 Pin MiniDIN –
ATC or Cond
9 Pin MiniDIN
– RDO
RS232
Ground
Power