2
Thermo Scientific Revco Laboratory Refrigerators Installation and Operation
4 Installation
Do not exceed the electrical and temperature ratings.
CAUTION! Improper operation of the equipment
could result in dangerous conditions. To preclude
hazard and minimize risk, follow all instructions and
operate within design limits noted on the dataplate.
4.1 Location
Install the unit in a level area free from vibration with a minimum
of 6 inches of space on the sides and rear and 12 inches at the top.
Do not position the equipment in direct sunlight or near heating
diffusers, radiators, or other sources of heat. The ambient
temperature range at the location must be 59 to 90°F
(15to32°C).
4.2 Wiring
CAUTION! Connect the equipment to the correct
power source. Incorrect voltage can result in severe
damage to the equipment.
DANGER! For personal safety and trouble-free
operation, this unit must be properly grounded before
it is used. Failure to ground the equipment may cause
personal injury or damage to the equipment. Always
conform to the National Electrical Code and local
codes. Do not connect unit to already overloaded
power lines.
Always connect the equipment to a dedicated (separate) circuit.
Electrical codes require fuse or circuit breaker protection for
branch circuit conductors. Use time delay fuses for #12 AWG
circuits.
Chromatography refrigerators are equipped with a duplex vapor-
proof interior outlet with a maximum of 4 amps per receptacle.
The wiring schematic is attached to the back of the cabinet.
4.3 Leveling
It is important to make sure the unit is level. Use thin sheets of
metal to level units equipped with casters.
Undercounter models come with leveling feet installed, with
casters provided in a bag inside the cabinet. The unit must be
level. To level undercounter units, rotate the leveling screws,
located under the front corners of the unit, until the unit is level.
If the floor is seriously out of level, you may need to shim the
corners with thin sheets of metal.
4.4 Door Seal
To check the door seal, complete the following steps:
1. Open the door.
2. Insert a strip of paper (a couple of inches wide) between the
door gasket and the cabinet flange and close the door.
3. Slowly pull the paper strip from the outside. You should feel
some resistance.
4. Repeat this test at 4-inch intervals around the door. If the
door does not seal properly, replace the gasket.
CAUTION! Door seal integrity is critical for
refrigerators and freezers. A loose fitting gasket allows
moist air to be drawn into the cabinet, resulting in
quicker frost buildup on the evaporator coil, longer
running time, poor temperature maintenance, and
increased operation cost.
4.5 Door Operation
Solid doors and standard glass doors for models larger than the
undercounter model stay open if opened 90 degrees. Door spring
tension cannot be adjusted.
If the self-closing doors do not work properly, make sure the unit
is level.
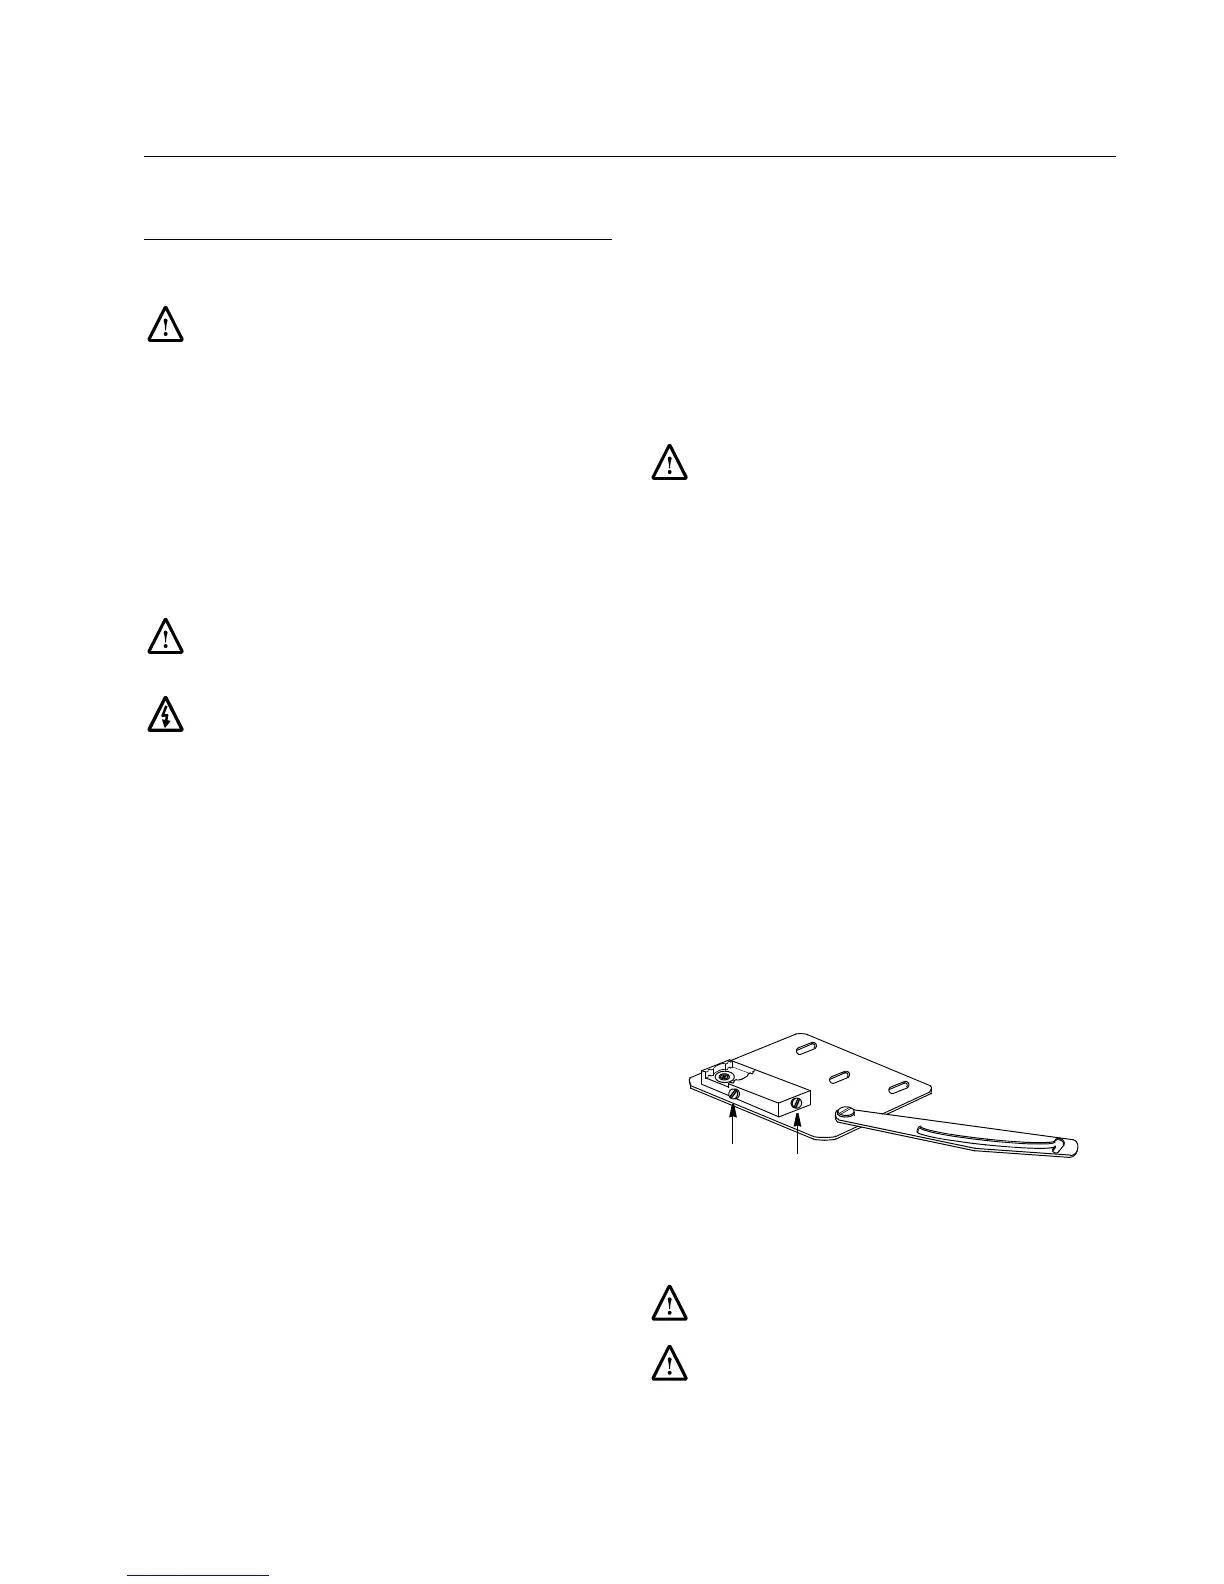
4.5.1 Adjustable Hinged Glass Doors (Undercounter
Models Only)
On undercounter models with hinged glass doors, you can use a
regular screwdriver to adjust spring tension and center each door
on its frame. The adjustment screws (“torque” for tension and
“sag” for door placement) are located on the bottom hinge
bracket (shown below in Figure 1).
Hinged glass doors can be propped open with metal braces at the
bottom hinges. Open the door 90 degrees or until you feel some
resistance. Push the door open past the resistance and the metal
braces engage. To close the door, push it toward the unit (past the
resistance).
Figure 1. Undercounter Hinge Bracket for Glass Door
Adjustments
CAUTION! Do not overtighten the tension as
damage to the equipment can result.
WARNING! Disconnect equipment from main power
before attempting any maintenance to equipment or its
controls.
To rq ue
Sag

 Loading...