5015931_01 3 of 6
2
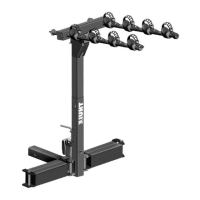
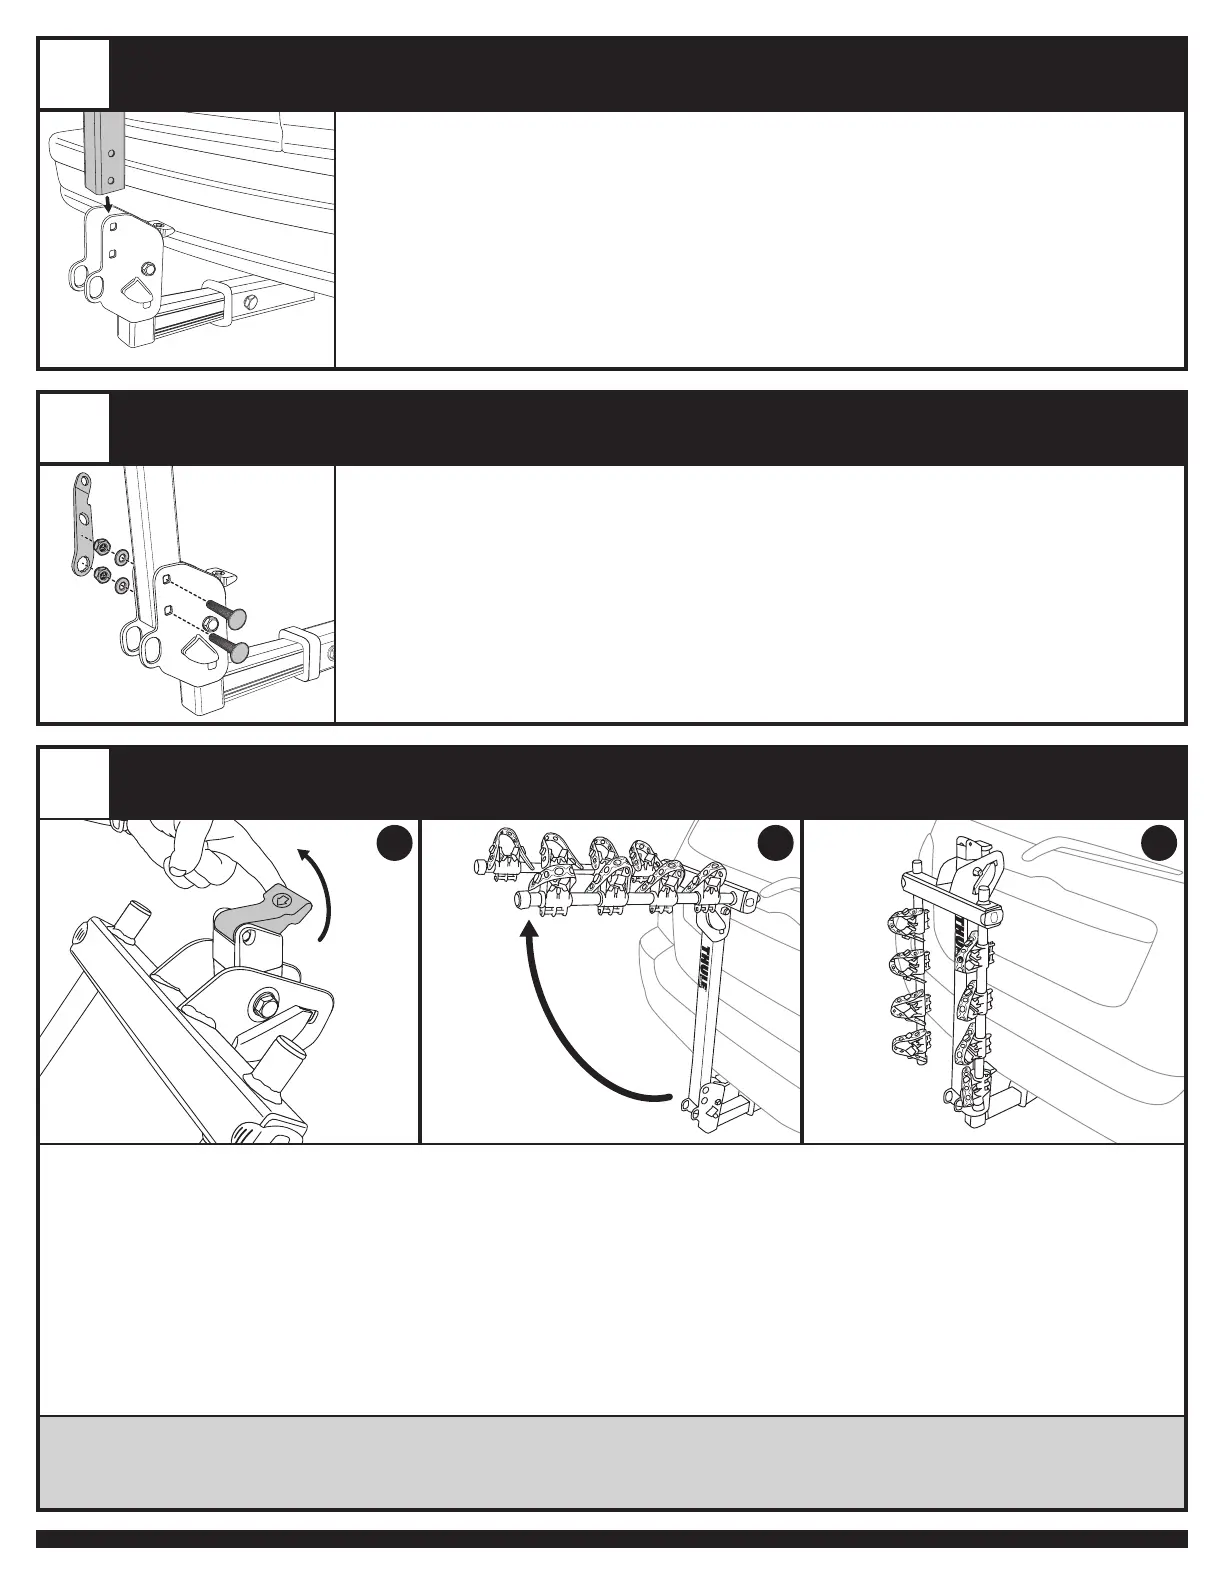
UPRIGHT ASSEMBLY / ENSEMBLE DE MONTANT / ENSAMBLAJE VERTICAL
• Position upright assembly between bottom plates of hitch assembly as illustrated.
Positionnez l’ensemble de montant entre les plaques inférieures de l’ensemble d’attelage, comme indiqué
Coloque el ensamblaje vertical entre las placas inferiores del ensamblaje del enganche, según se muestra en el dibujo.
3
SECURING UPRIGHT ASSEMBLY / FIXATION DE L’ENSEMBLE DE MONTANT / FIJACIÓN DEL ENSAMBLAJE VERTICAL
• Insert 1/2 -13 carriage bolts, flat washers and 1/2 -13 lock nut as illustrated.
Insérez les vis de carrosserie 1/2 -13, les rondelles plates et l’écrou bloquant 1/2 -13 comme indiqué.
Introduzca los pernos de carruaje 1/2 -13, las arandelas planas y la contratuerca 1/2 -13 según se muestra en el dibujo.
• Tighten firmly with Thule tool.
Serrez fermement à l’aide de l’outil Thule.
Apriete firmemente con la herramienta Thule.
4
BICYCLE TRANSPORTATION / TRANSPORT DE VÉLOS / MONTAJE DE LAS JAULAS ANTI-BALANCEO “STAY-PUT”
• Lift lever of upper Hitch Switch™ as illustrated.
Relevez le levier Hitch Switch™ supérieur comme indiqué.
Levante la palanca del Hitch Switch™ superior según se muestra.
• With other hand lift bike carrier arm assembly upward until the Hitch Switch™ lever “clicks” into locked position.
De l’autre main, relevez le bras du porte-vélos jusqu’à ce que le levier Hitch Switch™ s’enclenche en position verrouillée.
Con la otra mano levante el brazo del portabicicletas hacia arriba hasta que la palanca del Hitch Switch™ haga “clic” en su lugar.
• Reverse operation to store.
Effectuez l’opération dans l’ordre inverse pour le rangement.
Siga los pasos en orden inverso para almacenar el portabicicletas.
WARNING: Inspect trigger pin to ensure carrier is in locked upright position. Each side should show gold.
ATTENTION: Inspectez la goupille de déclenchement pour vous assurer que le porte-vélos soit verrouillée en position relevée. Chaque côté doit laisser apparaître une surface dorée.
ADVERTENCIA: Inspeccione el pasador de gatillo para asegurarse de que el portabicicletas esté bien fijado en la posición vertical. Cada lado debe mostrar el color dorado.
A B C