EasyManua.ls Logo

THUNDER TIGER EK4-S2 User Manual

THUNDER TIGER EK4-S2
12 pages
To Next Page IconTo Next Page
Page #1 background imageLoading...
Page #1 background image
Thunder Tiger Corporation guarantees this model kit to be free from defects in both material and workmanship.
The total monetary value under warranty will in no case exceed the cost of the original kit purchased. This warranty
does not cover any components damaged by use or modification. Part or parts missing from this kit must be
reported within 60 days of purchase. No part or parts will be sent under warranty without proof of purchase.
To receive part or parts under warranty, the service center must receive a proof of purchase and/or the defective
part or parts. Should you find a defective or missing part, contact the authorized Thunder Tiger Service/Distributor
nearest you. Under no circumstances can a dealer or distributor accept return of a kit if assembly has started.
JD1440.V3
No.6216
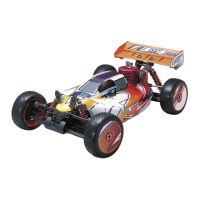
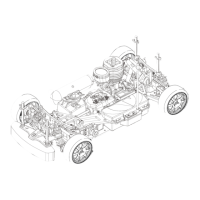
1/8 OFF-ROAD, 4WD MONSTER TRUCK
Question and Answer IconNeed help?

Do you have a question about the THUNDER TIGER EK4-S2 and is the answer not in the manual?

THUNDER TIGER EK4-S2 Specifications

General IconGeneral
Scale1/10
Drive Type4WD
Tire TypeRubber
ESCIncluded
Radio2.4GHz
Battery TypeNiMH

Summary

Thunder Tiger Warranty Information

Introduction and Required Items

Items Required for Operation

Lists essential parts and accessories needed for the RC model's operation.

Included Tools Overview

Details the tools that are included with the model kit.

Radio Gear Installation

Servo Tray and Servo Installation

Installing the servo tray and servos into the chassis securely.

Receiver and Antenna Setup

Placing the receiver in its box and routing the antenna.

Battery Box Installation

Installing the receiver battery box and connecting power.

Steering Linkage Assembly and Installation

Building and attaching the steering linkage to the servo and steering rack.

Throttle and Igniter Setup

Throttle Linkage Assembly and Installation

Assembling and installing the throttle/brake linkages and servo horn.

Glow Plug Igniter Charging Procedure

Steps for charging the glow plug igniter using the AC adapter.

Radio System Preparation and Operation

Radio Frequency and Crystal Check

Verifying transmitter and receiver crystal frequencies match.

Transmitter Antenna Installation

Installing the antenna into the transmitter unit.

Transmitter and Receiver Battery Installation

Installing AA batteries into both transmitter and receiver boxes.

Transmitter and Receiver Power Sequence

Correct order for turning the radio transmitter and receiver on and off.

Servo Reverse and Trim Adjustment

Adjusting servo reverse switches and trim levers for steering and throttle.

Radio Control Functions

Steering Function Check and Trim

Verifying steering response and using trim lever for alignment.

Throttle/Brake Function Check and Trim

Verifying throttle/brake response and using trim lever.

Linkage and Carburetor Adjustments

Throttle/Brake Linkage Adjustment

Adjusting brake collar and throttle linkage for proper operation.

Carburetor Idle and Needle Adjustment

Setting carburetor idle speed and high/mid/low speed needles.

Air Filter Preparation and Installation

Moistening air filter foam and installing it correctly.

Fueling and Safety Warnings

Fueling the Model Car

Steps for filling the fuel tank with glow fuel.

Fuel and Glow Plug Recommendations

Guidance on recommended fuel types and glow plugs for the engine.

General Safety Warnings

Important safety precautions and disclaimers for product operation.

Engine Preparation and Starting

Glow Plug and Starter Preparation

Checking the glow plug and preparing the electric starter tool.

Engine Priming Procedure

Priming the engine with fuel using the starter before ignition.

Engine Starting Sequence

Steps to start the engine using the radio and electric starter.

Handling Flooded Engines

Procedure to unflood an engine if it fails to start.

Engine Break-In Procedure

Initial Engine Break-In Settings

Setting high speed needle and idle for initial break-in.

Break-In Running Procedure

Running the engine through different throttle positions during break-in.

Carburetor Adjustment During Break-In

Adjusting low and high speed needles based on engine behavior.

Engine Tuning for Normal Operation

Carburetor Idle and Mid-Speed Setting

Setting the idle and mid-speed needles for normal operation.

High-Speed Needle Tuning

Adjusting the high-speed needle for peak performance and optimal setting.

Low-Speed Needle Tuning

Adjusting the low-speed needle for stable idle and transitions.

Optimum Tuning for PRO-70BX Engine

Guidance on achieving optimal performance with rich settings for PRO-70BX.

Model Specifications

Related product manuals