This document provides general assembly instructions for the Tiger Siberian Log Cabin, a garden building designed for outdoor use. The manual, identified by the code TIG/INS12, guides users through the process of constructing the log cabin, from unpacking components to final touches like installing storm braces.
Function Description:
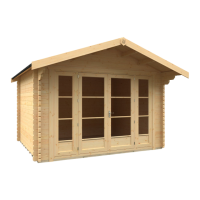
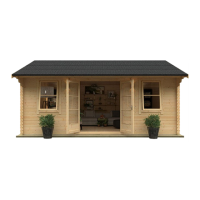
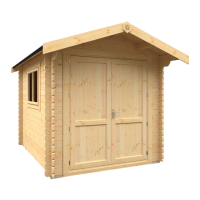
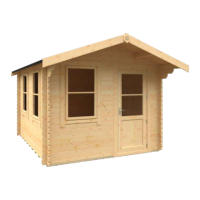
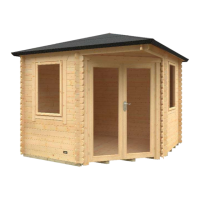
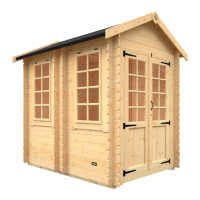
The Tiger Siberian Log Cabin is a self-assembly garden building intended for various outdoor uses, such as a storage shed, workshop, or recreational space. Its design emphasizes a robust log construction, providing durability and a classic aesthetic. The cabin is designed to be erected on a firm and level base, ensuring stability and longevity. The assembly process involves interlocking timber logs, installing doors and windows, constructing the roof, and adding finishing elements like fascia boards and skirting. The cabin's design incorporates features to accommodate natural timber expansion and contraction, which is crucial for maintaining its structural integrity over time.
Important Technical Specifications:
- Timber Construction: The cabin is built using natural timber logs, which are subject to environmental factors like rain and dry spells, leading to swelling, warping, or contraction.
- Base Requirements: A firm and level base is essential for proper assembly and to prevent distortion. Recommended base types include durable plastic grids, concrete (75mm laid on 75mm hard-core), slabs (laid on 50mm sharp sand), or a self-constructed/pre-made timber base. The base should be at least the size of the tanalised floor bearers and ideally 25mm above ground level to prevent flooding.
- Fixing Kit Contents: The assembly requires various fasteners:
- C20: 20mm Galvanised Clout Nails (QTY 300)
- N40: 40mm Galvanised Nails (QTY 30)
- N65: 65mm Galvanised Nails (QTY 300)
- S40: 40mm Screws (QTY 30)
- S60: 60mm Screws (QTY 8)
- S80: 80mm Screws (QTY 16)
- BA40: 40mm Bright Annular Nails (QTY 400)
- CB40: M6 Coach Bolts (40mm - QTY 8)
- Tanalised Bearers: These are positioned at approximately 400mm centres on the base. For larger cabins, bearers may be supplied in multiple pieces. Dimensions for bearers are 58mm x 44mm.
- Floorboard Gap: A 2.5mm gap is required between the edge of the floorboards and the outer logs to allow for expansion and contraction of the timber.
- Roof Felt Overlap: When felting the roof, felt strips should overlap by 75mm to ensure proper waterproofing.
- FSC Certification: The timber used is FSC® C125286 certified, indicating responsible forestry.
- Manufacturing Origin: The product is "MADE IN THE UK SINCE 1913."
Usage Features:
- Self-Assembly: The cabin is supplied as a kit requiring self-assembly, with detailed step-by-step instructions provided.
- Two-Person Assembly: It is strongly recommended that all buildings be erected by two competent adults for safety and ease of construction.
- Tool Requirements: Essential tools (not supplied) include a hammer, rubber mallet, drill, ladder, tape measure, sharp knife, spirit level, screwdriver, wood saw, and spanner.
- Pre-Drilled Holes: Holes for door framing are pre-drilled at the factory. However, screw holes for general assembly should be pre-drilled by the user to prevent timber splitting.
- Staggered Log Interlocks: The logs interlock in a staggered pattern, with some featuring additional full and half notches for a secure fit.
- Door and Window Installation: Doors and windows are heavy and require careful lifting into place. They should be positioned centrally within their openings, leaving a gap for settling. They should not be fixed in place until the cabin walls reach eaves height to allow for adjustments.
- Storm Braces: Storm braces are installed on the inside of the gables using M6 Coach Bolts (CB40). The bottom bolt should be left slack to allow the storm brace to move with the cabin's expansion and contraction.
- Adaptability for Partitions: For cabins with internal partitions, floorboards must be fully installed early in the process to accommodate partition base logs.
- Timber Movement Accommodation: The design accounts for natural timber movement, advising against fully securing floorboards initially and leaving gaps around them. Fascia boards can be unscrewed and re-screwed to rectify slight gapping caused by timber expansion/contraction.
Maintenance Features:
- Pre-Assembly Treatment Warning: It is crucial NOT to paint or treat cabin timbers before assembly. They must remain dry to ensure a snug tongue and groove fit.
- Post-Assembly Treatment: To validate the guarantee and ensure product longevity, the building MUST be treated with an appropriate high-quality oil or solvent-based preservative AFTER assembly, both internally and externally, and then annually thereafter.
- Weather Mitigation: During extended periods of warm sunshine, it is suggested that the outdoor building be sprayed with water. During rain or snow, it should be sheltered as much as possible to mitigate the effects of timber swelling or warping.
- Access for Maintenance: When choosing a location for the building, ensure there is access to all sides for future maintenance work and annual treatment.
- Regular Checks: Users are advised to regularly check that the cabin is square both vertically and horizontally and adjust if required, especially before installing roof boards.
- Spirit Level Use: A spirit level should be used frequently during assembly to ensure the floor and walls are level and square, preventing distortion of doors and windows.