EasyManua.ls Logo

Tiger RAYNER - User Manual

Tiger RAYNER
20 pages
Print Icon
To Next Page IconTo Next Page
Loading...
TIGER
RAYNER
LOG CABIN
GENERAL ASSEMBLY
INSTRUCTIONS
TIG/INS24
Question and Answer IconNeed help?

Do you have a question about the Tiger RAYNER and is the answer not in the manual?

Summary

Getting Started

Read Instructions Carefully

Essential preparatory advice before commencing assembly.

Timber Considerations

Guidance on how natural timber reacts to weather conditions and treatment.

Building a Base

Instructions on constructing a suitable, firm, and level base for the cabin.

Types of Base

Outlines various suitable base options for cabin installation.

Safety Cautions

Important warnings regarding adult supervision and wearing safety gloves during assembly.

Pro-Installation Service

Information on arranging professional installation for your cabin.

Tools Required

Lists the necessary tools recommended for cabin assembly.

Fixing Kit Contents

Details all the screws, nails, and bolts provided in the kit.

Unpacking Cabin Components

Instructions on how to safely unpack and prepare cabin parts.

Building Pack Contents

Information on checking all included parts against diagrams and lists.

Assembly Overview and Important Notes

General advice on assembly process and critical pre-build checks.

Assembly Steps

Step 1: Unpack Cabin Components

Detailed instructions for unpacking and organizing cabin parts.

Step 2: Double Door Assembly

Guide for assembling the double door frame and fitting.

Step 3: Lay Down Tanalised Bearers

Instructions for positioning the treated wooden bearers on the prepared base.

Step 4: Begin Building Walls

Steps for starting the cabin construction by laying the first layer of logs.

Step 5: Securing Floor

Process for temporarily securing the floorboards to maintain squareness.

Step 6: Continue Building Walls

Guidance on building cabin walls layer by layer up to three logs high.

Step 7: Install Doors and Windows

Instructions for fitting the doors and windows into the cabin structure.

Step 8: Install Gable Tops

How to attach the gable top pieces to the top of the walls.

Step 9: Install Purlins

Guidance on positioning and securing the roof purlins.

Step 10: Install Roof Boards

Instructions for fitting the tongue and groove roof boards.

Step 11: Install Roof Batten and Skirting

How to attach roof battens and skirting to the underside of the roof.

Step 12: Felt the Roof

Detailed steps for measuring, cutting, and applying the roof felt.

Step 13: Attach Roof Fascia Boards

Instructions for fixing the fascia boards to the roof edges for drainage.

Step 14: Lay Floorboards

How to install the final floorboards, including cutting the last one.

Step 15: Fixing Doors and Windows

Securing the doors and windows by attaching fascia boards.

Step 16: Install Internal Roof Battens

Attaching internal battens to seal the roof and side walls.

Step 17: Fit Internal Skirting

How to measure, cut, and secure internal skirting around the floor.

Step 18: Attach Storm Braces

Instructions for securing storm braces to the gable ends for stability.

Overview

This document provides general assembly instructions for the Tiger Rayner Log Cabin. It covers various aspects from preparation and tools to the step-by-step construction of the cabin, including walls, roof, doors, windows, and internal fittings.

Function Description:

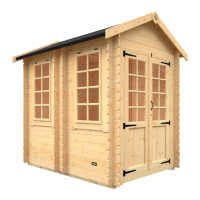
The Tiger Rayner Log Cabin is a garden building designed for outdoor use, offering a versatile space that can serve various purposes such as a garden office, workshop, storage shed, or recreational area. The assembly instructions guide users through the process of constructing the log cabin from its individual components, ensuring a sturdy and functional structure. The design emphasizes interlocking log construction, which contributes to the cabin's stability and traditional aesthetic.

Important Technical Specifications:

  • Timber Material: Natural timber, susceptible to swelling during heavy rain and warping during dry spells due to moisture loss.
  • Base Requirements: Must be a firm and level base, built on firm ground to prevent distortion. The constructed base should be at least the size of the tanalised floor bearers and at least 25mm above the surrounding ground level to avoid flooding.
  • Recommended Base Types: Durable plastic grid, concrete (75mm laid on 75mm hard-core), slabs (laid on 50mm sharp sand), or a self-constructed/pre-made timber base.
  • Log Interlocking: Each log interlocks in a staggered pattern, with some logs featuring additional full notches and half notches for precise fitting.
  • Door Frame Assembly: Double door frames are assembled using four components, secured with 1x S60 screw per corner. Holes for framing are pre-drilled.
  • Tanalised Bearers: Positioned equally at approximately 400mm centres. For larger cabins, tanalised bearers may be supplied in more than one piece.
  • Log Fixing: Logs are screwed into tanalised bearers using 3x S80 screws per log (1x S80 in the centre, 1x S80 per end notch).
  • Floorboard Installation: Floorboards should have an approximate 2.5mm gap between their edge and the inside of external walls to allow for expansion and contraction. They are nailed to tanalised bearers with 2x BA40 nails per floorboard per bearer.
  • Roof Board Installation: Roof boards are fixed through apex purlins, additional purlins, and side top logs using 2x N65 nails per board per fixing point.
  • Roof Felt Installation: Felt is rolled out with a 75mm overhang at each end. It is secured to the roof using CN20 nails at both ends and approximately 100mm intervals along the skirting and top side. Overlapping felt by 75mm is required for full coverage.
  • Fascia Boards (Bargeboards): Attached using 4x N40 nails per fascia board, through the top purlin and bottom roof batten. Finials are secured with 2x N40 nails. No bargeboards are supplied for the low side of the roof to ensure effective water drainage.
  • Internal Roof Battens: Fixed to the top side logs using 4x S40 screws, evenly spaced along the batten.
  • Internal Skirting: Secured using 3x S40 screws evenly spaced along the length, not fixed to the floorboards.
  • Storm Braces: Fixed to the inside of gables with 2x CB40 bolts. The bottom CB40 bolt should be left slack to allow for cabin expansion and contraction.

Usage Features:

  • DIY Assembly: Designed for self-assembly with clear, step-by-step instructions.
  • Two-Person Assembly: Recommended to be erected by two competent adults for safety and ease of construction.
  • Pre-Drilled Holes: Door framing holes are pre-drilled in the factory to simplify assembly.
  • Settling Gaps: Doors and windows are positioned centrally within their openings, leaving a gap on either side to allow for timber settling.
  • Expansion and Contraction Allowance: Floorboards are installed with a gap to accommodate natural timber movement. Storm braces are designed to allow for cabin expansion and contraction.
  • Maintenance Access: It is crucial to ensure access to all sides of the building for maintenance work and annual treatment.
  • Professional Installation Option: A Pro-Installation service is available for customers who prefer professional assembly.

Maintenance Features:

  • Timber Treatment: It is ESSENTIAL to treat the building with an appropriate high-quality oil or solvent-based preservative AFTER assembly, both internally and externally, and then annually thereafter. This validates the guarantee and ensures product longevity.
  • Pre-Assembly Treatment Warning: Do not paint or treat cabin timbers before assembly, as they must stay dry for a snug tongue and groove fit.
  • Weather Mitigation: During extended periods of warm sunshine, spraying the outdoor building with water can mitigate warping. Sheltering the building as much as possible during rain or snow is also recommended.
  • Regular Checks: Periodically check the cabin's squareness and levelness, especially if doors and windows appear twisted or out of square, indicating potential base issues.
  • Fascia Board Adjustment: Minor gapping in the log cabin due to timber expansion and contraction can be rectified by unscrewing and re-screwing fascia boards over time.

Tiger RAYNER Specifications

General IconGeneral
BrandTiger
ModelRAYNER
CategoryGarden Houses
LanguageEnglish

Related product manuals