Final installation: Taking the above in consideration, use the adhesive tape or the screws to attach
the wall mount to the wall. Now, attach the detector to the wall mount, and change the detecting
angle and distance by adjusting the installation height and the bracket. It is advised to install the
device at a height of approximately 2 meters.
Test
1. After the installation, turn the switch to ON. Now, walk or move in front of the PIR sensor at a
distance between 3 and 6 meters.
2. The Indicator light should light up once. Note the 5 seconds delay between 2 signals. The delay is
normal and intentional to save battery power.
3. If needed, adjust the detector angle to get the desired detection range.
When the detector indicator flashes
• LED flashes once: A signal is detected, and the detector sends a signal to the alarm unit.
• LED continuously on: Low-voltage indication, please change the battery as soon as possible.
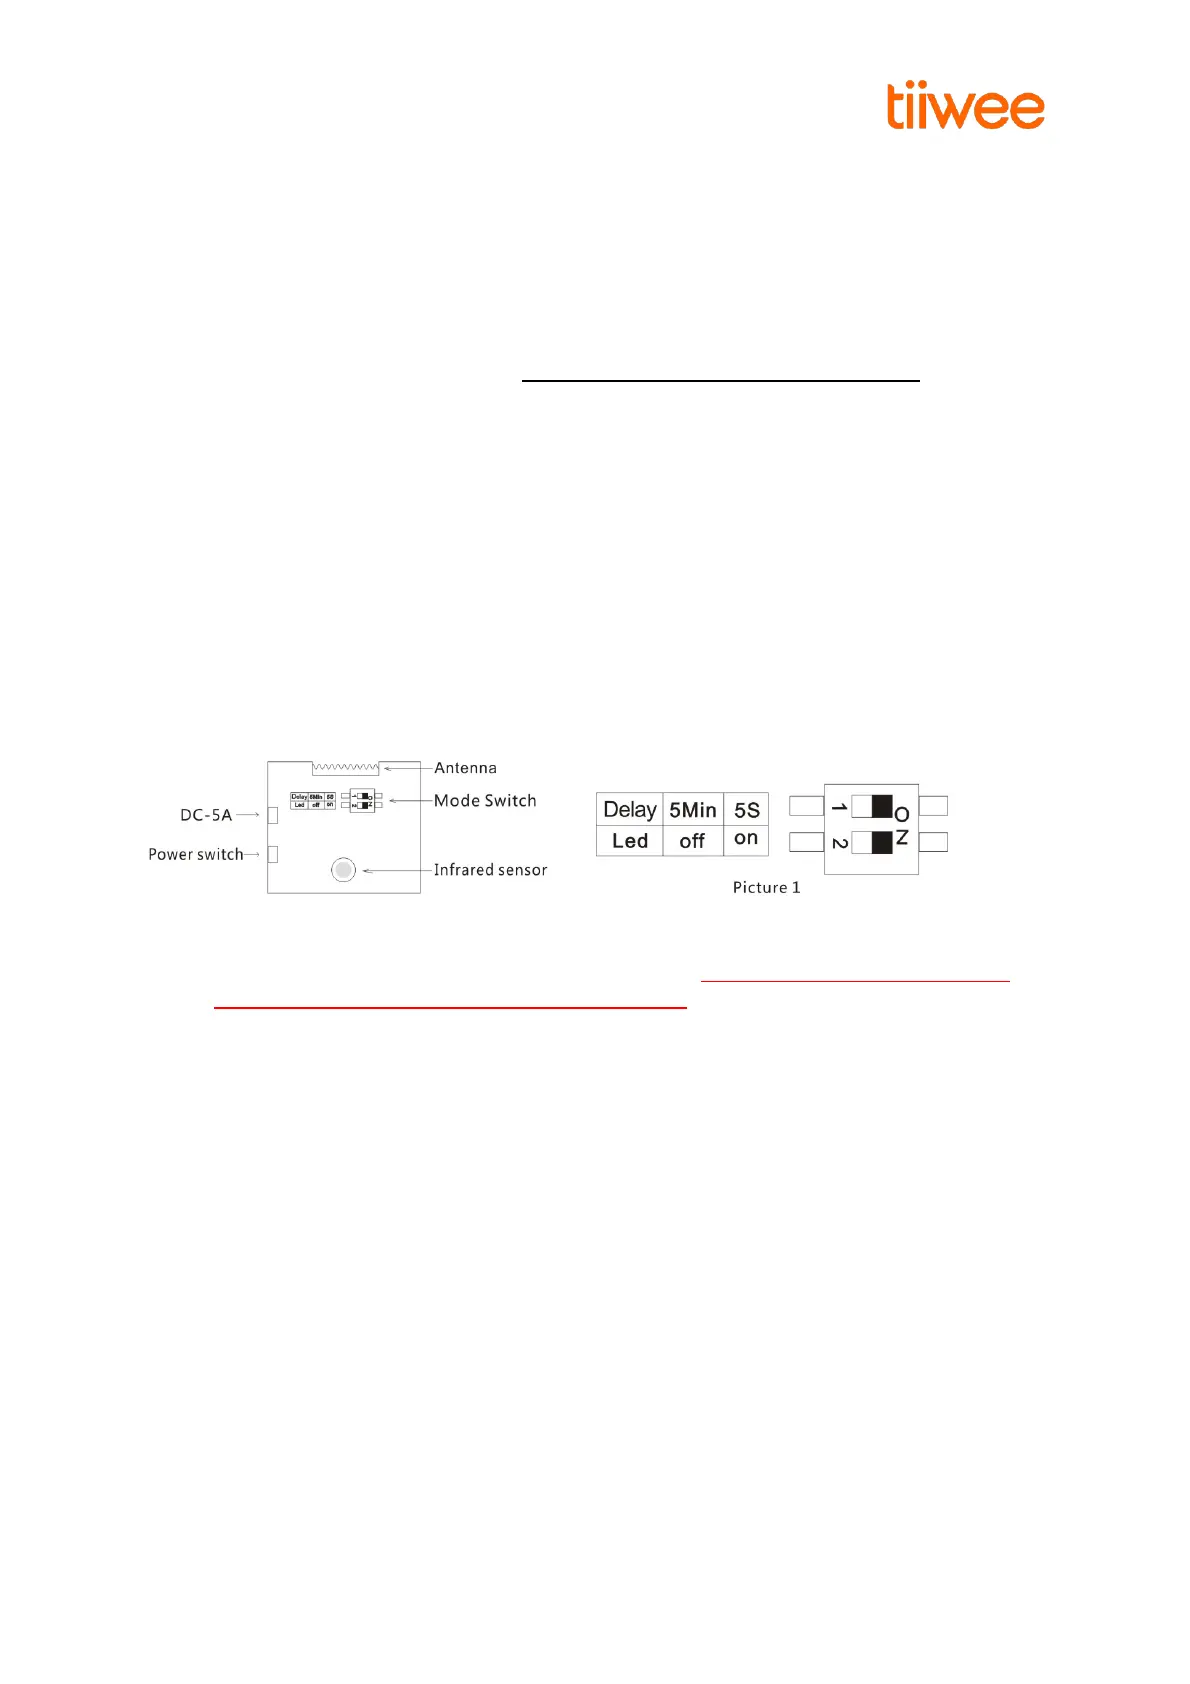
Advanced features
The Tiiwee PIR sensor is equipped with some additional features to allow you to adjust the device to
your specific needs. To access these functions, remove the screw at the top of the sensor. Then
separate the two parts (front and back piece) by using an appropriate tool (screwdriver, i.e.). Now
you see the circuit board with the two switches.
1. The Indicator light can be switched off to save battery power (“Led off” position). In this
mode, an alarm signal will still be sent to the X1-siren. IMPORTANT: Please note that the
low battery indication is switched off in this setting.
2. A waiting time of 5 minutes between detections can be set to save battery power (“5 Min” or
“5s” switch). Use the 5-minute waiting period when your PIR sensor is set to result in a loud
siren alarm. We do not advise to use this mode in combination with the doorbell-sound
setting on your Alarm unit.
Changing Factory Settings
The factory settings are “5s” and “Led On”. The sensor will respect a 5-seconds waiting time between
2 signals and that the LED indicator light will always flash if a movement is detected. These are the
most commonly used settings.
1. If both switches are set to the ON position, as shown in picture 1, the LED will flash each time a
movement is detected. After each signal, a waiting time of 5 seconds allows a person to pass the
detector without triggering a signal continuously.
2. If the top switch is set to “Off”, the detector will respect a 5-minute delay before it will become
active again. This is a power saving mode. A doorbell-sound sound setting on the Alarm unit is not
advised with this delay.
3. If the lower switch is set to “Off”, the Led light will not flash when a signal is detected. This setting
 Loading...