6
OPERATION
Battery Charging
• The battery is partially charged and will
run for a short time.
• The battery is located on the back of
the vacuum. It can be charged while
installed on the vacuum, or the battery
can be removed from the vacuum and
charged independently (see Removing
and Reinstalling the Battery, page 10).
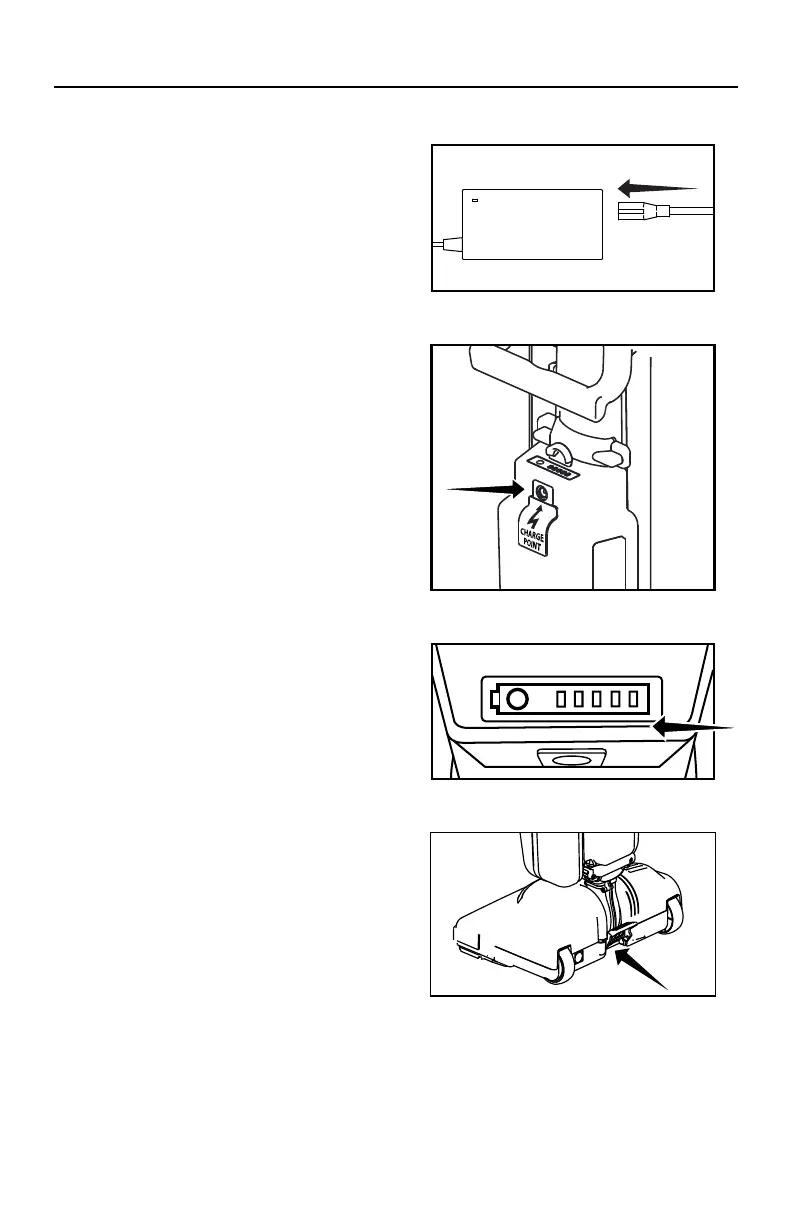
• Plug the AC cable into the charger and
into a wall socket (Fig. 1).
• Plug the charger DC cable into the
Charge Point on the battery. (Fig. 2).
• The charger LED light will be red during
charging and will turn green when the
battery pack is fully charged.
Battery Life Display
• Press the button on the battery to
illuminate the LED lights.
• When the battery is fully charged there
will be four (4) green lights and one (1)
red light showing (Fig. 3).
• As the battery is discharged during use,
the number of green lights showing will
reduce from four (4) to none (0).
• When all of the green lights are off and
only the red light is showing there is a
small amount of time remaining before
the battery will be fully discharged and
will require recharging.
Reclining the Handle
• Press the Handle Release Pedal located
on the back of the vacuum with your
foot to recline the handle (Fig. 4).
Fig. 2
Fig. 1
Fig. 4
This vacuum is intended for household use only.
MATERIAL
DRAWN
ISSUED
SCALE
FINISH
DATE
DATE
DO NOT SCALE
UNLESS OTHERWISE SPECIFIED
DESCRIPTION
DRAWING SIZE:C
PART NUMBER
SHEET 3 OF 8
TACONY CORPORATION CLAIMS PROPRIETARY
RIGHTS IN THE MATERIAL DISCLOSED HERE IN.
THIS DRAWING IS ISSUED FOR ENGINEERING
INFORMATION ONLY. IT MAY NOT BE REPRO-
DUCED, NOR MAY THE INFORMATION HERE IN
BE USED FOR MANUFACTURING PURPOSES
WITHOUT WRITTEN PERMISSION FROM TACONY
CORPORATION.
0.250
TACONY CORPORATION
1760 Gilsinn Lane, Fenton, MO 63026
DESCRIPTION OF CHANGE
REV
PART NUMBER
SHEET
3 OF 8
X.X .5 mm RADII X.X .5mm
X.XX .25mm X.XX .25mm
X.XXX .12mm MACHINE SURFACE
X.XXXX .012mm BREAK SHARP CORNERS TO .25mm MAX
0 30" COMMON TO BE CONCETRIC TO .05mm
BYECN NODATEREV
Fig. 3
 Loading...