EasyManuals Logo

TomTom Runner 3 User Manual

TomTom Runner 3
77 pages
To Next Page IconTo Next Page
To Previous Page IconTo Previous Page
Page #66 background imageLoading...
Page #66 background image
66
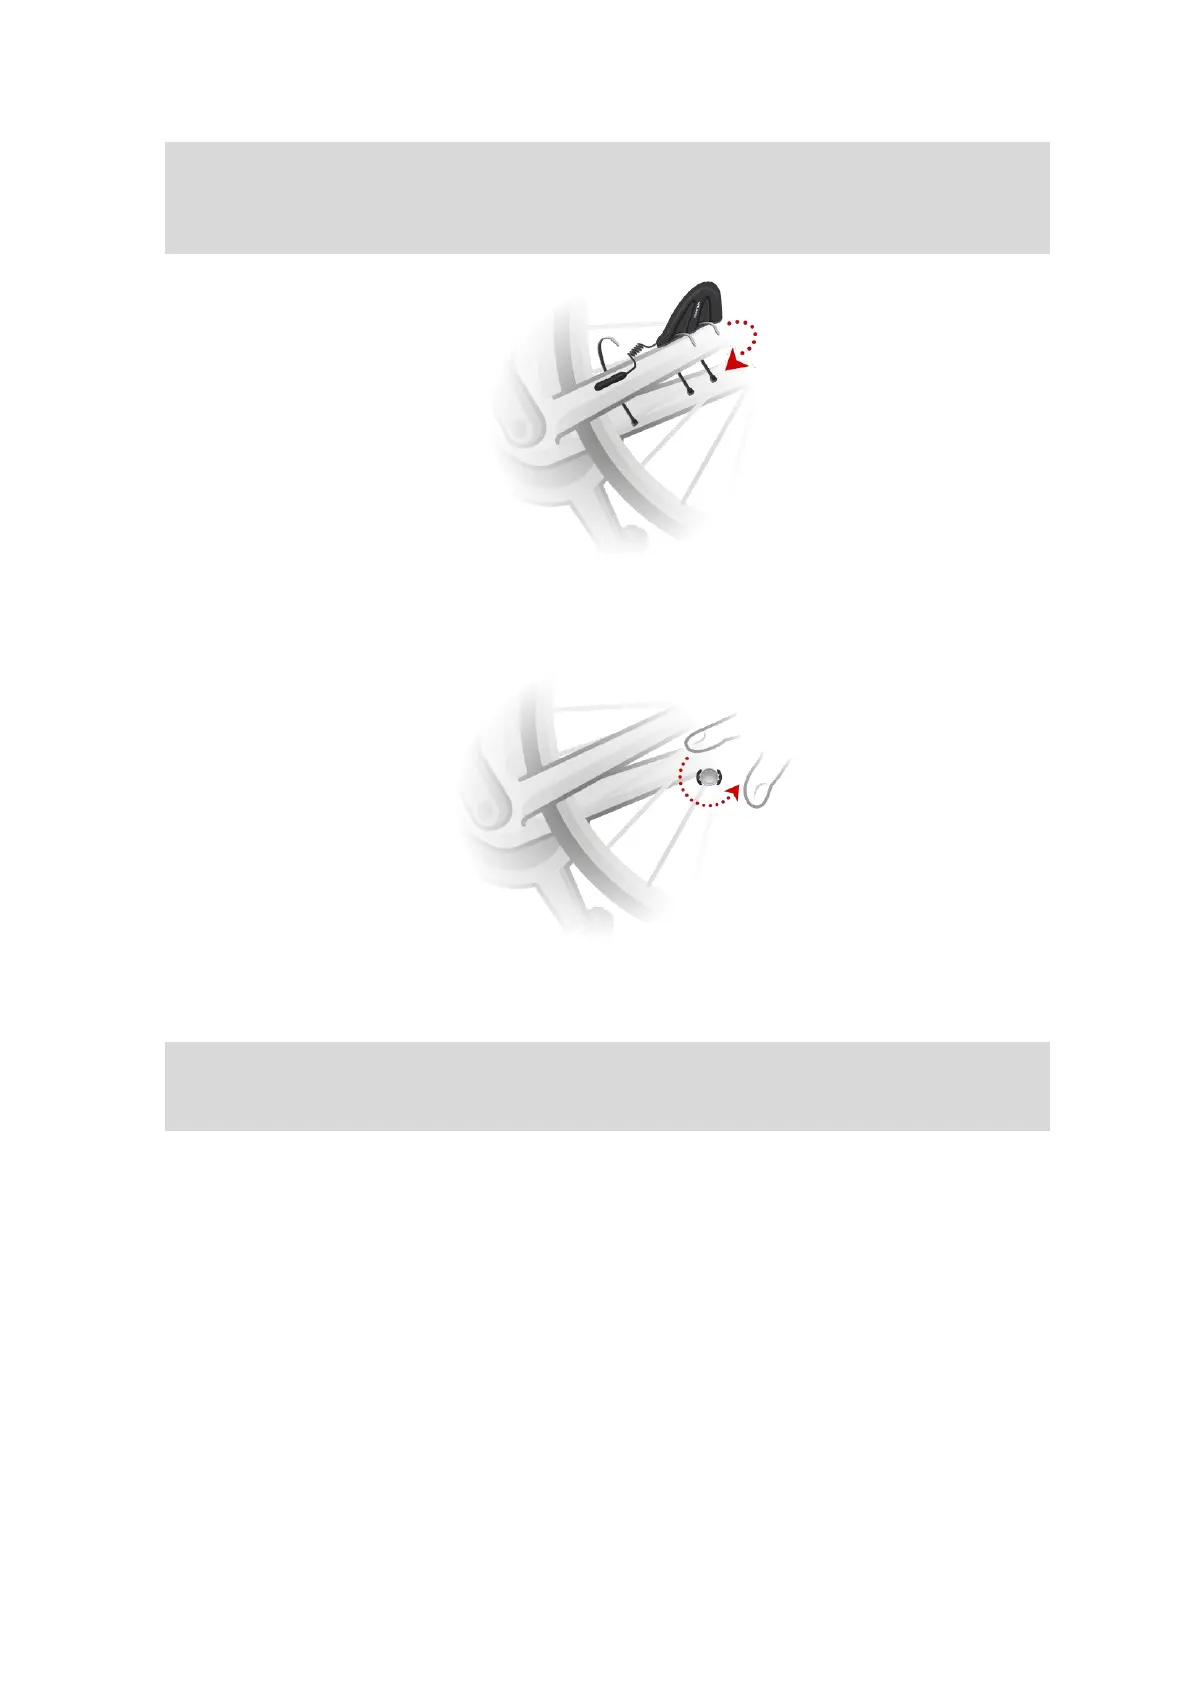
Important: The smaller part of the sensor needs to face the crankarms and should not be
attached to the top of the chainstay. You may have to tilt the main body of the sensor towards
the wheel depending on your bike. You should make this adjustment after you have attached
the spoke magnet.
2. Attach the spoke magnet to one of the spokes on your bike. The magnet should face the
chainstay where you attached the chainstay sensor.
3. Adjust the position of the spoke magnet and the chainstay sensor so that when the wheel turns,
the spoke magnet passes the tip of the main body of the chainstay sensor.
Important: The distance between the chainstay sensor and the spoke magnet should not be
more than 2 mm when they pass each other. On some bikes, you may have to tilt the main
body of the sensor towards the wheel.

Table of Contents

Questions and Answers:

Question and Answer IconNeed help?

Do you have a question about the TomTom Runner 3 and is the answer not in the manual?

TomTom Runner 3 Specifications

General IconGeneral
Band sizeL
Product colorBlack, Green
Water resistance5 ATM
Waterproof up to40 m
Market positioningSport watch
Protection featuresWater resistant
Vibrating alertYes
Recommended activityCycling, Running, Swimming
Languages supportMulti
Battery life (max)3 week(s)
Battery life (GPS mode)11 h
Display resolution144 x 168 pixels
Weight and Dimensions IconWeight and Dimensions
Weight49 g
Thickness11.5 mm

Related product manuals