29
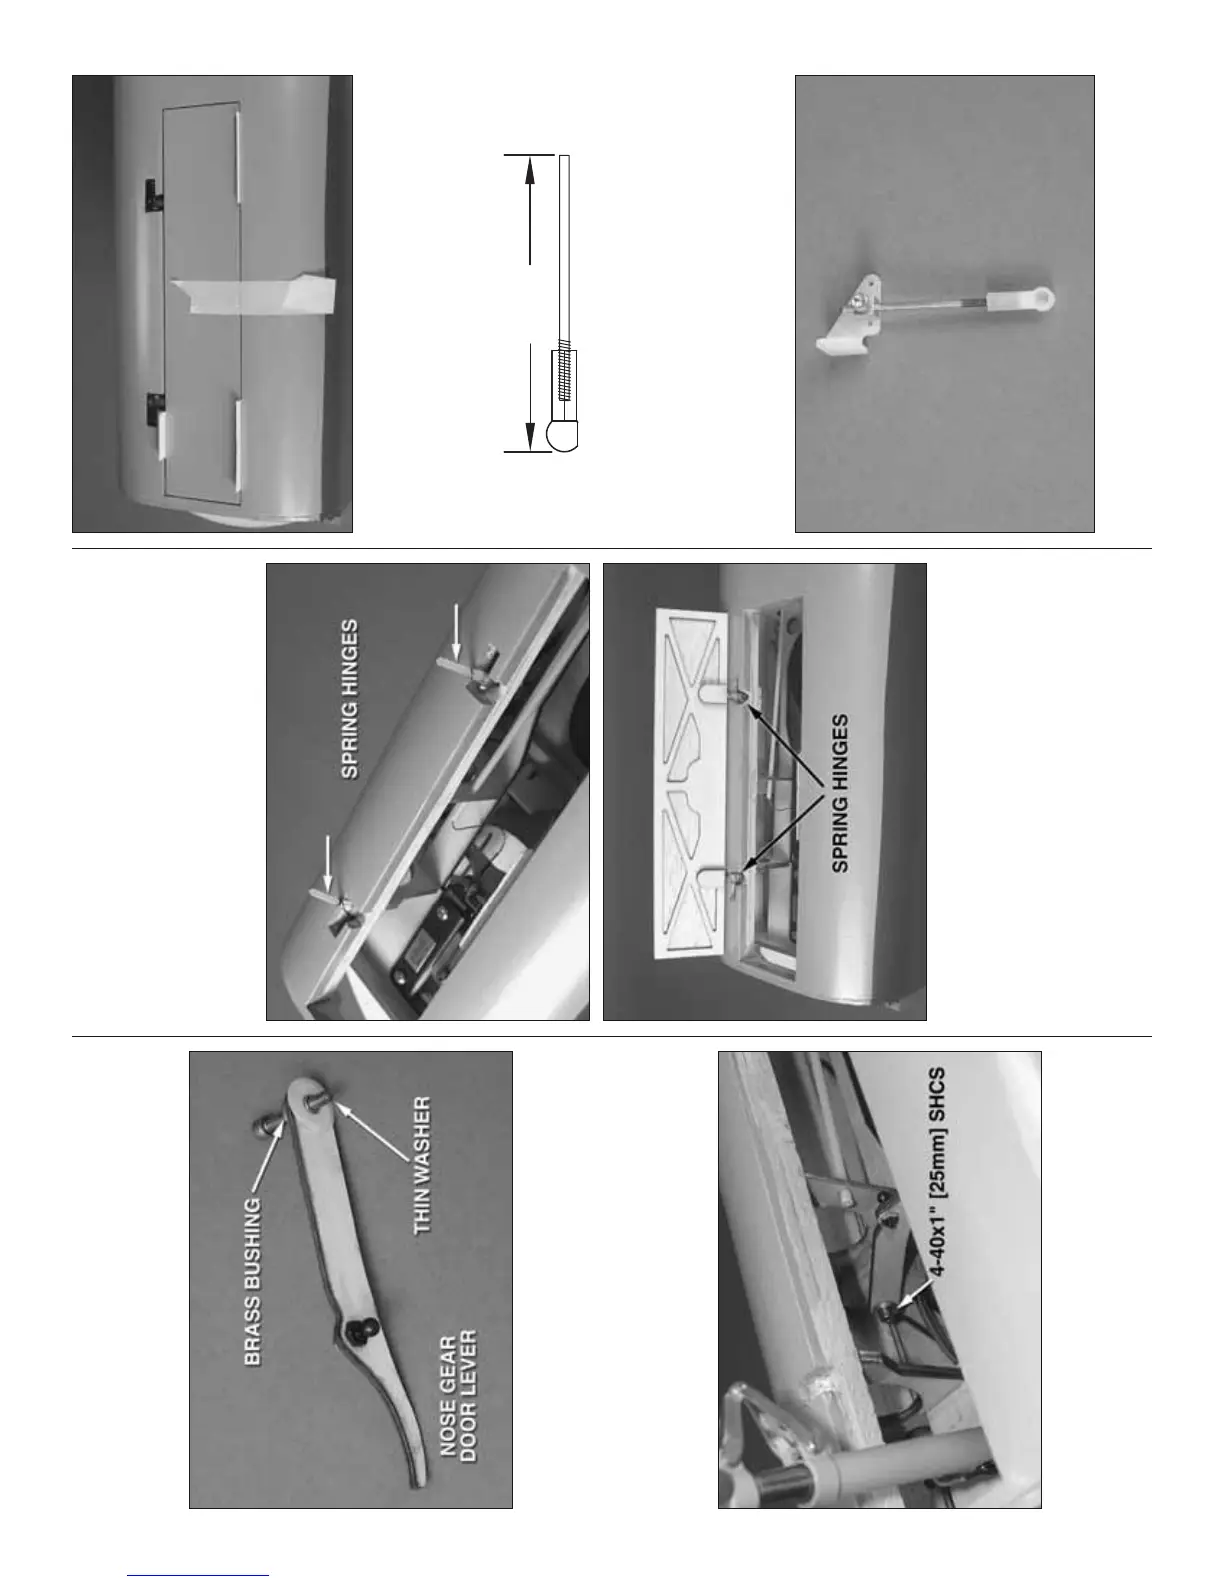
HOOK UP THE NOSE GEAR DOOR
(FOR RETRACTS ONLY)
Use this photo for the next three steps.
❏ 1. Same as was done for the levers on the main
landing gear doors, glue one of the thin, plastic
5mm x 12mm washers to the back surface of the
plywood nose gear door lever.
❏ 2. Mount a 2-56 ball link ball on the back of the
lever with a 2-56 nut and a drop of threadlocker.
❏ 3. Fit a brass bushing into the front of the lever
with a 4-40 x 1" [25mm] SHCS. Add a few drops of
threadlocker to the threads on the end of the screw.
Then, mount the lever to the wood block on the front of
former 2 inside the fuselage—there are access holes
through the front two formers that you can guide your
3/32" ball end wrench through and there is a 4-40
blind nut in the back of the former. Tighten the screw
as much as possible without binding the lever.
❏ 4. Test fi t the nose gear door to the fuselage with the
special spring hinges. Note: The hinges are installed
to spring the door open, not closed. Holding the door
closed, adjust the hinges so the door is centered in
the opening.
❏ 5. Remove the door hinges. Paint the hinge recesses
with black or gray paint.
❏ 6. Glue the hinges in the doors and in the fuselage
with 30-minute epoxy. Use masking tape and thin
cardstock to hold the door closed and centered until
the epoxy has hardened.
2-1/8"
[55mm]
NOSE GEAR DOOR PUSHROD
❏ 7. Cut 1/2" [13mm] from the threaded end of a
4" [100mm] pushrod. Thread the pushrod about half-
way into a nylon ball link. Cut the overall length from
the end of the ball link to the end of the pushrod to
2-1/8" [55mm].
❏ 8. Sand the base of a small nylon control horn
so glue will adhere. Connect a screw-lock pushrod