31
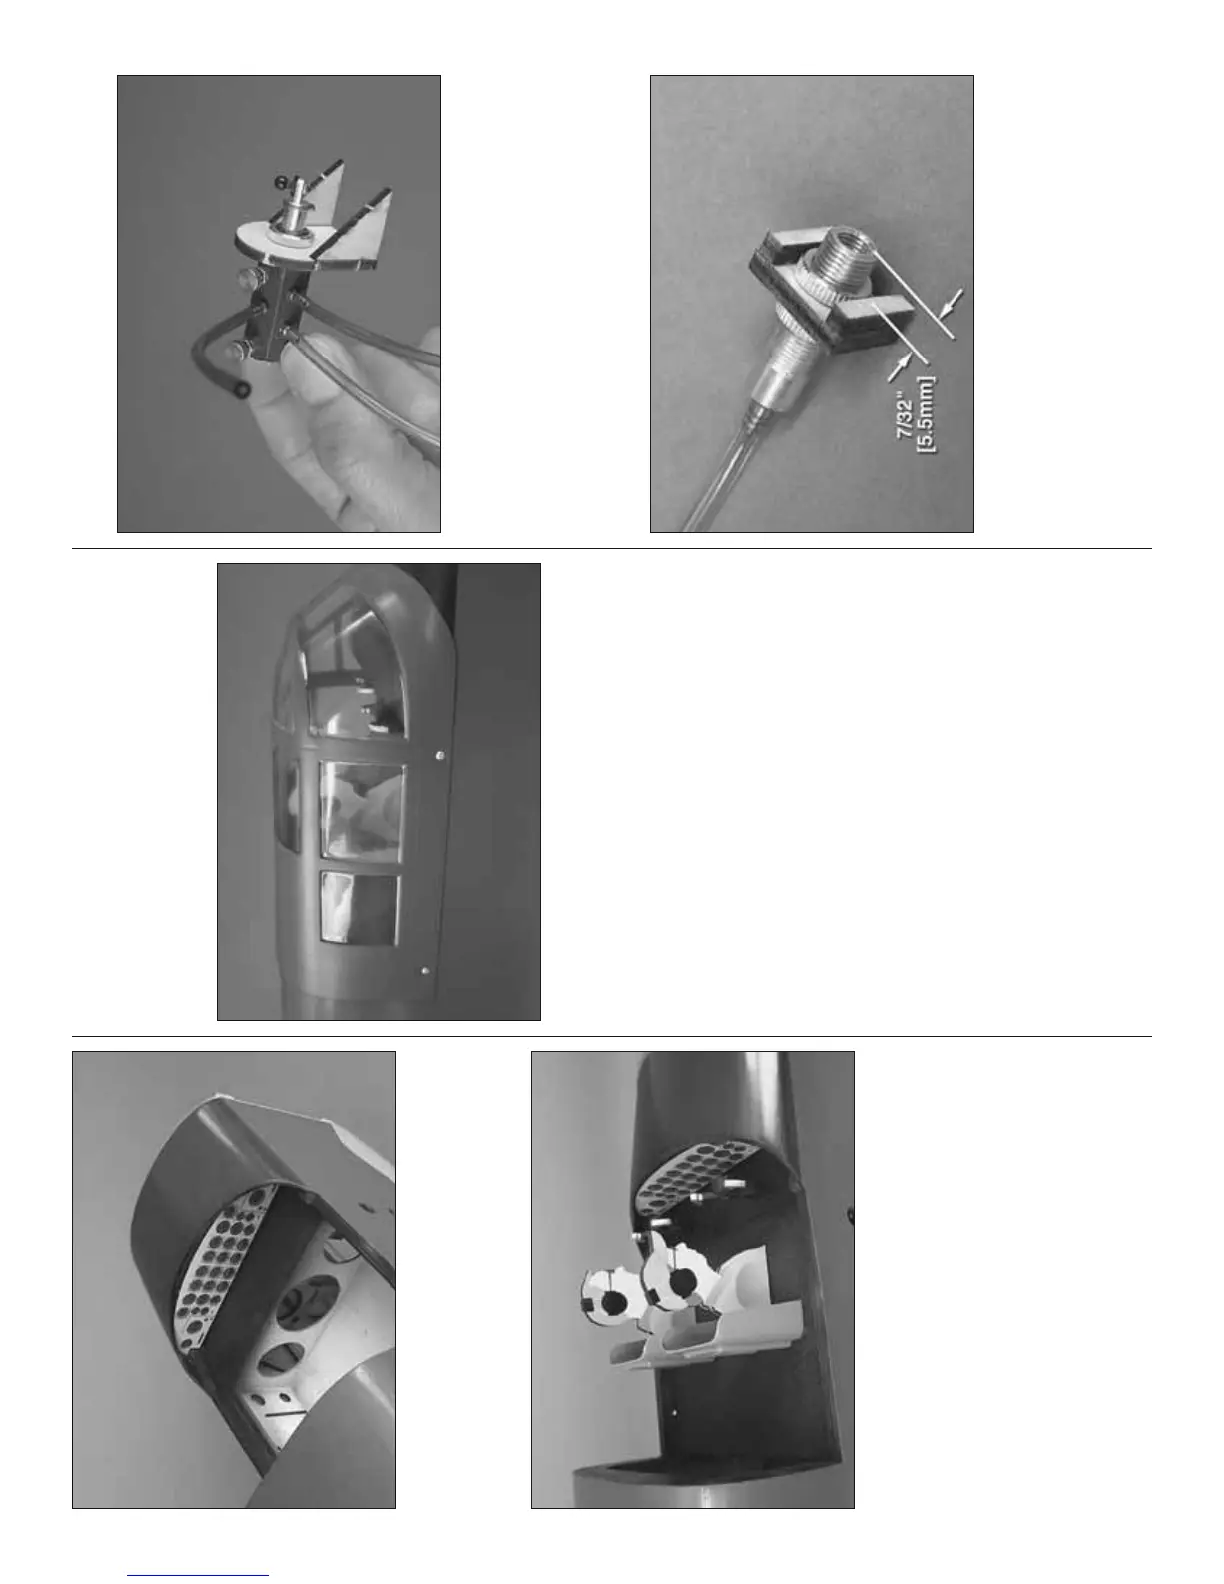
❏ 7. Use a few dabs of RTV silicone rubber to glue
the completed instrument panel into the cockpit.
Refer to this photo for the next four steps.
❏ 8. Paint the edges of the three pilot fi gures with
plastic-compatible fl at black paint. While the paint is
drying, carefully cut the pilot fi gures from the decal
sheet. After the paint has dried, attach the decals to
both sides of each fi gure.
❏ 9. Set the tail-gunner fi gure aside until fi nishing the
tail-gunner cockpit later. Glue the pilot and co-pilot
fi gures to the cockpit fl oor.
❏ 10. Trim the bases of the cockpit seats as necessary.
Glue the seats to the cockpit fl oor.
❏ 11. Trim the back of both control yokes to fi t the
yoke posts. Glue the control yokes to the posts. Paint
any additional scale details preferred inside the
cockpit. Then, cut the yoke posts to the correct height
and glue them into position.
❏ 12. Position the cockpit canopy over the cockpit.
Drill two 1/16" [1/6mm] holes through each side of
the canopy into the fuselage where shown. Remove
the canopy, enlarge the holes in the canopy only
with a 3/32" [2.4mm] drill, and then mount the canopy
to the fuselage with four #2 x 3/8" button-head
Allen screws.
HOOK UP THE AIR SYSTEM
❏ 1. Mount the air control valve to the plywood air
control valve mount as shown and glue on the
plywood triangular supports. Connect about 4"
[100mm] each of “up,” “down” and “fi ll” line to the valve
and mount a 0-80 ball link ball to the valve with a 0-80
nut and a drop of threadlocker.
❏ 2. Mount the air fi ller valve to the plywood fi ll valve
mount pieces. The valve should protrude from the
front of the mount 7/32" [5.5mm] so it will be fl ush
with the outside of the fuselage. Connect about one
inch [25mm] of air line to the fi ll valve and connect
one of the “T” fi ttings that came with the air system
to the line.