23
2
Turn the unit on and allow auto-leveling to complete. Con
-
firm that the grade is set to 00.000%.
3
Put the laser sensor in fine detection mode by pressing
the mode switch.(See page 35.)
4
Position the sensor so that it “finds” the rotating laser
beam and signals “on-grade” by displaying a horizontal
bar and emitting a continuous beep.
5
Mark the “on-grade” position and turn off the instrument.
6
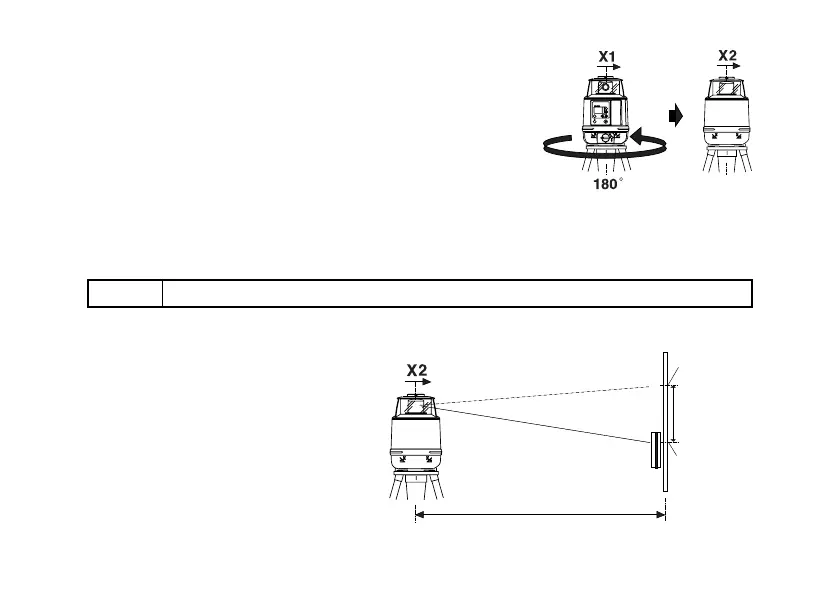
Loosen the tripod screw, rotate the instrument 180 degrees and re-secure it on the tripod.
7
Turn the unit on again and allow
auto-leveling to complete. Confirm
the grade is set to 00.000%.
8
Position the sensor so that it “finds”
the rotating laser beam and signals
“on-grade”.
9
Mark the on-grade position (X2).
10
Measure the distance between the
first mark (X1) and your second
Note
• When rotating the instrument, avoid knocking it off level or changing height.
X
rpm
100
MANU
×
POWER
%
ON
ENT
X1 laser beam
X2 laser beam
If less than
5mm( 0.2
inches)
No calibration
Necessary
50m (160feet)
1st
On-Grade
Position (X1)
2nd
On-Grade
Position (X2)


 To Next Page