IT
INSTALLATION
3
3.1
GENERAL RECOMMENDATIONS
The automation must be installed exclusively by competent, qualified technical personnel in possession of the
technical requisites foreseen by the legislation in force in the country of installation.
& Do not install the automation on the external wall of the building, subject to atmospheric agents (rain, snow, etc.).
& Do not use the automation in environments with a potentially explosive atmosphere.
& The zones in which there may be a danger of crushing, shearing, conveyance or other risks are signaled and
protected by means of special electronic safety devices, safety stops or barriers. These devices must be installed
depending on the environment and type of use and operating logic of the product.
& The forces developed by the complete system during operation must respect the regulations in force in the country of
installation; if this is not possible, protect and signal by means of electronic safety devices the zones affected by those
forces.
& Before installing the automation, verify that the structure to be automated is stable, sturdy and able to withstand the
weight of the automation and, if necessary, take steps to ensure that it is. Topp srl is not liable for failure to comply with the
rules of good workmanship in the construction of the door panels to motorize, or for any distortions that may develop with
use of the device.
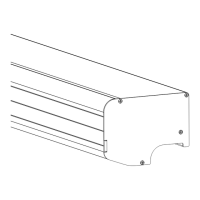
(Model with two panels) To install the crossbar, proceed as follows:
% Mark the surface where the automation will be fastened at the center of the opening VL that is also the center of the
crossbar;
% Decide the position of fastening the crossbar supporting brackets, referring to the measurements shown in Fig.8;
@ If the floor is not perfectly flat, decide the position of the supporting brackets referring to the highest point of the floor.
% Fasten the crossbar supporting brackets to the wall using self-drilling/sell-tapping screws type d5.5 or d6,3;
% Remove the cover on the casing;
% Install the crossbar and make sure it is aligned;
% Fasten the crossbar to the wall with 3 self-tapping screws type d6.3 for every meter of crossbar and paying careful
attention not to damage the gliding base of the carriages with the drill spindle. In case of damage it will be necessary to
replace the entire crossbar;
% After fastening the crossbar clean the glide zone soiled by drilling residues.
3.2
INSTALLING THE CROSSBAR
((Model with 1 panel) To install the crossbar, proceed as follows:
% Mark the surface where the automation will be fastened at the center of the crossbar that corresponds:
Ÿ to the line of the wall end on the left of the doorway for application of 1 door panel with the opening toward the left;
Ÿ to the line of the wall end on the left of the doorway for application of 1 door panel with the opening toward the right;
% Decide the position of fastening the crossbar supporting brackets, referring to the measurements shown in Fig.8;
@ If the floor is not perfectly flat, decide the position of the supporting brackets referring to the highest point of the floor.
% Remove the cover on the casing;
% Fasten the crossbar supporting brackets to the wall using self-drilling/sell-tapping screws type d5.5 or d6,3.
% Install the crossbar and make sure it is aligned;
% Fasten the crossbar to the wall with 3 self-tapping screws type d6.3 for every meter of crossbar and paying careful
attention not to damage the gliding base of the carriages with the drill spindle. In case of damage it will be necessary to
replace the entire crossbar.
% After fastening the crossbar clean the glide zone soiled by drilling residues.
11
INSTRUCTIONS FOR INSTALLATION AND USE
EN
K140