0
If the brushes are disassembled manually,
proceed as follows:
1. Lift the brush base by stepping on the pedal
(13).
2. Turn the key counter-clockwise.
3. Take off the electric supply to the brush
motor by unplugging the battery connector (1).
4. With the brush base lifted, rotate the brush
until it is released from the brush holder plate as
indicated in the figure. The figures show the
direction the brushes must be rotated.
(BD 22/14 and BD 26/14)
ATTENTION:
During the operation of AUTOMATIC
disassembly, make sure that there are no
persons or objects near the brushes.
Carrying out MANUAL brush disassembly
operations with the electric supply on may
cause injuries.
ATTENTION:
The handling of the brush operation must be
carried out using suitable gloves to protect
hands from both contact with the bristles and
the chemical risk of with dangerous
solutions.
SQUEEGEE CLEANING
Keeping the squeegee clean produces the best
drying action.
For cleaning it is necessary to:
1. Take off the squeegee hose (3) from the
coupling.
2. Disassemble the squeegee from the support
by rotating the lever (2)) counter-clockwise,
sliding the stud bolts (1) in their slots.
3. Clean the internal part of the squeegee inlet
eliminating dirt residuals.
4. Clean the squeegee rubbers.
5. Reassemble all parts.
WEEKLY MAINTENANCE
REAR SQUEEGEE RUBBER
REPLACEMENT
Regularly check the squeegee rubber wear.
For replacement, it is necessary to:
1. Lift the squeegee by pulling the lever (12).
2. Release the hook (1) of the rubber holder
blade and take the rubber off.
3. Turn the rubber to a new side or replace it.
To reassemble the squeegee repeat in reverse
the mentioned above. Inserting the rubber on
the guides (2) and blocking it with the rubber
holder blade.
SQUEEGEE HOSE CLEANING
In case of a weak suction, check that the
squeegee hose is not obstructed. To clean it,
proceed as follows:
1. Take off the hose from the squeegee
coupling (1) and release the guide spring of the
squeegee hose (2).
2. Wash the inside of the hose with a water jet,
from the squeegee hose side.
3. To reassemble the hose repeat the
instructions mentioned above in reverse.
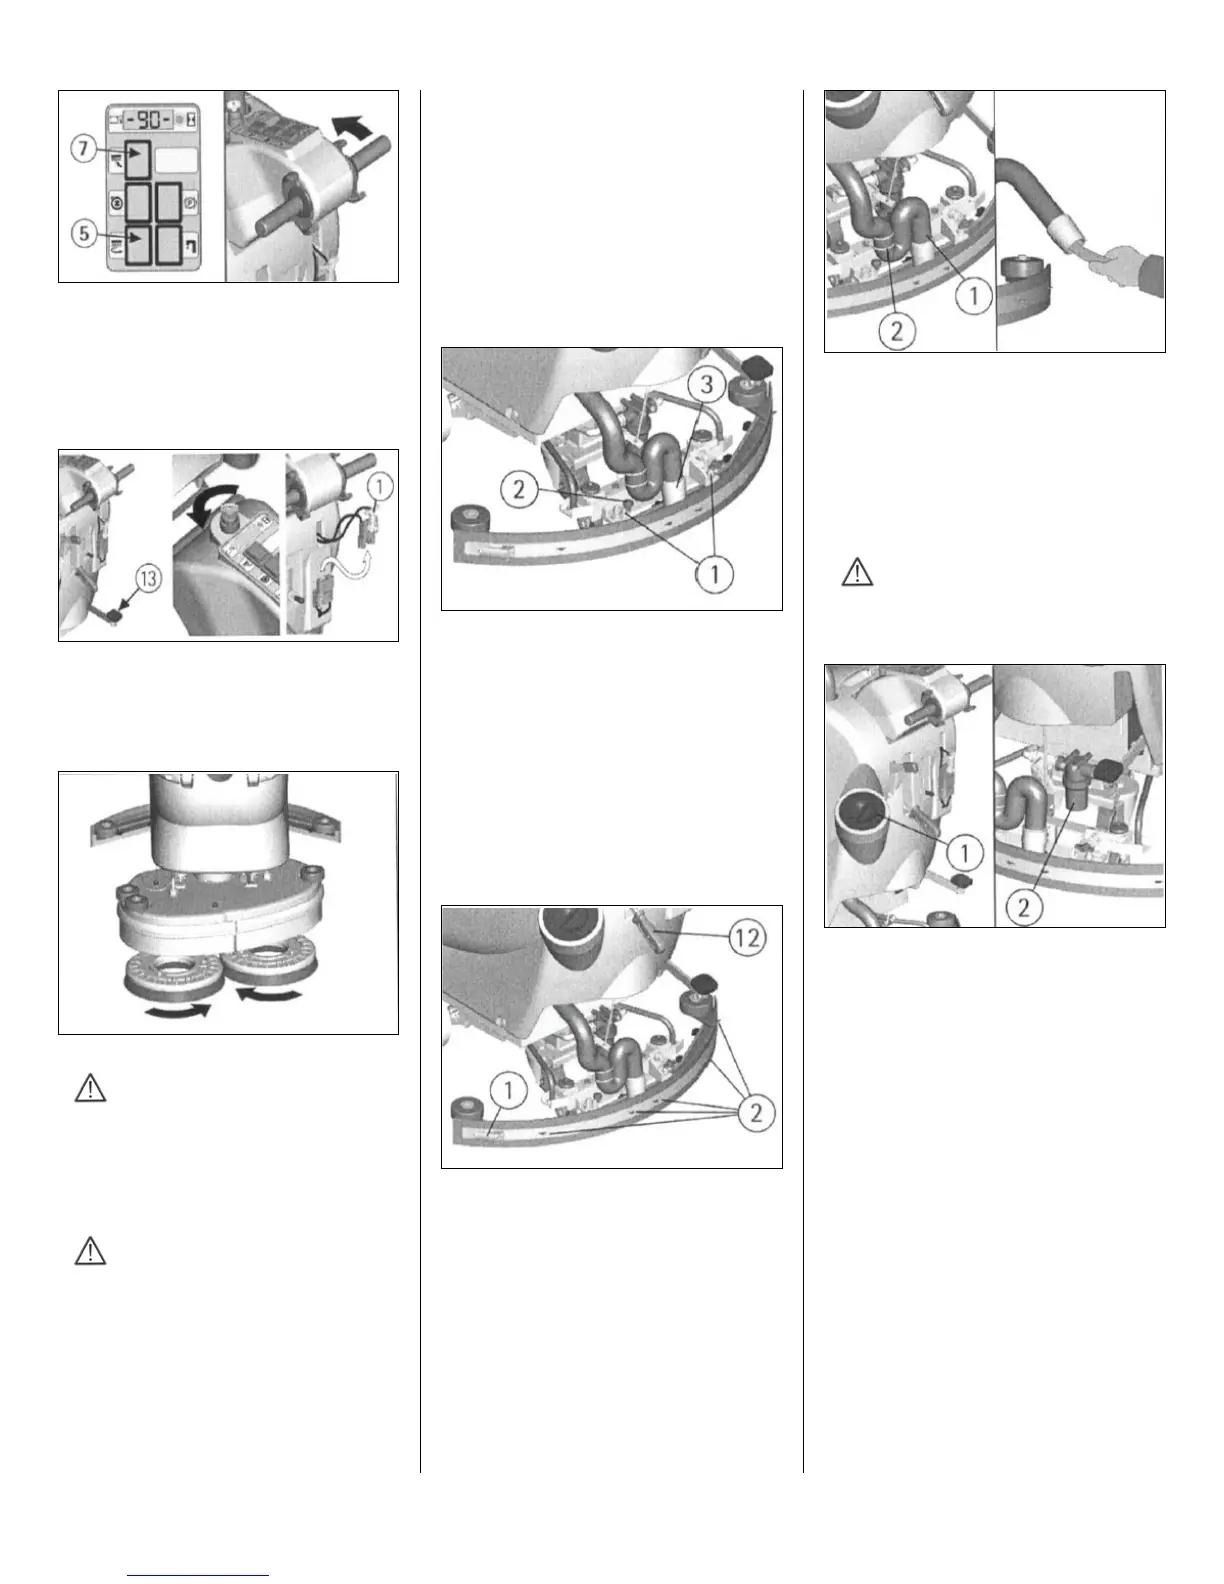
CLEANING SOLUTION TANK AND FILTER
1. Bring the machine to an appropriate place for
draining tanks.
2. Unscrew the solution tank cap (1).
3. Unscrew the exhaust plug (2).
4. Rinse with a water jet the solution tank.
5. Rinse the solution tank filter placed inside the
exhaust plug (2).
6. Reassemble all parts.
ATTENTION:
This operation must be carried out using gloves
to protect from contact with dangerous
solutions.
TWO-MONTHLY MAINTENANCE
FRONT SQUEEGEE RUBBER
REPLACEMENT
Check the wear of the squeegee rubber.
For replacement, see below:
1. Take off the squeegee hose (3).
2. Disassemble the squeegee from the support by
rotating the levers (2) counter-clockwise and by
sliding the stud bolts (1) in their slots.
3. Unscrew the wing nuts (4) in the front part of
the squeegee.
4. Take off the rubber holder blade.
5. Replace the front rubber.
6. Reassemble all parts.
 Loading...