.
ADJUSTMENT OF THE BRUSH
PRESSURE
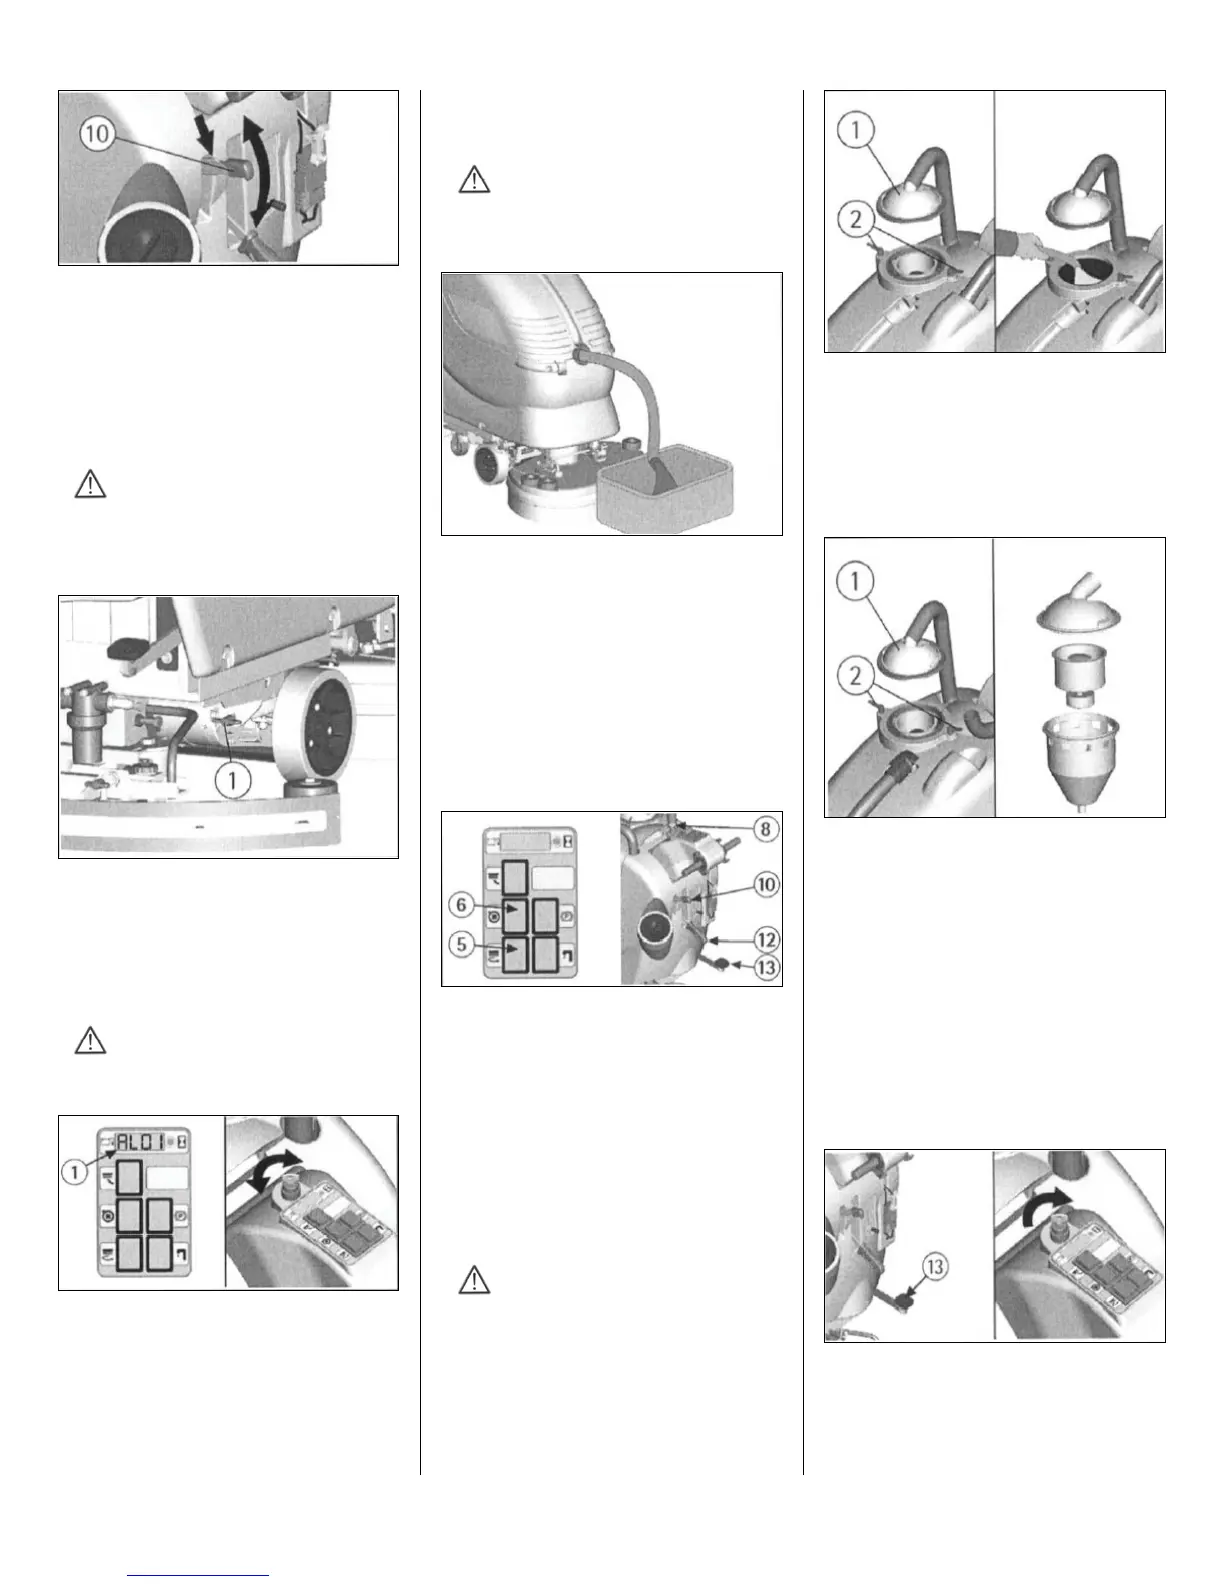
Through the register (1) you may adjust the
brush pressure on the cleaned surface.
By turning the wing nut clockwise the pressure
increases, rotating the wing nut counter-
clockwise, the pressure decreases.
This device allows a more efficient cleaning
action especially on difficult and dirty surfaces.
ATTENTION:
In order not to overload the brush motor, it
is convenient to reduce the brush pressure
going from smooth floors to rough ones (ex.
concrete).
BRUSH MOTOR OVERLOAD
PROTECTION DEVICE
The presence of a protective device indicating
the overload is activated on the display showing
the malfunction with ”AL01”. Check the
pressure regulation as indicated in the previous
paragraph and adjust the brush pressure.
ATTENTION:
To restore the functioning of the brush
motor, turn off the machine restart it.
OVERFLOW DEVICE
In order to avoid serious damages to the vacuum
motor, the machine is equipped with a float that
intervenes when the recovery tank is full,
closing the suction hose and stopping the
suction.
When this happens, empty the recovery tank:
1. Hold the exhaust hose placed in the front
part of the machine.
2. Take off the exhaust plug by pulling its
lever. Empty the recovery tank into appropriate
containers, according to the standard norms.
ATTENTION:
This operation must be carried out using
gloves to protect contact from dangerous
solutions.
STOPPING THE MACHINE AFTER
CLEANING OPERATION
Before executing any type of maintenance:
1. Turn the brush motor switch off (5).
2. Turn the vacuum motor switch off (6).
3. Lift the brush base by pressing the pedal
(13).
4. Lift the squeegee using the lever (12).
5. Bring the machine to an appropriate place
for draining tanks.
6. Turn the key (8) counter-clockwise.
7. Put on the parking brake (10).
DAILY MAINTENANCE
RECOVERY TANK CLEANING
1. Hold the exhaust hose placed in the front
part of the machine.
2. Take off the exhaust plug using its lever and
empty the recovery tank into appropriate
containers.
3. Take off suction cover (1) after rotating the
blocking levers (2).
4. Take off the filter and filter protection.
5. Rinse the tank with water jet.
ATTENTION:
This operation must be carried out using
gloves to protect contact from dangerous
solutions.
SUCTION FILTER CLEANING
1. Take off suction cover (1) after rotating the
blocking levers (2).
2. Take off the filter and filter protection.
3. Clean all parts with water jet especially inside
surfaces and filter bottom.
4. Carry out cleaning operations carefully.
5. Reassemble all parts.
BRUSH CLEANING
Disassemble the brushes and clean them with a
water jet (check “BRUSH DISASSEMBLY”
paragraph”).
BRUSH DISASSEMBLY
The machine is equipped with an automatic device
for the brush disassembly.
1. Lift the brush base by stepping on the pedal
(13).
2. Turn the key clockwise.
3. Press the switch of the brush motor (5).
4. Keep the brush release button (7) pressed, on
the drive control.
The brush will rotate for a few seconds and drop to
the floor.
 Loading...