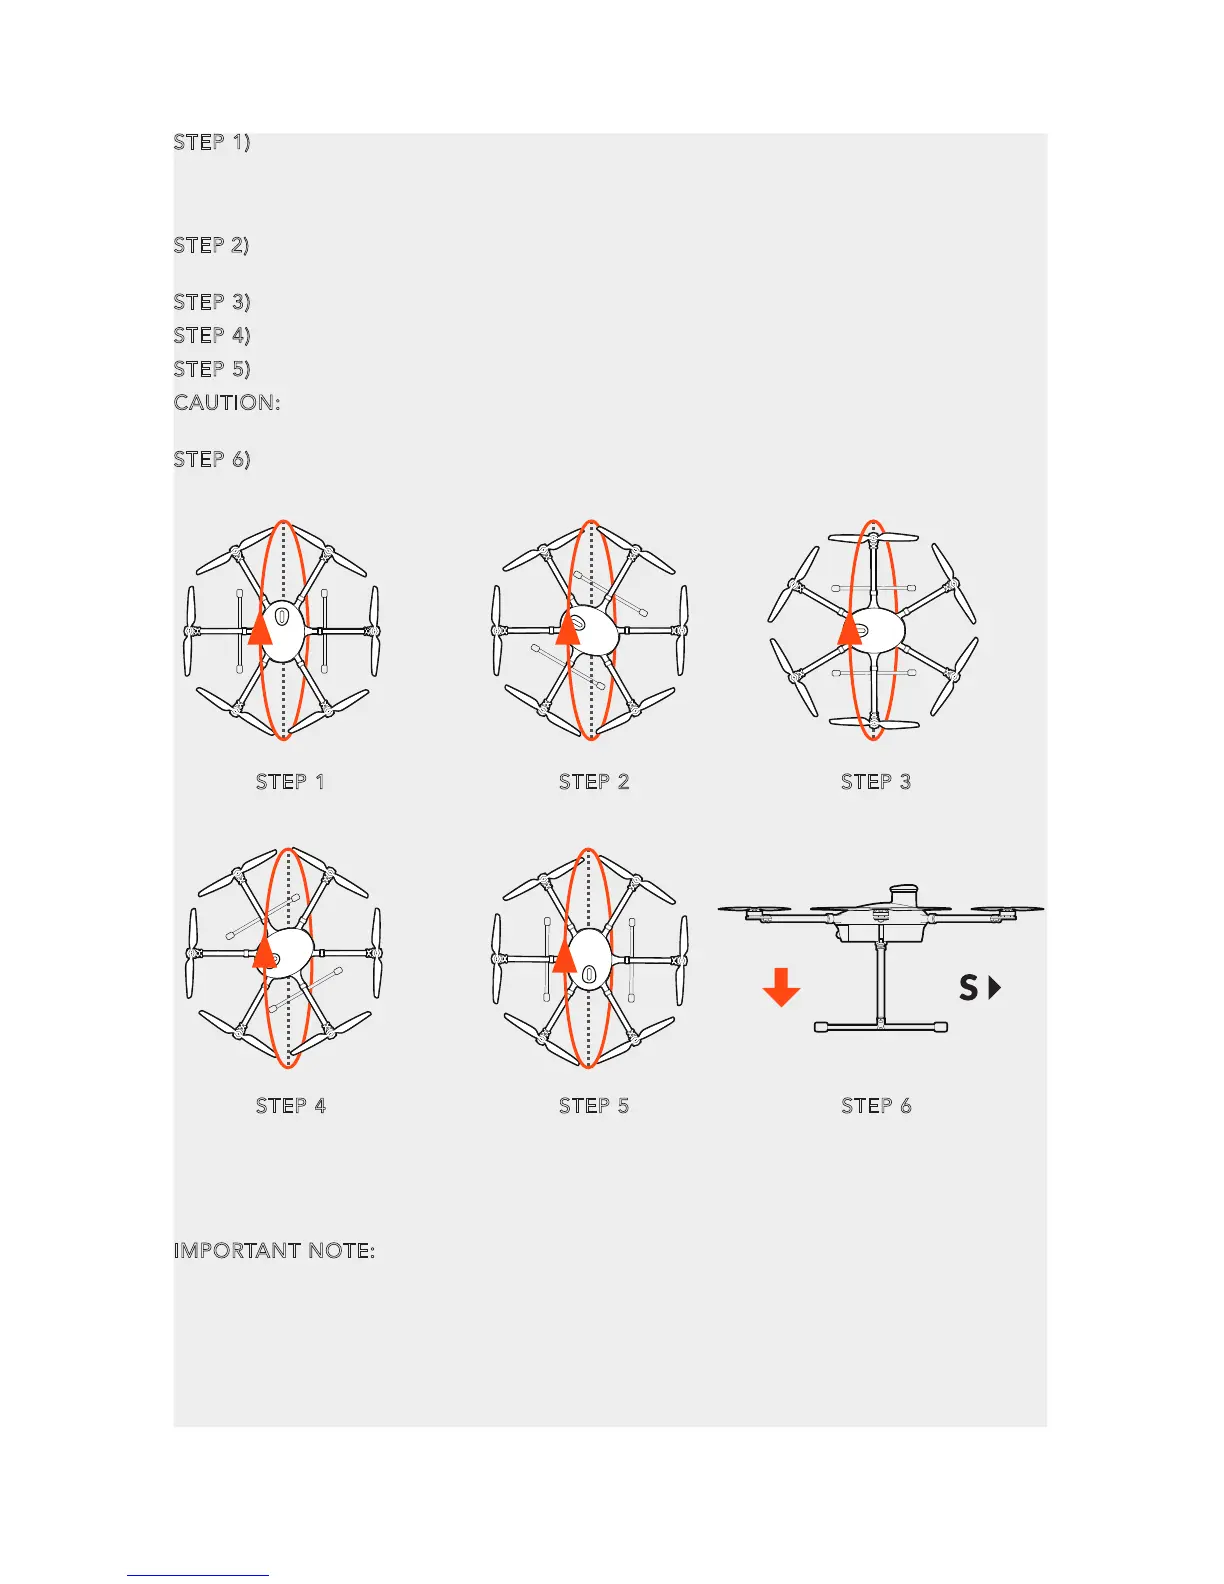
STEP 1) Lift the H920 airframe straight & level, then point the nose towards the north
and hold it in this position for 4 seconds. The LED status indicators will automatically
start to flash red/green/blue quickly. Slowly turn the H920 forward and around 360
degrees (pitch axis) until it is flat again.
STEP 2) Turn the H920 45° to the left and then turn it forward 360° again until it is lying
flat in your hands again.
STEP 3) Turn the H920 45° to the left and then turn it forward 360° again until it is lying flat.
STEP 4) Turn the H920 45° to the left and then turn it forward 360° again until it is lying flat.
STEP 5) Turn the H920 45° to the left and then turn it forward 360° again until it is lying flat.
CAUTION: Steps 1 to 5 should be completed within a time span of 30 seconds in order
to achieve successful calibration.
STEP 6) Place the H920 on the ground and wait a few seconds.
If the calibration has been successful, the flight controller restarts, you will recognize
this when you hear the acknowledgement tone, the same one you hear when you
switch the system on.
IMPORTANT NOTE:
If calibration has failed, you must switch off the aircraft manually
by repeating the calibration process. If the calibration should continue to fail, either
the site of calibration is unsuitable or the compass is defective. Refer to your Yuneec
service center.
STEP 1 STEP 2 STEP 3
STEP 4 STEP 5 STEP 6
22