STEP 5) Push the camera forward into Camera Frame.
NOTICE: Make sure the Camera Battery and SD card
have been installed!
STEP 6) Rotate the upper and lower Camera
Fastening Screws to secure postion as illustrated.
NOTICE: If the camera has WiFi connectivity with a
mobile device, you may mount the mobile device to
the special mount located at the front of the
ProAction™ to use it as a view finder. For detailed
operations, please refer to your camera
manufacturer's instruction manual. Skip this
procedure if your camera or phone doesn't have this
function. It requires securing the fastening screws of
camera lens if the GB603 is with a SONY a7 lens
mount frame
32
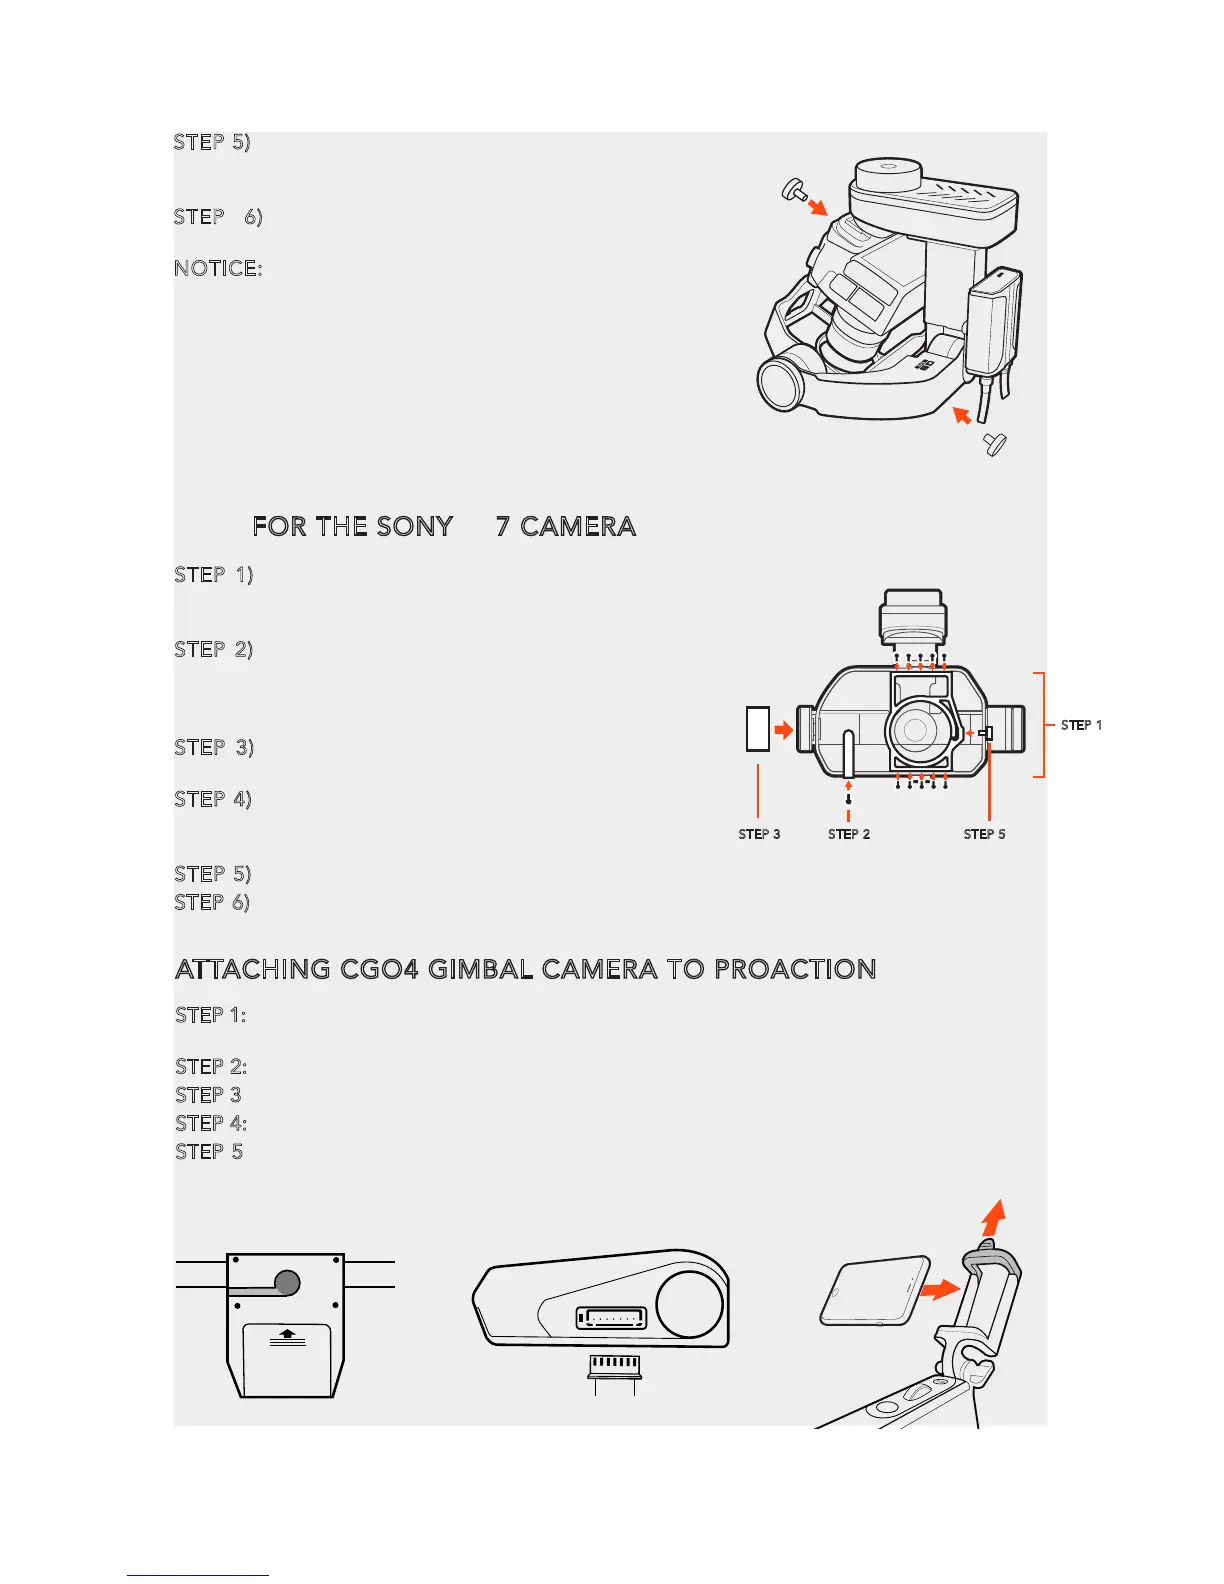
FOR THE SONY® α7 CAMERA
STEP 1) Replace the GH4 camera lens mount frame
with SONY® α7 lens mount frame, and secure the 10
screws on the top and bottom of the frame to fix the frame.
STEP 2) Install the infrared ray mount device to the
left side of the SONY® α7 lens mount frame, secure
the screw on the bottom of the device, and connect
the white connector to the IR port.
STEP 3) Mount the SONY® α7 CG balancer on the
GB603 as illustrated.
STEP 4) Install the SONY® α7 camera on the camera
mount, there is no need to connect shutter cable for
SONY® α7.
STEP 5) Push the camera forward into Camera Frame.
STEP 6) Rotate the Camera Fastening Screw to secure
position as illustrated.
STEP 1
STEP 2 STEP 5STEP 3
ATTACHING CGO4 GIMBAL CAMERA TO PROACTION
STEP 1: Securely attach CGO4 gimbal camera to ProAction™ with Gimbal Thumb Screws, then
withdraw the Gimbal Cord from the left side.
STEP 2: Insert the Gimbal Cord into the center carrying handle socket.
STEP 3: Install the ProAction™ Battery and engage the connector properly.
STEP 4: Download the CGO4 app from Google play or App store.
STEP 5: Erect the phone holder and install the mobile phone into it, and then you can make
Wi-Fi connection between CGO4 and mobile device by joining the CGO4 network in your phone’s
Wi-Fi setting.