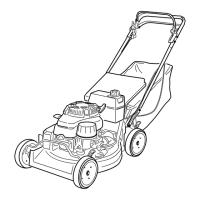
Scraping Method
If w ashing does not remo v e all debris from under
the mo w er , scrape it clean.
1. Disconnect the wire from the spark plug
( Figure 11 ).
2. Drain the fuel from the fuel tank. R efer to
Emptying the Fuel T ank and Cleaning the Fuel
Filter .
Tipping the mo w er may cause the fuel to
leak fr om the carbur etor or the fuel tank.
Gasoline is extr emel y flamma ble, highl y
explosi v e, and, under cer tain conditions,
can cause per sonal injur y or pr oper ty
dama ge.
A v oid fuel spills by r unning the engine
dr y or by r emo ving the gasoline with a
hand pump; nev er siphon.
3. Tip the mo w er onto its right side .
4. R emo v e the dir t and g rass clippings with a
hardw ood scraper . A v oid bur rs and shar p
edg es .
5. R etur n the mo w er to its operating position.
6. Fill the fuel tank.
7. Connect the wire to the spark plug .
Cleaning the Blade Brake
Clutch Shield
Clean inside the blade brak e clutc h shield when
y ou c hang e the engine oil or when y ou shar pen
the blade , because y ou need to remo v e the blade
in order to remo v e the shield.
1. Stop the engine and w ait for all mo ving par ts
to stop .
2. Disconnect the wire from the spark plug
( Figure 11 ).
3. Drain the g asoline from the fuel tank; refer
to Emptying the Fuel T ank and Cleaning the
Fuel Filter .
4. Tip the mo w er on its right side .
Tipping the mo w er may cause the fuel to
leak fr om the carbur etor or the fuel tank.
Gasoline is extr emel y flamma ble, highl y
explosi v e, and, under cer tain conditions,
can cause per sonal injur y or pr oper ty
dama ge.
A v oid fuel spills by emptying the fuel
tank as dir ected; nev er siphon.
5. R emo v e 2 blade n uts , the anti-scalp cup , and
the blade ( Figure 28 ).
6. R emo v e the 4 screws that hold the shield in
place ( Figure 33 )..
Figure 33
1. Screws (4)
2. Blade brake clutch shield
7. R emo v e the shield and br ush or blo w all the
debris from under the shield and around the
blade brak e clutc h system.
8. Install the shield using the 4 screws that y ou
previously remo v ed.
9. Install the blade , the anti-scalp cup , and the 2
blade n uts .
10. R etur n the mo w er to its operating position.
11. Connect the wire to the spark plug .
25

 Loading...