18
1. Set the parking brake and start the engine :refer to
Starting and Stopping the Engine, page 16
2. Squeeze the blade control bail against upper control
bar. The blades should not rotate.
3. Then continue holding the blade control bail and pull
up on the blade control switch and release. The clutch
should engage and the mower blades begin rotating.
4. Release the blade control bail. The blades should stop
rotating.
5. With the engine running, pull up the blade control
switch (PTO) and release without holding the blade
control bail. The blades should not rotate.
Driving Forward or Backward
The throttle control regulates the engine speed as
measured in rpm (revolutions per minute). Place the
throttle control in the “FAST” position for best
performance.
Forward
1. To go forward, move the shift lever to a forward gear.
2. Release the parking brake: refer to Releasing the
Parking Brake, page 16.
3. Slowly press on the upper control bar to move forward
(Fig. 16).
To go straight, apply equal pressure to both ends of the
upper control bar (Fig. 16).
To turn, release pressure on the upper control bar side
away from the direction you want to turn (Fig. 16).
2
1
m–5190
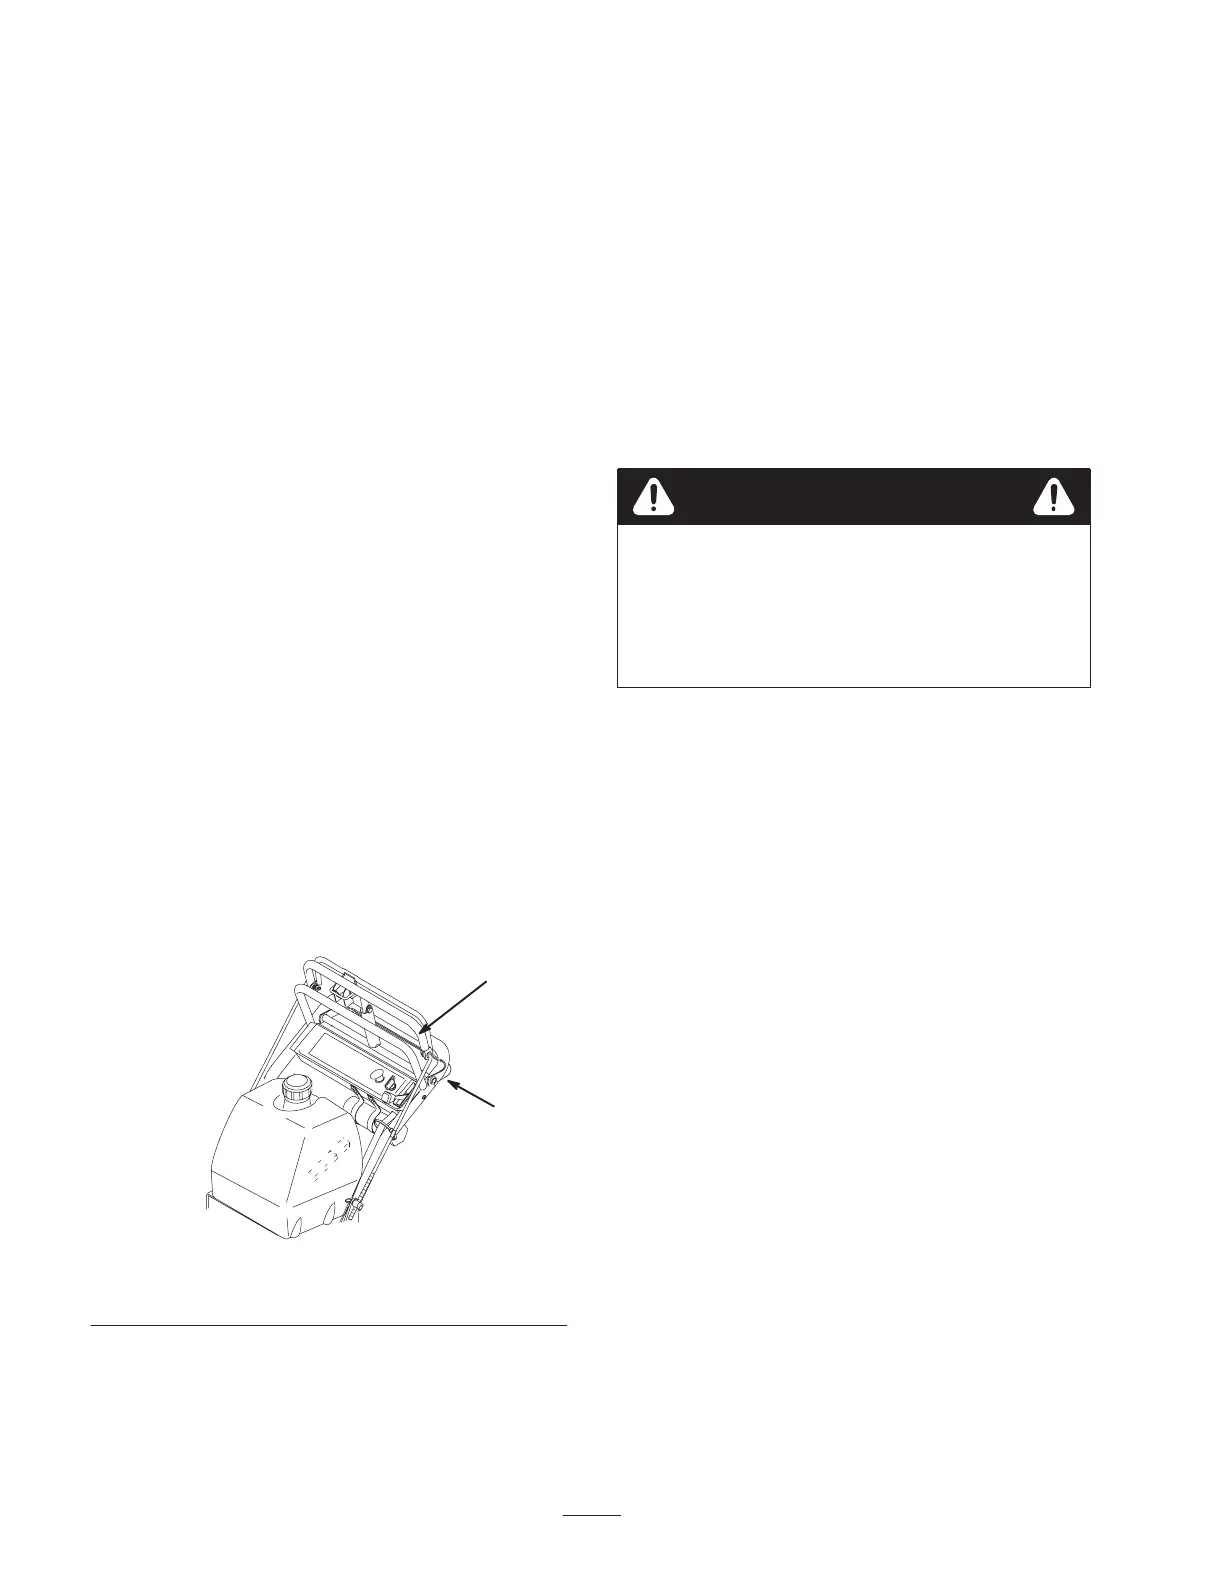
Figure 16
1. Upper control bar 2. Lower control bar
Backward
1. To go backward, move the shift lever to reverse gear.
2. Release the parking brake: refer to Releasing the
Parking Brake, page 16.
3. Slowly squeeze the lower control bar and handle
together to move rearward (Fig. 16).
Lower Control Bar Operation
This procedure is for driving up a curb. This can be
performed while driving forward or backward.
1. Disengage the mower blades.
A blade can be bent or damaged when driving up
a curb. Pieces of blade that may be thrown could
seriously injure or kill you or bystanders.
• Do not run blades while driving up a curb
forward or backward.
Warning
2. Select first gear or reverse to drive machine.
3. Drive machine until drive wheels contact curb
(Fig. 18).
Note: Both drive wheels should contact the curb and
caster wheels straight.
4. At the same time engage lower control bar and lift up
on handle (Fig. 17 and 18).
Note: Lifting up on handle will assist driving the machine
up a curb and not spin the drive wheels.