27
5. Install a new filter and move the hose clamps close to
the filter.
6. Open fuel shut-off valve at fuel tank (Fig. 32).
7. Check for fuel leaks and repair if needed (Fig. 32).
3
2
1
m–5234
3
1
Figure 33
1. Hose clamp
2. Fuel line
3. Filter
Replacing the Drive Belt
Service Interval/Specification
Check all belts after every 50 operating hours or monthly,
whichever occurs first. Look for dirt, wear, cracks and
signs of overheating.
1. Remove top capscrew securing idler support and idler
bracket to rear frame (Fig. 34).
2. Loosen bottom two mounting screws enough to allow
belt to pass between drive pulley and idler support
(Fig. 34).
3. Raise wheel off ground enough to allow belt removal.
2
m–1722
1
4
3
Figure 34
1. Top capscrew
2. Idler bracket
3. Idler support
4. Bottom capscrew
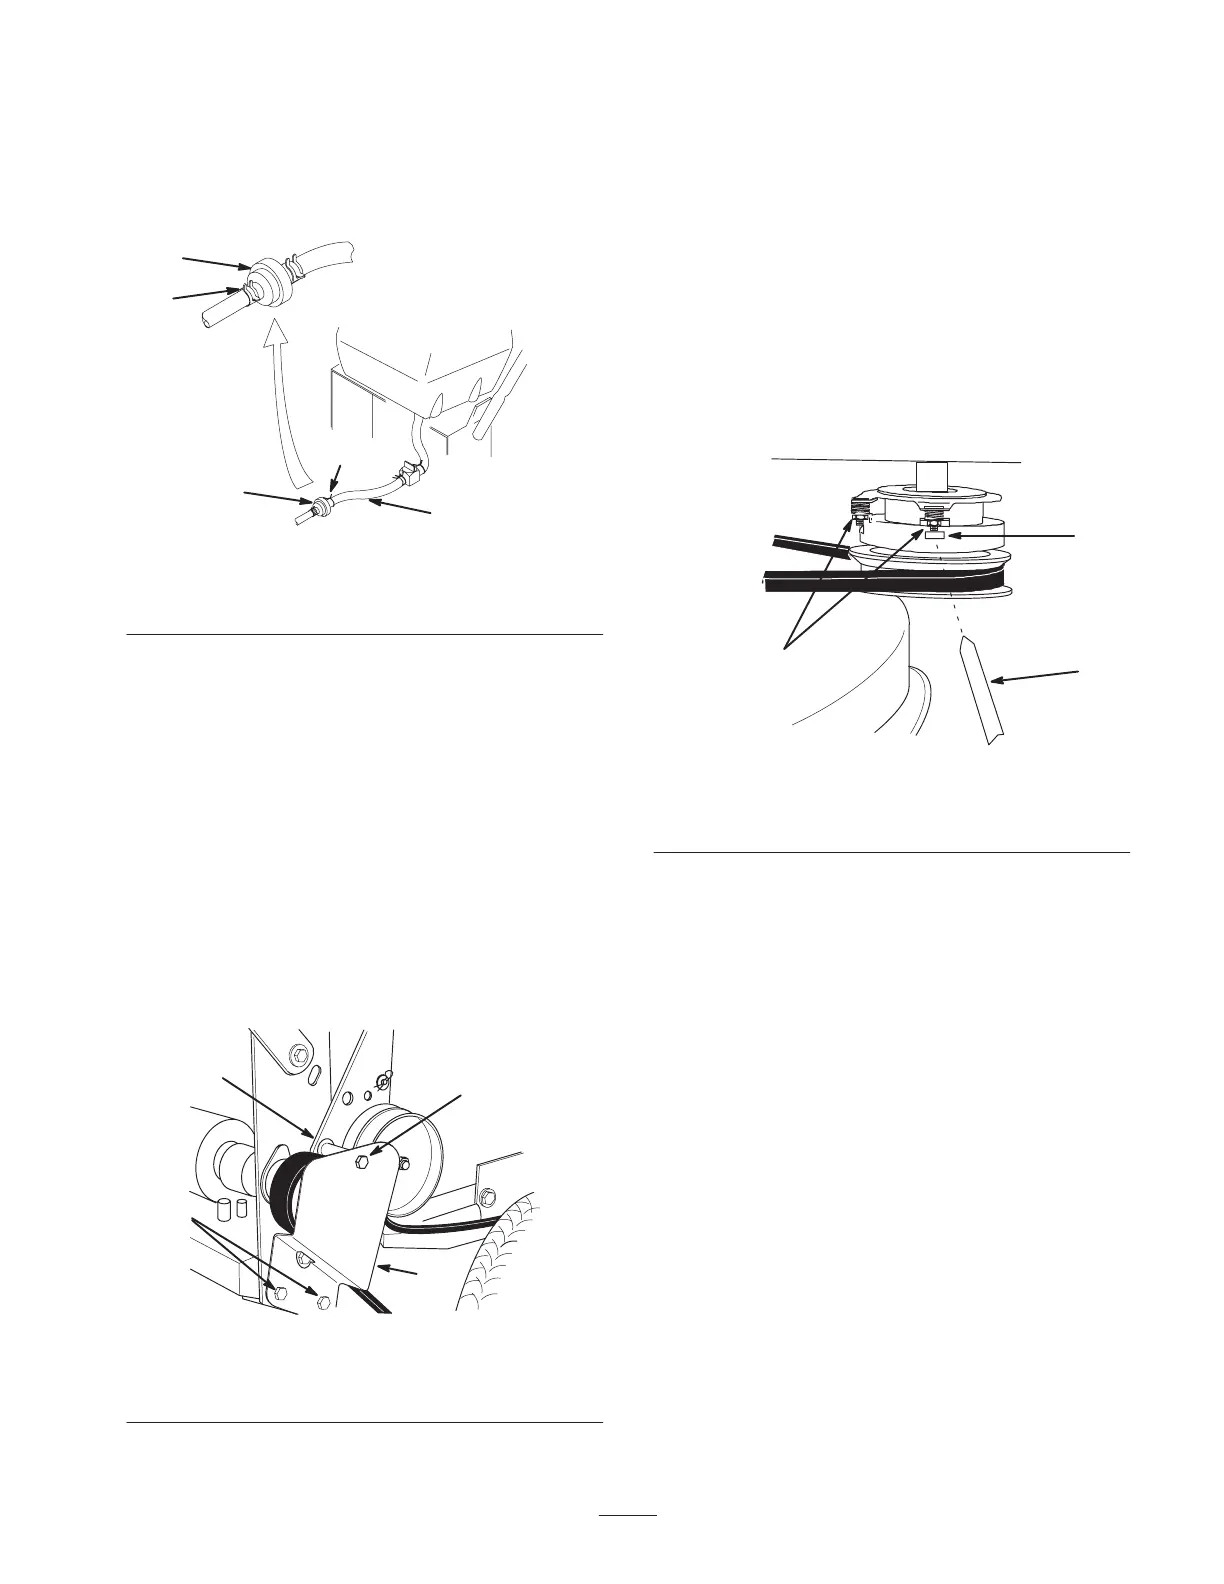
Adjusting the Electric Clutch
The clutch is adjustable to ensure proper engagement and
proper braking. Check adjustment after every 100 hours of
operation.
1. To adjust clutch, tighten or loosen lock nuts on flange
studs (Fig. 35).
2. Check adjustment by inserting feeler gauge thru slots
next to studs (Fig. 35).
3. The proper disengaged clearance between the clutch
plates is .012–.018 in. (0.30-0.45 mm). It will be
necessary to check this clearance at each of the three
slots to ensure the plates are parallel to each other.
m–2600
1
2
3
Figure 35
1. Adjusting nut
2. Slot
3. Feeler gauge