2.Removethebladebolt,anti-scalpplate,andbladefrom
thespindleshaft(Figure69).
SharpeningtheBlades
WARNING
Whensharpeningblade,piecesofbladecouldbe
thrownandcauseseriousinjury.
Wearpropereyeprotectionwhensharpening
blades.
1.Sharpenthecuttingedgeatbothendsoftheblade
(Figure67).Maintaintheoriginalangle.Theblade
retainsitsbalanceifthesameamountofmaterialis
removedfrombothcuttingedges.
Figure67
1.Sharpenatoriginalangle
2.Checkthebalanceofthebladebyputtingitonablade
balancer(Figure68).Ifthebladestaysinahorizontal
position,thebladeisbalancedandcanbeused.Ifthe
bladeisnotbalanced,lesomemetalofftheendof
thesailareaonly(Figure69).Repeatthisprocedure
untilthebladeisbalanced.
Figure68
1.Blade2.Balancer
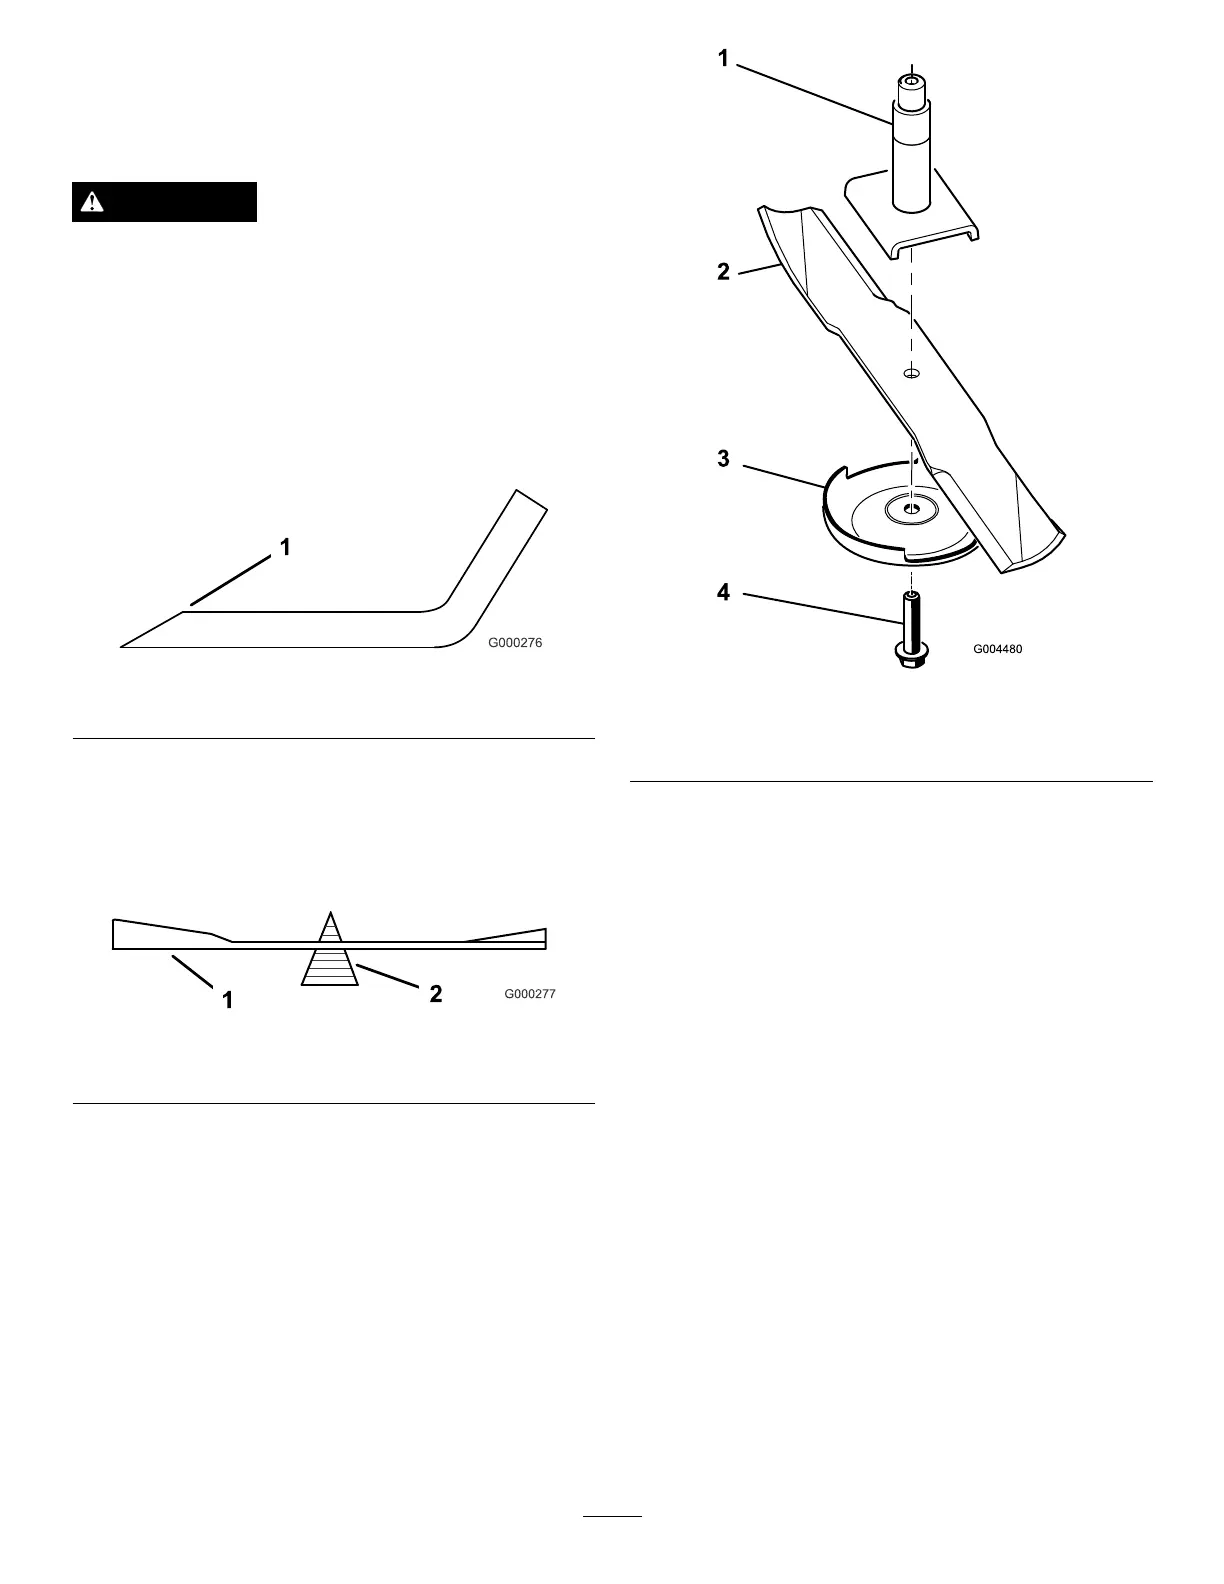
InstallingtheBlades
1.Installthebladeontothespindleshaft(Figure69).
Important:Thecurvedpartoftheblademustbe
pointingupwardtowardtheinsideofthemowerto
ensurepropercutting.
2.Installtheanti-scalpplateandbladebolt(
Figure69).
Figure69
1.Spindle
3.Anti-scalpplate
2.SailAreaofBlade
4.BladeBolt
3.Torquethebladeboltto115-150N-m(85-110ft-lb).
CorrectingMowerDeck
Mismatch
Ifthecutisunevenacrossthemowerswath,correctitas
follows:
1.Positionthemachineonalevelsurfaceontheshop
oor.
2.Setthecuttingunittothedesiredheightofcut,move
thethrottlelevertotheSlowposition,stoptheengine,
settheparkingbrake,andremovetheignitionkey.
3.Checkandadjustfrontandreartractortirepressure;
refertoCheckingTirePressure.
4.Checkforbentblades.
5.Removethecoversfromthetopofthecuttingunits.
6.Rotatethebladeoneachspindleuntiltheendsface
forwardandbackward.
7.Measurefromtheoortothefronttipofthecutting
edge.
8.Adjustthejamnutssecuringthedeckyokes/chainsto
themowerdeckuntilthemowerdeckislevel(
Figure
70).
58