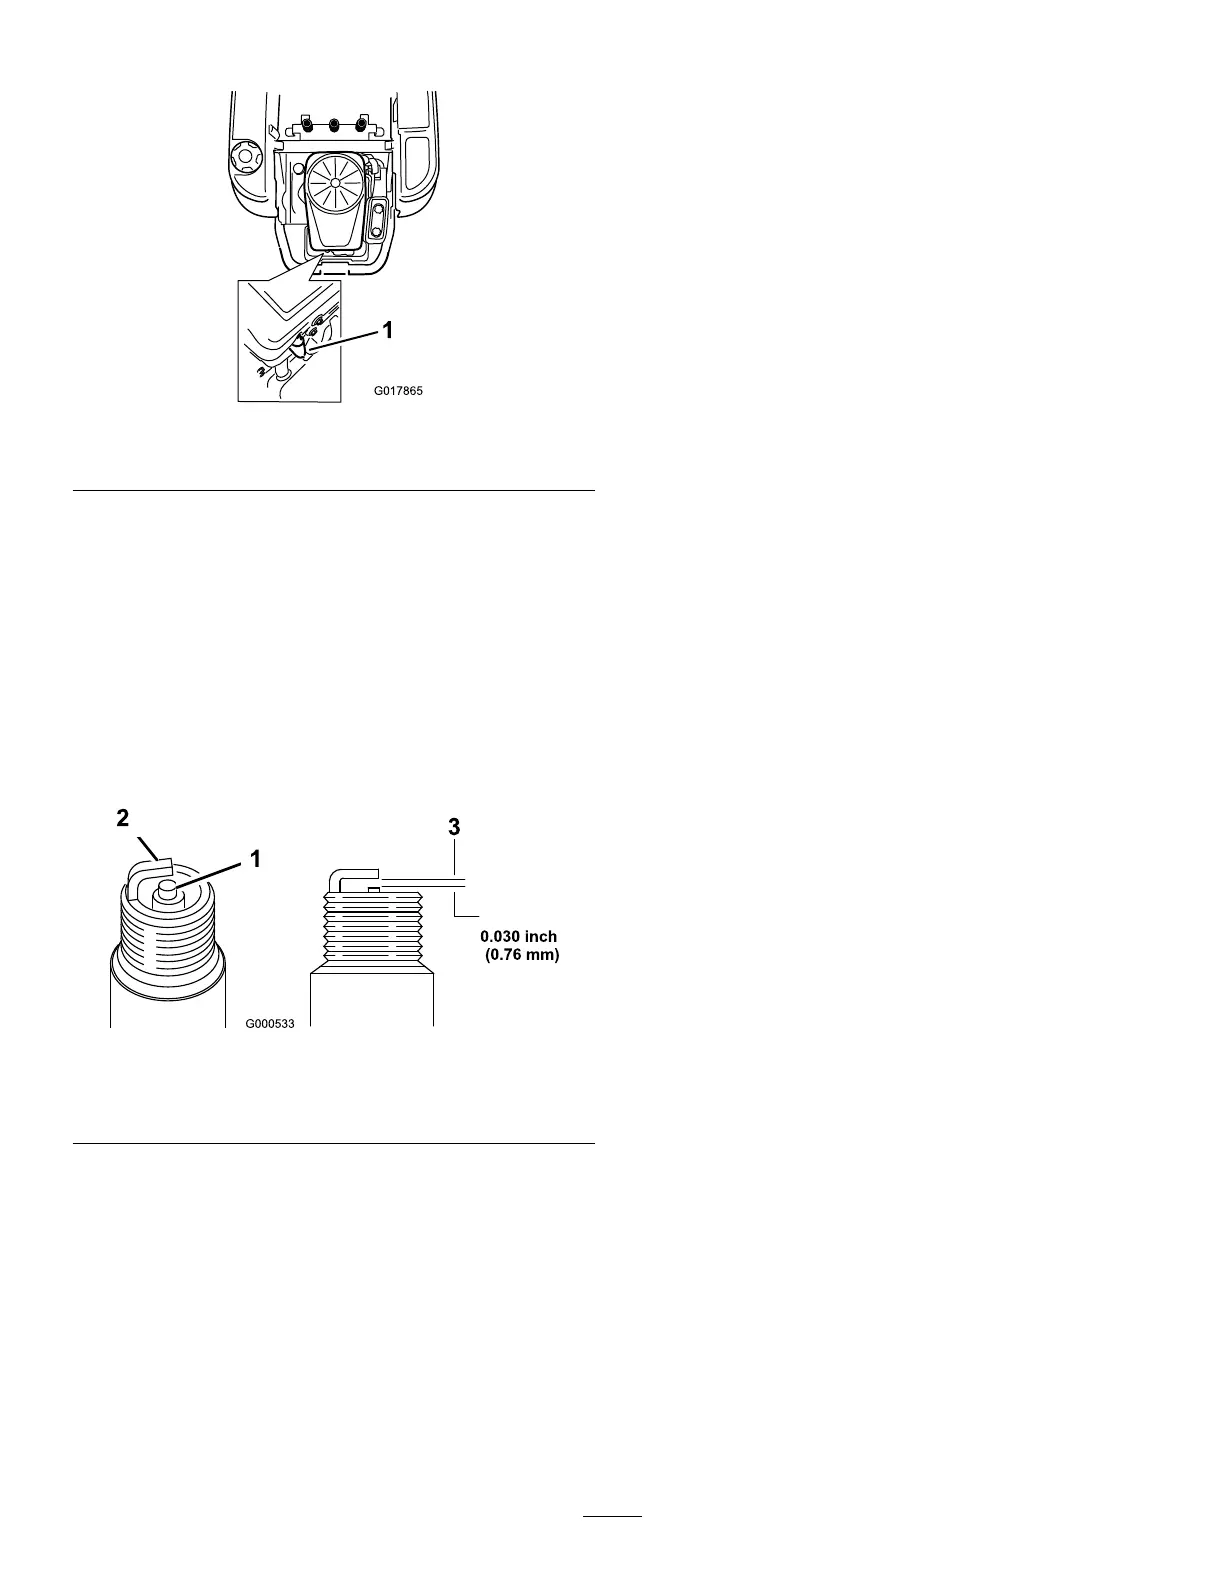
3.Disconnectthewirefromthesparkplug(Figure33).
Figure33
1.Spark-plugwire
4.Cleanaroundthesparkplugtopreventdirtfromfalling
intotheengineandpotentiallycausingdamage.
5.Removethesparkplugandmetalwasher.
CheckingtheSparkPlug
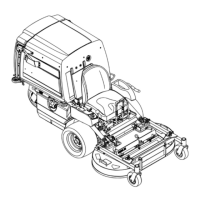
1.Inspectthesparkplug(Figure34).
Note:Ifyouseelightbrownorgrayontheinsulator,
theengineisoperatingproperly.Ablackcoatingonthe
insulatorusuallymeansthattheaircleanerisdirty.
Figure34
1.Centerelectrodeinsulator3.Airgap(nottoscale)
2.Sideelectrode
Important:Donotcleanthesparkplug.Always
replacethesparkplugwhenithasablackcoating,
wornelectrodes,anoilylm,orcracks.
2.Checkthegapbetweenthecenterandsideelectrodes
(
Figure34).Bendthesideelectrodeifthegapisnot
correct.
InstallingtheSparkPlug
1.Installthesparkplugandmetalwasher.
Note:Ensurethattheairgapissetcorrectly.
2.Tightenthesparkplugto15ft-lb(20N-m).
3.Connectthewiretothesparkplug.
CleaningtheBlowerHousing
Toensurepropercooling,makesurethegrassscreen,cooling
ns,andotherexternalsurfacesoftheenginearekeptclean
atalltimes.
Annuallyorevery100hoursofoperation(moreoftenunder
extremelydusty,dirtyconditions),removetheblowerhousing
andanyothercoolingshrouds.Cleanthecoolingnsand
externalsurfacesasnecessary.Makesurethecoolingshrouds
arereinstalled.Torquetheblowerhousingscrewsto5.5ft-lb
(7.5N-m).
Important:Operatingtheenginewithablockedgrass
screen,dirtyorpluggedcoolingns,and/orcooling
shroudsremoved,willcauseenginedamagedueto
overheating.
26