Forward
1. Mo v e the lev ers to the center , unloc k ed
position.
2. T o g o forw ard, slo wly push the motion control
lev ers forw ard ( Figure 12 ).
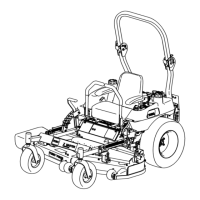
Figure 12
1. Center unlock position 3. Backward
2. Forward 4. Brake position
T o g o straight, apply equal pressure to both
motion control lev ers ( Figure 12 ).
T o tur n, release pressure on the motion control
lev er to w ard the direction y ou w ant to tur n
( Figure 12 ).
T he far ther y ou mo v e the traction control
lev ers in either direction, the faster the mac hine
will mo v e in that direction.
T o stop , pull the motion control lev ers to
neutral.
Backward
1. Mo v e the lev ers to the center , unloc k ed
position.
2. T o g o bac kw ard, slo wly pull the motion control
lev ers rearw ard ( Figure 12 ).
T o g o straight, apply equal pressure to both
motion control lev ers ( Figure 12 ).
T o tur n, release the pressure on the motion
control lev er to w ard the direction y ou w ant to
tur n ( Figure 12 ).
T o stop , push the motion control lev ers to
neutral.
Operating the Blades
T he blade control switc h, re presented b y a po w er
tak e-off (PTO) symbol, eng ag es and diseng ag es
po w er to the mo w er blades . T his switc h controls
po w er to any attac hments that dra w po w er from
the engine , including the mo w er dec k and cutting
blades .
Engaging the Blades
1. R elease pressure on the traction control lev ers
and place the mac hine in neutral.
2. Mo v e the throttle to the F ast position.
3. Pull out on the blade control switc h to eng ag e
blades ( Figure 13 ).
Figure 13
1. Blade control switch-On 2. Blade control switch-Off
Disengaging the Blades
Push the blade control switc h to Off to diseng ag e
the blades ( Figure 13 ).
Stopping the Machine
T o stop the mac hine , mo v e the traction control
lev ers to neutral and se parate to the brak e position,
diseng ag e the blade control switc h, ensure the
throttle is in the fast position, and tur n the ignition
k ey to off . R emember to remo v e the k ey from the
ignition switc h.
18