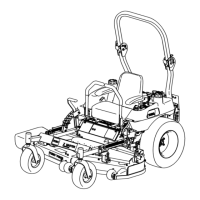
Figure 52
1. Hairpin cotter and washer 3. Front hole
2. Leveling bracket 4. Rear hole
8. Chec k the front-to-rear blade slope; refer to
Adjusting the F ront-to-R ear Blade Slope .
Adjusting the Front-to-Rear
Blade Slope
Chec k the front-to-rear blade lev el any time y ou
install the mo w er . If the front of the mo w er is
more than 5/16 inc h (7.9 mm) lo w er than the
rear of the mo w er , adjust the blade lev el using the
follo wing instr uctions:
1. P ark the mac hine on a lev el surface and
diseng ag e the blade control switc h.
2. Mo v e the motion control lev ers to the brak e
position, stop the engine , remo v e the k ey , and
w ait for all mo ving par ts to stop before lea ving
the operating position.
3. Chec k the air pressure of all four tires . If
needed, adjust to the recommended inflation;
refer to Chec king the Tire Pressure in
Dri v e System Maintenance , pag e 37 .
4. Chec k and adjust the side-to-side blade lev el
if y ou ha v e not c hec k ed the setting; refer to
Lev eling the Mo w er from Side-to-Side .
5. Measure the length of the rod extending out of
the adjusting bloc k on the sides of the c hassis
( Figure 53 ).
6. If the rod length is not a 3/4 inc h (19 mm),
remo v e the hair pin cotter and w asher from the
end of the adjusting rod ( Figure 53 ) and tur n
the rod until the 3/4 inc h (19 mm) dimension
is obtained.
7. Install the end of the rod into the hole in the
mo w er mount and secure it with the w asher
and hair pin cotter .
Figure 53
1. Leveling bracket 3. Adjusting rod
2. Adjusting block 4. Hairpin cotter and washer
8. R e peat ste ps 5 through 7 for the opposite side
of the mo w er .
9. Set the height-of-cut at position D [3 inc h
(76 mm)] and carefully rotate the blades so
they are facing front to rear ( Figure 54 ).
10. Measure from the tip of the front blade to the
flat surface and the tip of the rear blade to the
flat surface ( Figure 54 ). If the front blade tip
is not 1/16-5/16 inc h (1.6-7.9 mm) lo w er than
the rear blade tip , adjust the front loc kn uts .
Figure 54
1. Blades side to side 3. Outside cutting edges
2. Cutting edge 4. Measure here
11. T o adjust the front-to-rear blade slope , remo v e
the loc kn uts and then rotate the adjustment
n uts in the front of the mo w er ( Figure 55 ).
40