12. T o raise the front of the mo w er , tighten the
adjustment n uts . T o lo w er the front of the
mo w er , loosen the adjustment n uts .
13. After adjusting both adjustment n uts ev enly ,
c hec k the front-to-rear slope ag ain. Contin ue
adjusting the n uts until the front blade tip is
1/16-5/16 inc h (1.6-7.9 mm) lo w er than the
rear blade tip ( Figure 55 ).
Note: After adjusting the adjustment n uts ,
mak e sure there is no slac k in either suppor t
rod ( Figure 56 ). Tighten either one to remo v e
the slac k ( Figure 55 ).
Figure 55
1. Locknut and adjusting nut 3. Adjustment nut
2. Front tire
4. Lock nut
14. W hen the front-to-rear blade slope is cor rect,
tighten the loc k n uts and c hec k the side-to-side
lev el of the mo w er; refer to Lev eling the
Mo w er from Side-to-Side .
Removing the Mower
Note: Before remo ving the mo w er , mak e a note
for whic h holes are used in the lev eling brac k ets
( Figure 57 ).
1. P ark the mac hine on a lev el surface and
diseng ag e the blade control switc h.
2. Mo v e the motion control lev ers to the brak e
position, stop the engine , remo v e the k ey , and
w ait for all mo ving par ts to stop before lea ving
the operating position.
3. Lo w er the height-of-cut lev er to the lo w est
position.
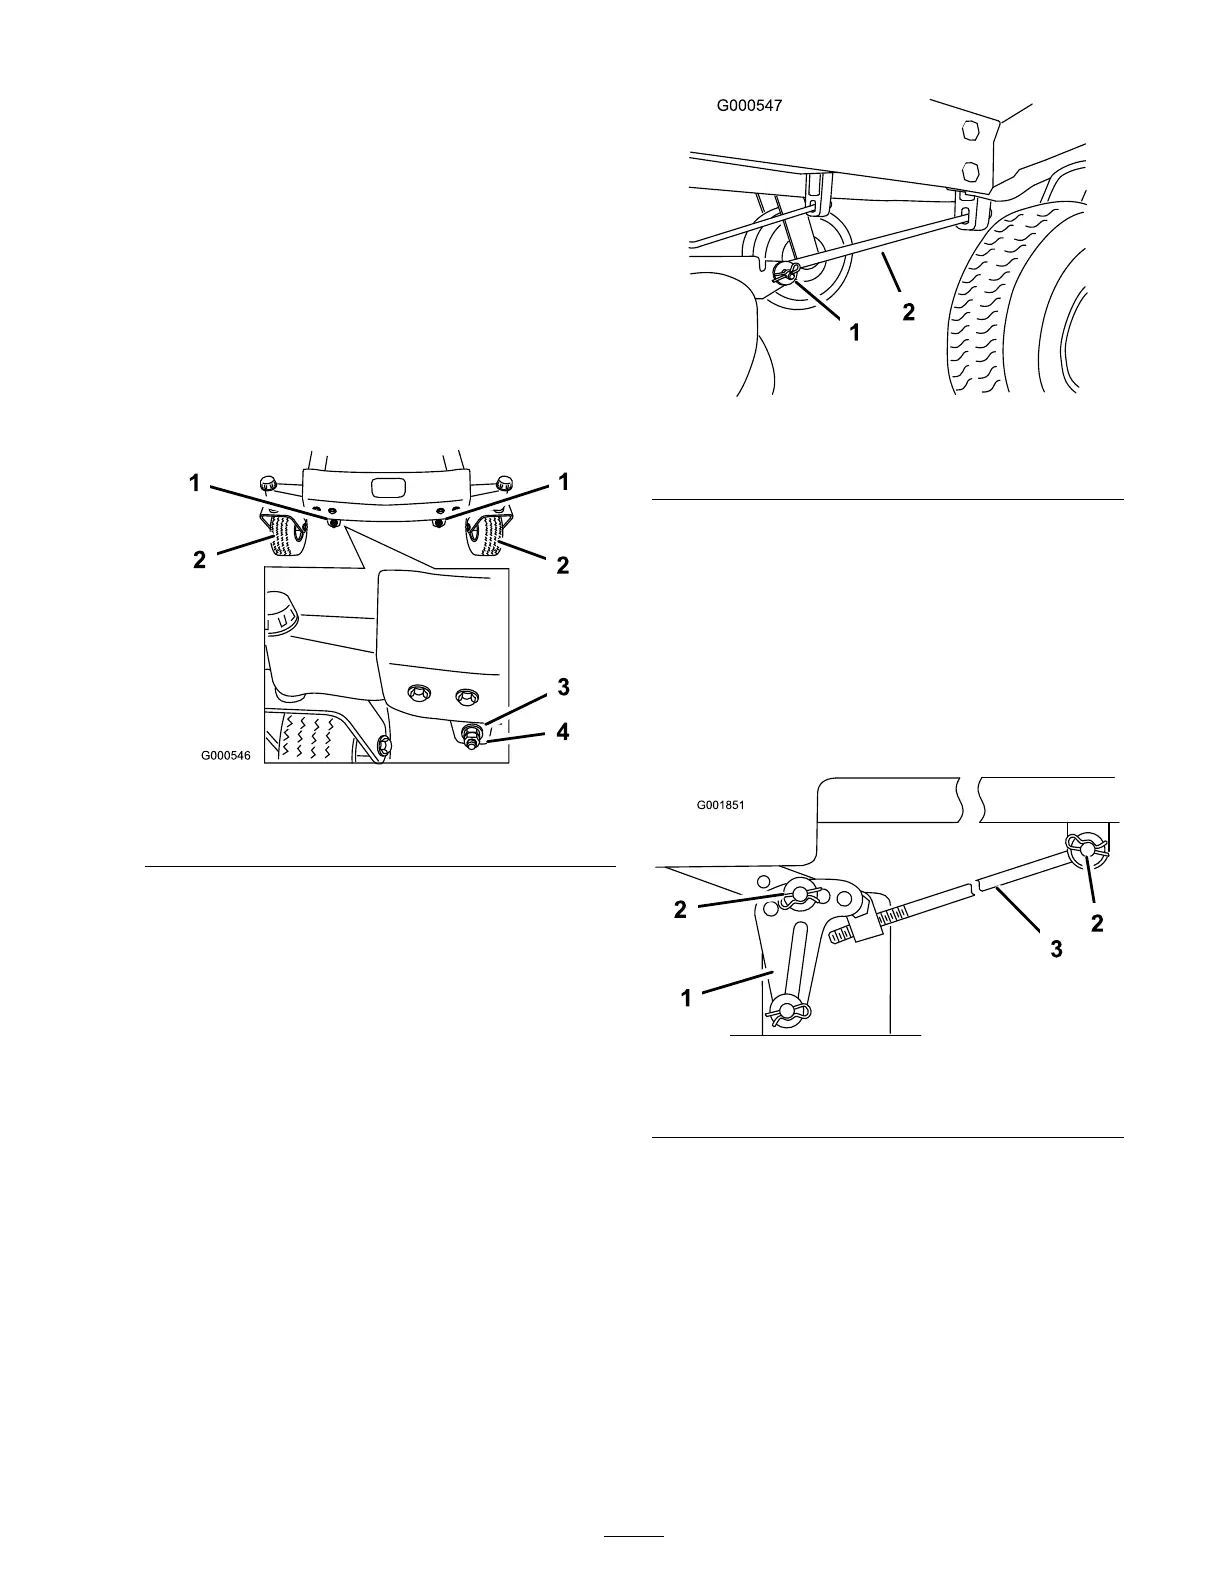
4. R emo v e the hair pin cotter and clevis pin from
the front suppor t rod on eac h side of the
mo w er ( Figure 56 ).
Figure 56
1. Hairpin cotter and clevis
pin
2. Support rod
5. R emo v e the hair pin cotter and w asher from
the adjusting rod ( Figure 57 ) on eac h side of
the mo w er .
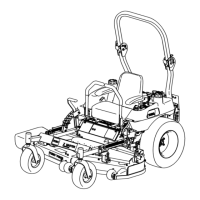
6. R emo v e the hair pin cotter and w asher at
the mo w er lev eling brac k ets ( Figure 57 ) on
eac h side of the mo w er . Note whic h hole
the lev eling brac k et is mounted in for future
installation. Slide the brac k ets off of the
mounting pin.
Figure 57
1. Leveling bracket 3. Adjusting rod
2. Hairpin cotter and washer
7. Lift up the front par t of the mac hine and
suppor t the mac hine using jac k stands .
8. Slide the mo w er forw ard and out from
under neath the mac hine .
Note: R etain all par ts for future installation.
Mower Belt Maintenance
Inspecting the Belts
Inspect all belts ev er y 100 hours .
41