•Upperhole—usethispositionwiththemower
deckinthe63mm(2-1/2inches)andbelowthe
height-of-cutpositions(Figure21).
•Lowerhole—usethispositionwiththemower
deckinthe76mm(3inches)andabovethe
height-of-cutpositions(Figure21).
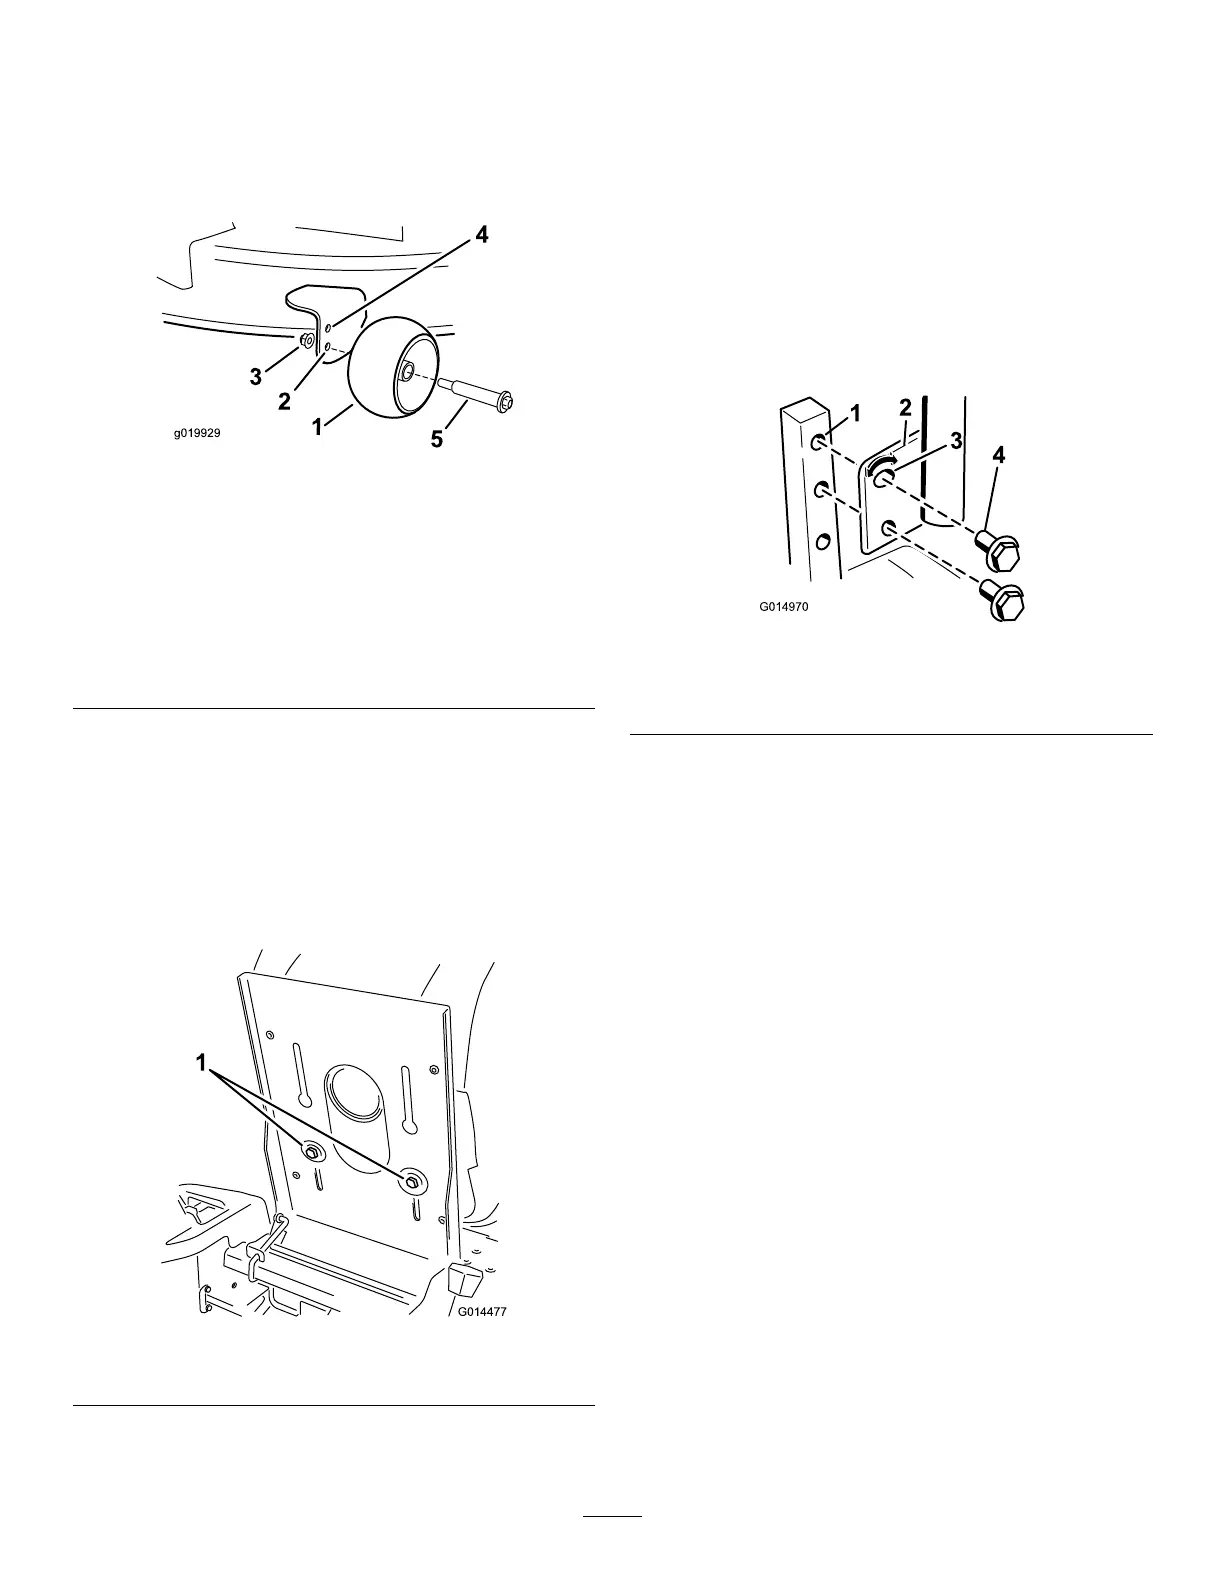
Figure21
1.Anti-scalproller4.Upperhole—themower
deckinthe63mm(2-1/2
inches)andbelowthe
height-of-cutpositions
2.Lowerhole—themower
deckinthe76mm(3
inches)andabovethe
height-of-cutpositions
5.Bolt
3.Flangenut
PositioningtheSeat
Theseatcanmoveforwardandbackward.Positiontheseat
whereyouhavethebestcontrolofthemachineandaremost
comfortable.
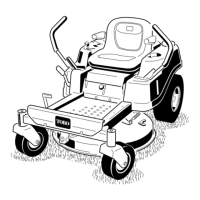
1.Raisetheseat,andloosentheadjustmentboltsjust
enough,sothattheseatcanmove(
Figure22).
Figure22
1.Adjustmentbolts
2.Movetheseattothedesiredpositionandtightenthe
bolts.
AdjustingtheMotion-control
Levers
AdjustingtheHeight
Themotion-controlleverscanbeadjustedhigherorlowerfor
maximumoperatorcomfort.
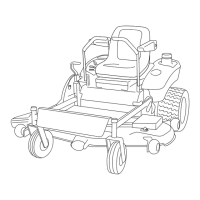
1.Removethe2boltsholdingthecontrollevertothe
control-armshaft(Figure23).
2.Movethecontrollevertothenextsetofholes.
3.Securetheleverwiththe2bolts(Figure23).
Figure23
1.Control-armshaft3.Slotted,upperhole
2.Controllever
4.Bolt
4.Repeattheadjustmentfortheoppositecontrollever.
AdjustingtheTilt
Themotion-controlleverscanbetiltedforeoraftfor
maximumoperatorcomfort.
1.Loosentheupperboltholdingthecontrollevertothe
control-armshaft.
2.Loosenthelowerboltjustenoughtopivotthecontrol
leverforeoraft(Figure23).Tightenbothboltsto
securethecontrolinthenewposition.
3.Repeattheadjustmentfortheoppositecontrollever.
PushingtheMachinebyHand
Important:Alwayspushthemachinebyhand.Donot
towthemachine,becausedamagemayoccur.
Thismachinehasanelectric-brakemechanism,andtopush
themachine,theignitionkeyneedstobeintheRunposition.
Thebatteryneedstobechargedandfunctioningforthe
electricbraketobedisengage.
19