ReplacingtheGrass
Deector
ServiceInterval:Beforeeachuseordaily—Inspect
thegrassdeectorfordamage.
WARNING
Anuncovereddischargeopeningcouldallow
themachinetothrowobjectstowardyouor
bystanders,resultinginseriousinjury.Also,
contactwiththebladecouldoccur.
Neveroperatethemachinewithoutthe
grassdeector,thedischargecover,orthe
grass-collectionsysteminplace.
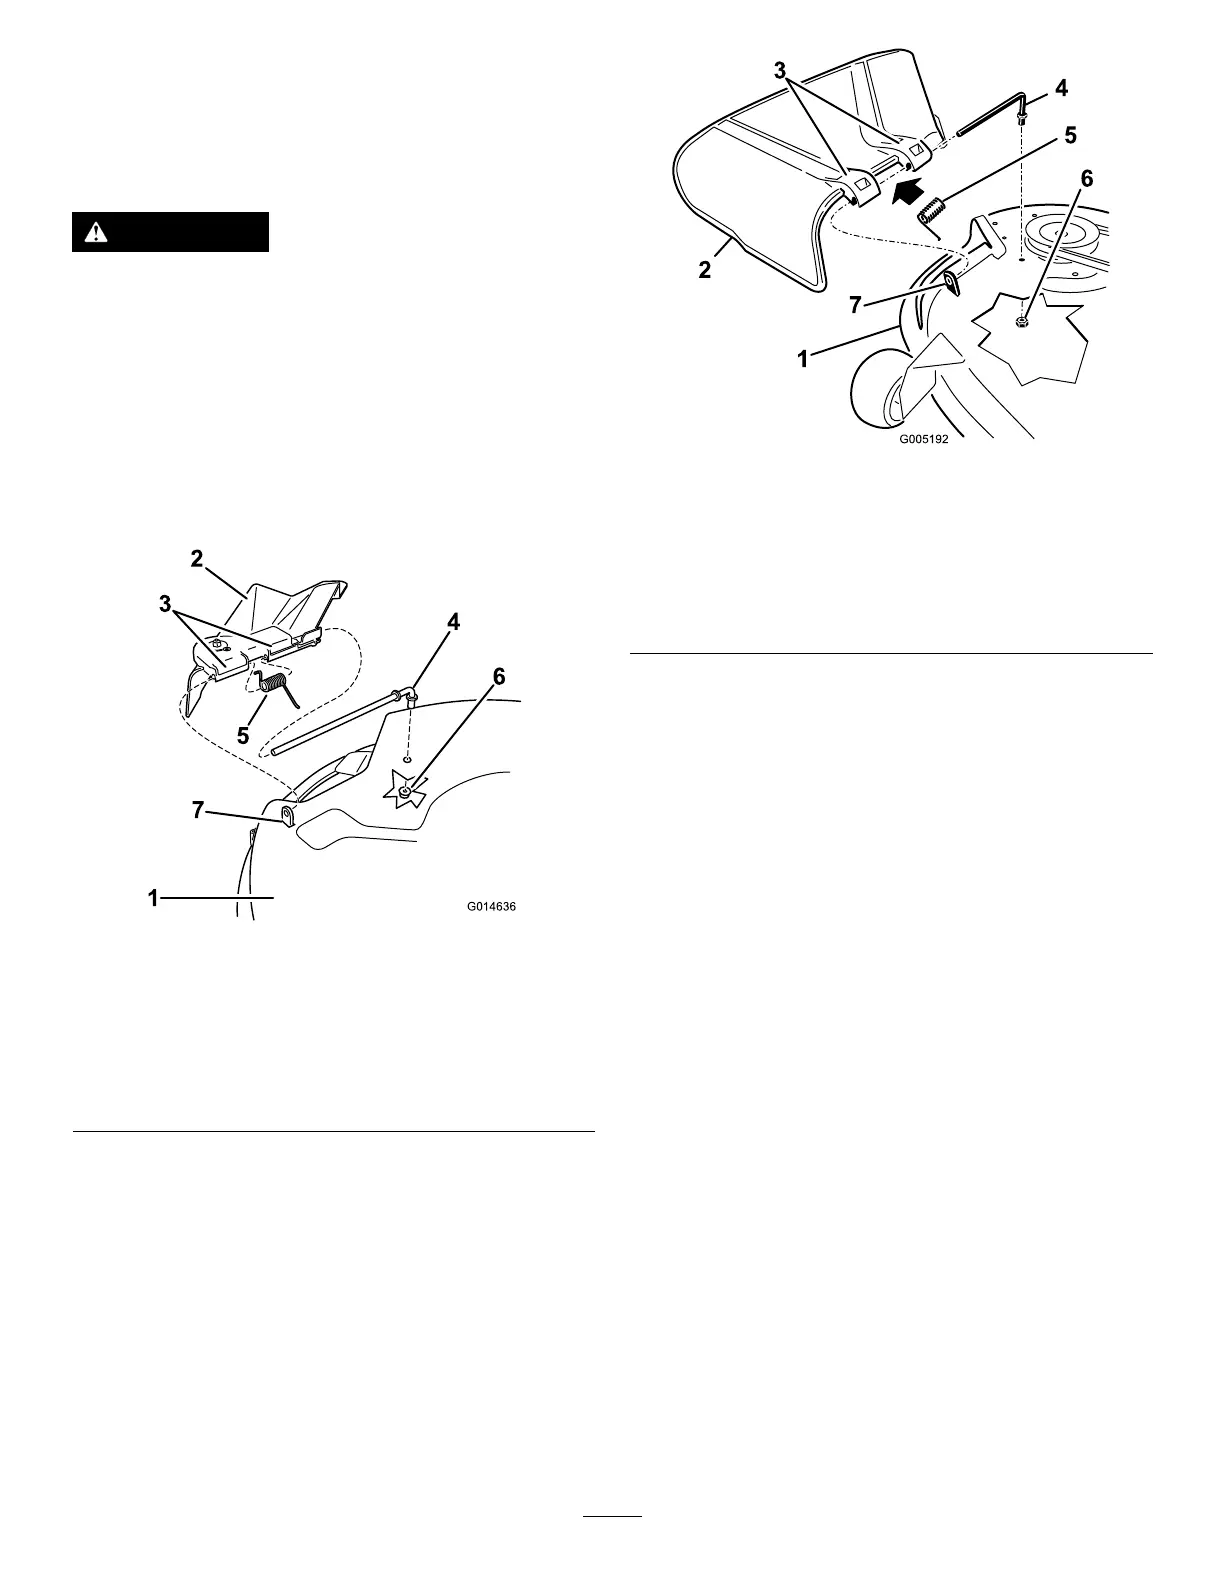
1.Removethenut(3/8inch)fromtherodunder
themower(Figure73andFigure74).
g014636
Figure73
81cm(32-Inch)Deck
1.Mowerdeck
5.Spring
2.Grassdeector6.Nut(3/8inch)
3.Grass-deectorbracket7.Shortstandoff
4.Rod
g005192
Figure74
107cm(42-Inch)Deck
1.Mowerdeck
5.Spring
2.Grassdeector6.Nut(3/8inch)
3.Grass-deectorbracket7.Shortstandoff
4.Rod
2.Slidetherodoutoftheshortstand-off,spring,
andgrassdeector(Figure73andFigure74).
3.Removethedamagedorworngrassdeector.
4.Replacethegrassdeector(Figure73and
Figure74).
5.Slidetherod(straightend),throughthe
rear-grass-deectorbracket.
6.Placethespringontherod,withtheendwires
down,andbetweenthegrassdeectorbrackets.
7.Slidetherodthroughsecondgrassdeector
bracket(Figure73andFigure74).
8.Inserttherodatthefrontofthegrassdeector
intotheshortstandoffonthedeck.
9.Securetherearendoftherodintothemower
withanut(3/8inch)asshowninFigure73
andFigure74.
Important:Thegrassdeectormustbe
springloadedinthedownposition.Liftthe
deectoruptotestthatitsnapstothefull
downposition.
48