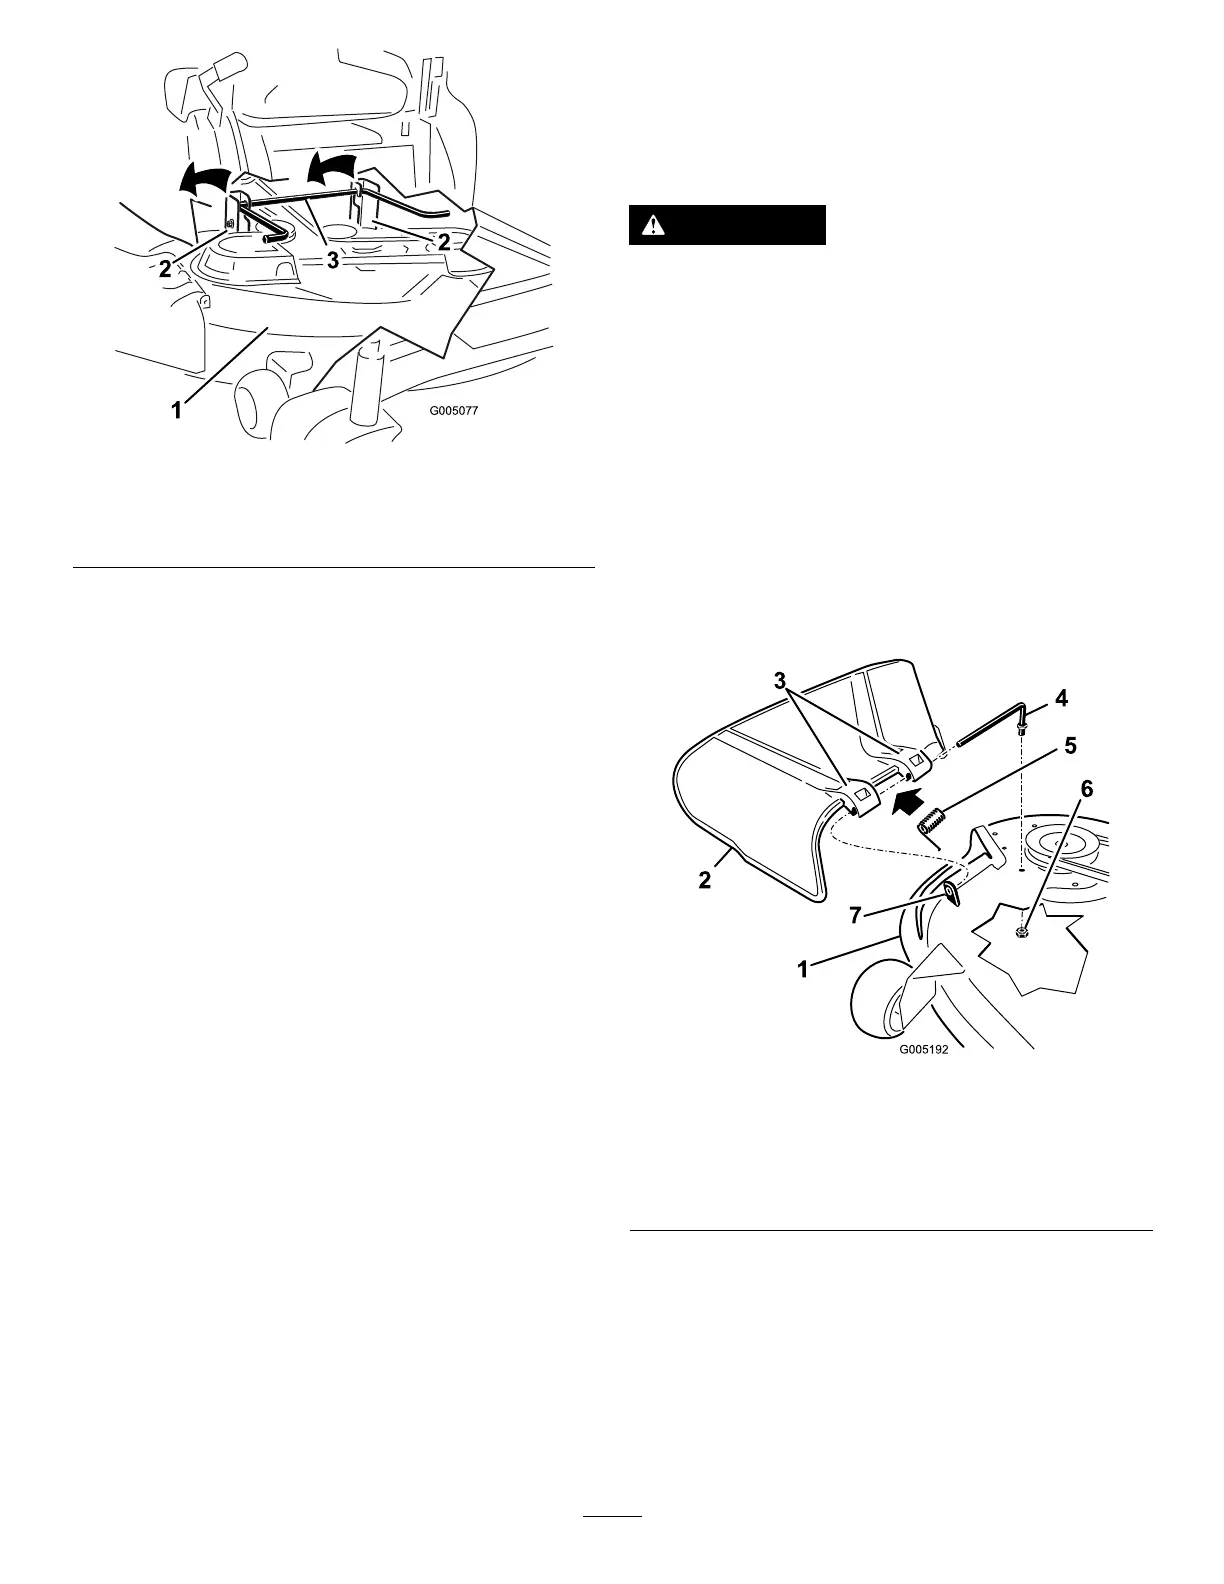
g005077
Figure60
1.Mowerdeck
3.Rearliftrod
2.Hangerbracket
7.Slidethemowerdeckrearwardtoremovethe
mowerbeltfromtheenginepulley.
8.Slidethemowerdeckoutfromunderneaththe
machine.
Note:Retainallpartsforfutureinstallation.
InstallingtheMower
1.Parkthemachineonalevelsurfaceand
disengagetheblade-controlswitch.
2.Movethemotion-controlleversoutwardtothe
PARKposition,shutofftheengine,removethe
key,andwaitforallmovingpartstostopbefore
leavingtheoperatingposition.
3.Slidethemowerunderthemachine.
4.Lowertheheight-of-cutlevertothelowest
position.
5.Lifttherearofthemowerdeckandguidethe
hangerbracketsovertherearliftrod(Figure60).
6.Attachthefrontsupportrodtothemowerdeck
withtheclevispinandhairpincotter(Figure59).
7.Installthemowerbeltontotheenginepulley.
ReplacingtheGrass
Deector
ServiceInterval:Beforeeachuseordaily—Inspect
thegrassdeectorfordamage.
WARNING
Anuncovereddischargeopeningcould
allowthemachinetothrowobjectsatyou
orbystanders,resultinginseriousinjury.
Also,contactwiththebladecouldoccur.
Neveroperatethemachinewithoutthe
grassdeector,thedischargecover,orthe
grass-collectionsysteminplace.
Neveroperatethemachinewithoutthe
grassdeector,thedischargecover,orthe
grass-collectionsysteminplace.
Inspectthegrassdeectorfordamagebeforeeach
use.Replaceanydamagedpartsbeforeuse.
1.Removethenut(3/8inch)fromtherodunder
themower(Figure61).
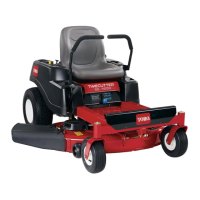
g005192
Figure61
1.Mowerdeck
5.Spring
2.Grassdeector6.Nut(3/8inch)
3.Grass-deectorbracket7.Shortstandoff
4.Rod
2.Slidetherodoutoftheshortstandoff,spring,
andthegrassdeector(Figure61).
3.Removethedamagedorworngrassdeector.
4.Replacethegrassdeector(Figure61).
5.Slidetherod(straightend),throughthe
rear-grass-deectorbracket.
6.Placethespringontherod,withtheendwires
downandbetweenthegrass-deectorbrackets.
42